CMS Setup and Configuration
Basic Content Creation
The Building Blocks: Pages vs. Posts
Now that your CMS is set up with a theme and some plugins, it’s time to add content. The two main ways you’ll do this are by creating pages and posts. They might seem similar, but they serve different purposes.
Think of pages as the core, timeless parts of your website. This is for your static content—the information that doesn't change often. Examples include your "About Us," "Contact," or "Services" pages. They form the permanent structure of your site.
Posts, on the other hand, are for timely, dynamic content. These are typically blog entries, news updates, or articles, usually displayed in reverse chronological order. If pages are the walls of your house, posts are the pictures you hang on them—you add new ones over time and the older ones are still there, just further down the hall.
A good rule of thumb: if the content would feel out of place on a timeline, it should probably be a page. If it's a journal-style entry, make it a post.
Creating either is simple. In your CMS dashboard, you'll find options like "Add New Page" or "Add New Post." Clicking one will take you to the content editor, which is where the magic happens.
Using the Content Editor
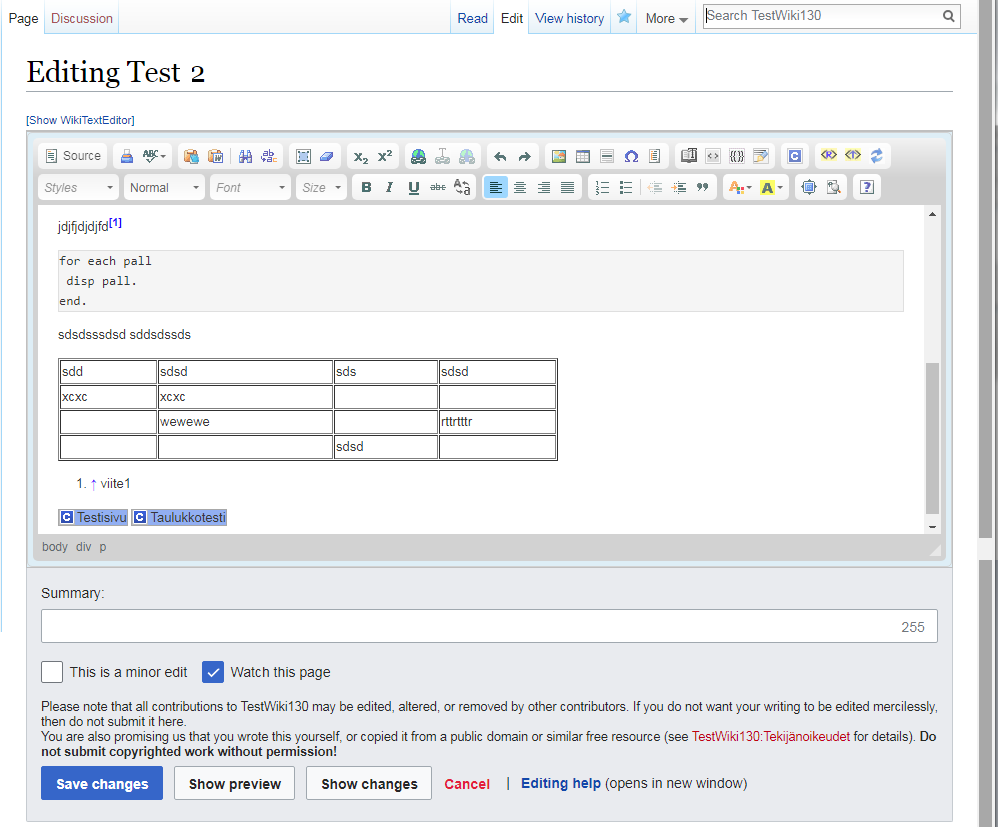
The content editor is your main tool for creating and formatting what people will see. Most modern CMS platforms use a visual or "What You See Is What You Get" (WYSIWYG) editor. This means the text and images you work with will look very similar to how they'll appear on the live website.
You'll see a toolbar with familiar icons, much like a word processor. You can bold text, create bulleted or numbered lists, and change text alignment. One of the most important formatting tools is the heading selector. Using headings (H2, H3, etc.) breaks your content into logical sections, making it much easier for visitors to read and scan.
Adding media is just as straightforward. Look for a button like "Add Media" or an icon of a picture. This will usually open your site's Media Library, a central place where all your uploaded images, videos, and audio files are stored. You can upload new files directly from your computer and insert them into your content.
To add a hyperlink, just highlight the text you want to be clickable and find the link icon. You can then paste the URL you want it to point to. These simple tools are all you need to create rich, engaging content.
Keeping Things Organized
As you add more posts, your site can get cluttered. This is where categories and tags come in. They are the primary tools for organizing your posts and helping visitors find what they're looking for.
Categories are for broad groupings of your posts. Think of them as the main sections of a bookstore: "Fiction," "History," "Science." A post should only belong to one or two categories at most. They provide a high-level structure to your content.
Tags are more specific keywords that describe the details within a post. If your post is in the "Science" category, its tags might be "astronomy," "black holes," or "space exploration." Unlike categories, you can add many tags to a single post. They offer a more granular way to connect related content across different categories.
| Feature | Categories | Tags |
|---|---|---|
| Purpose | Broadly group posts | Describe specific details |
| Scope | High-level, like a table of contents | Granular, like an index |
| Quantity | Use sparingly (1-2 per post) | Use freely (many per post) |
| Analogy | Bookstore sections | Keywords on a book's back cover |
Using both effectively makes your site easier to navigate. When a visitor enjoys a post about black holes, they can click the "astronomy" tag to find everything else you've written on that topic, regardless of its main category.
Best Practices for Content
Creating content is one thing; creating good content is another. Here are a few best practices to keep in mind:
-
Write for Your Audience: Know who you're talking to. Use language they'll understand and focus on topics they care about. Clear, direct communication is always better than trying to sound overly academic.
-
Make it Scannable: Most people don't read every word online. They scan. Use short paragraphs, headings, bold text, and bulleted lists to break up your text and highlight key points. This makes your content much more approachable.
-
Use Media Wisely: Images, videos, and charts can make your content more engaging and easier to understand. Ensure your images are high-quality and relevant to the text around them. Also, provide descriptive alt text for images. This helps with accessibility for screen readers and search engines.
-
Proofread and Edit: Simple typos and grammatical errors can make your content seem unprofessional. Always read through your work one last time before hitting "Publish." Reading it aloud is a great way to catch awkward phrasing.
Create complete, helpful content that answers real questions, cite expertise, build consistency, and structure your site clearly.
Ready to test your knowledge on content creation?
Which of the following is the best example of content that should be created as a "page" rather than a "post"?
A "What You See Is What You Get" (WYSIWYG) editor shows you a preview of your content that looks very similar to how it will appear on the live website.
By applying these principles, you can create a well-structured, engaging website that provides real value to your visitors.