Ukulele Chord Mastery
Basic Ukulele Chords
Your First Four Chords
You don't need to know dozens of chords to play hundreds of songs. In fact, many popular tunes are built on just four simple chords. We'll start with the most common ones: C major, G major, A minor, and F major. Mastering these will give you a solid foundation for your ukulele journey.
Each chord has a unique shape and sound. The key is to press the strings firmly enough to produce a clear note, without touching any of the other strings. Let's break them down one by one.
C Major (C)
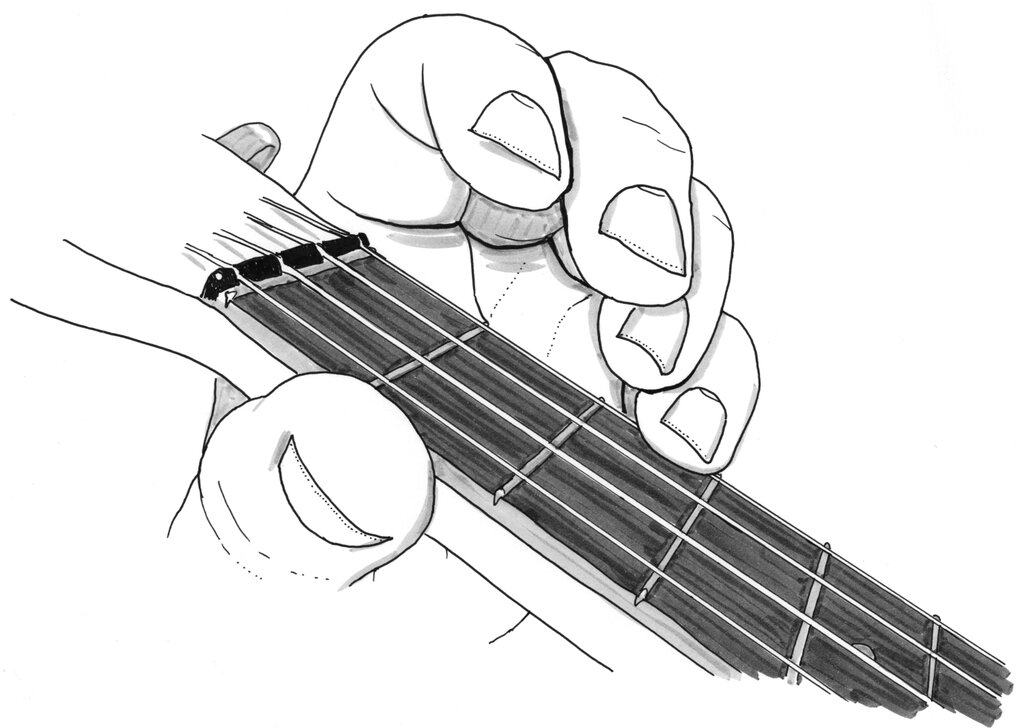
The C major chord is often the first one people learn, and for good reason: it only requires one finger. To play a C chord, place your ring finger on the third fret of the first string (the one closest to the floor, also called the A string). That's it.
Strum all four strings, and you should hear a bright, happy sound. Make sure your finger is pressing down just behind the metal fret wire, not on top of it. This will help you get a clean sound without any buzzing.
G Major (G)
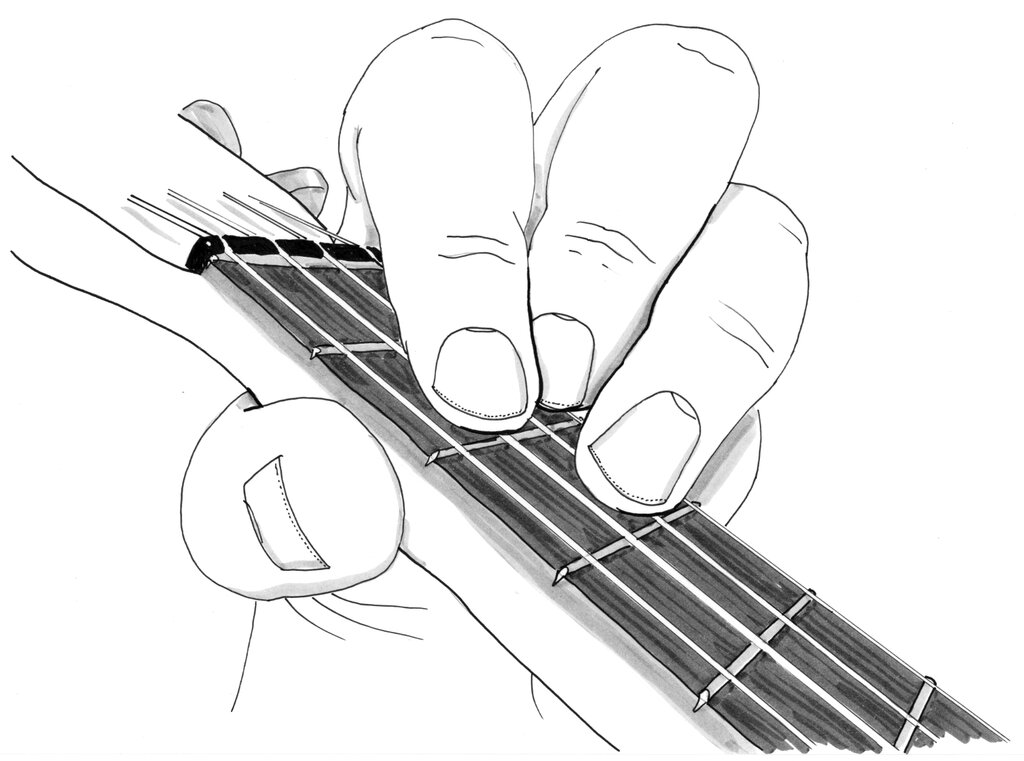
The G major chord is a bit more of a stretch, but it's a staple in countless songs. It uses three fingers in a small triangular shape.
- Place your index finger on the second fret of the third string (the C string).
- Place your middle finger on the second fret of the first string (the A string).
- Place your ring finger on the third fret of the second string (the E string).
Keep your fingers arched like a claw. This helps you press down on the target strings without accidentally muting the strings next to them. Strum all four strings to hear the full, rich sound of the G chord.
A Minor (Am) and F Major (F)
Next up are A minor and F major. Like C major, A minor is very simple and only uses one finger.
To play an A minor chord, place your middle finger on the second fret of the fourth string (the G string, closest to your face). Strum all four strings. It should have a slightly more mellow or somber sound compared to C major.
The F major chord builds directly on the A minor shape. Start by making the A minor chord. Then, add your index finger to the first fret of the second string (the E string). Now you have two fingers down. This chord is incredibly common and works well with the C and G chords you've already learned.
F Chord Fingering:
- Middle finger on the second fret of the G string.
- Index finger on the first fret of the E string.
Putting It All Together
Knowing the chord shapes is only half the battle. The real skill is switching between them smoothly. A great way to practice this is with a simple exercise.
Set a slow, steady tempo. Strum each chord four times, then switch to the next one. A common and useful progression is C -> G -> Am -> F.
The One-Minute Change Exercise
- Pick two chords, like C and G.
- Set a timer for one minute.
- Switch back and forth between the two chords as many times as you can in that minute. Count each successful, clean change.
Don't worry about speed at first. Focus on landing your fingers correctly so every string rings out clearly. Your goal is accuracy, not speed. As you practice, your fingers will develop muscle memory, and the transitions will become faster and more automatic.
Try practicing transitions without strumming at all. Just focus on moving your fingers from one chord shape to the next. This helps build the muscle memory you need.
Ready to test your knowledge of these foundational chords?
Which finger is used to play a C major chord?
To change from an A minor chord to an F major chord, what do you need to do?
With these four chords under your belt, you're well on your way to playing a huge number of songs.