Tracker Music Theory Essentials
Tracker Music Basics
The Grid of Sound
Imagine making music on a spreadsheet. Instead of numbers and formulas, you have notes and effects. That's the basic idea behind tracker music. It’s a way of composing that’s tied to the history of early computer music, especially on machines like the Amiga in the 1980s and 90s.
Unlike modern digital audio workstations (DAWs) that often use visual piano rolls or staff notation, trackers present music vertically. Time flows from top to bottom in a grid of columns and rows. This might seem strange at first, but it offers a unique and precise way to control your sound.
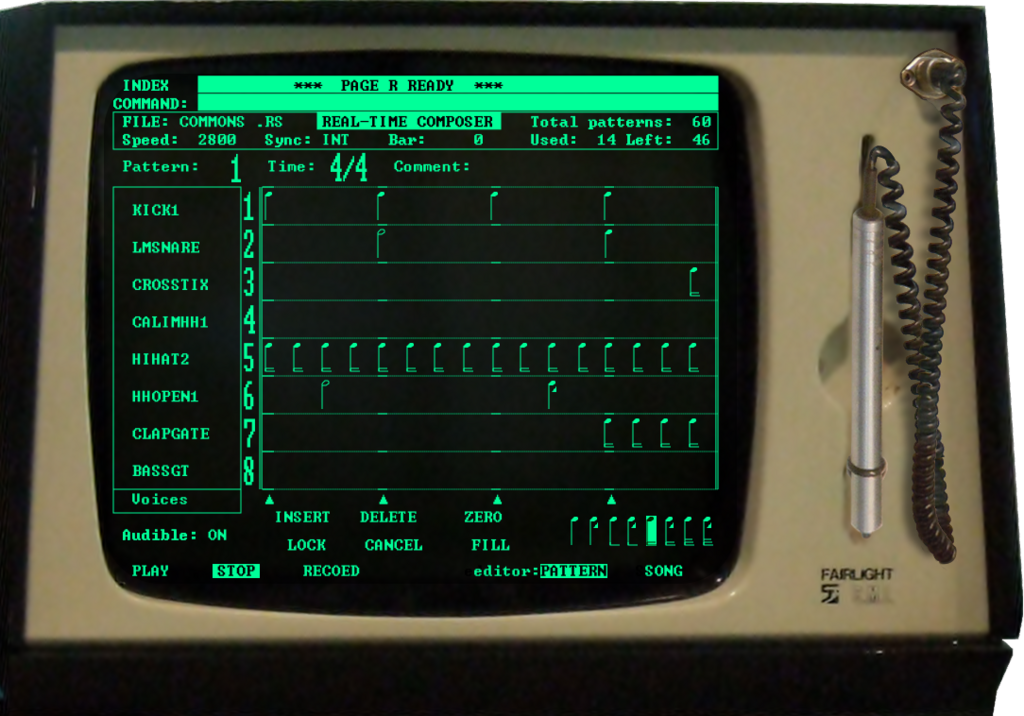
Navigating the Pattern Editor
The main screen of any tracker is the pattern editor. Think of a pattern as a short musical phrase or loop, like a single measure of sheet music. You arrange these patterns in a sequence to build a full song.
The pattern editor is a grid made of three key parts:
- Channels: These are the vertical columns. Each channel can play one note from one instrument at a time. You can think of them as individual musicians in a band. One channel might handle the bassline, another the drums, and a third the melody.
- Rows: These are the horizontal lines, representing steps in time. The music plays from the top row to the bottom. The speed at which it moves through the rows determines the tempo of your song.
- Cells: Each intersection of a row and a channel is a cell where you can place a command. You navigate this grid using your keyboard's arrow keys, much like moving around a text document.
Writing Notes and Commands
To write music, you type directly into the cells. Each cell in a channel is typically broken into a few sub-columns for different types of information.
The standard format is:
NOTE OCTAVE | INSTRUMENT | EFFECT COMMAND
- Note and Octave: This is the pitch.
C-4is middle C,F#5is F-sharp in the next octave up. Typing these characters places the note. - Instrument: This is a number that corresponds to a sound you’ve loaded, like a drum sample or a synthesized waveform.
01might be your bass sound,02a snare drum, etc. - Effect Command: This is where trackers really shine. You can add special commands to manipulate the sound on that specific step. This is done with a letter or number followed by two more digits.
To stop a note, you can either enter a new note in the same channel or use a special "note off" command. Leaving a row blank in a channel lets the previous note continue playing.
A Dash of Hex
Many values in trackers, especially for effects, are written in hexadecimal. This is a base-16 number system that uses digits 0-9 and letters A-F. It might seem intimidating, but it's just a compact way to write numbers, a holdover from the days when every byte of computer memory counted.
| Decimal | Hexadecimal |
|---|---|
| 0 | 00 |
| 10 | 0A |
| 15 | 0F |
| 16 | 10 |
| 32 | 20 |
| 64 | 40 |
| 127 | 7F |
| 255 | FF |
Effect commands use this system. For example, a command might look like 0C40. The 0C could be the command for setting volume, and 40 is the hexadecimal value for 64 (half of the maximum volume, which is usually FF or 255). Another classic effect is 0Axy, the volume slide, where x and y control how quickly the volume changes. Don't worry about memorizing these; every tracker has a list of its effects.
This combination of note entry and precise hexadecimal commands gives trackers their unique power. You have step-by-step control over every aspect of your music.
Now, let's test your understanding of these core concepts.
What is the fundamental way music is organized and displayed in a tracker?
In a tracker's pattern editor, what does a 'channel' represent?
With these fundamentals, you're ready to start exploring the world of tracker music. The grid-based workflow is a different way of thinking, but it's a powerful tool for creating intricate electronic music.