Traceable Typography for Environmental Concepts
Introduction to Digital Drawing Tools
Welcome to Vector Graphics
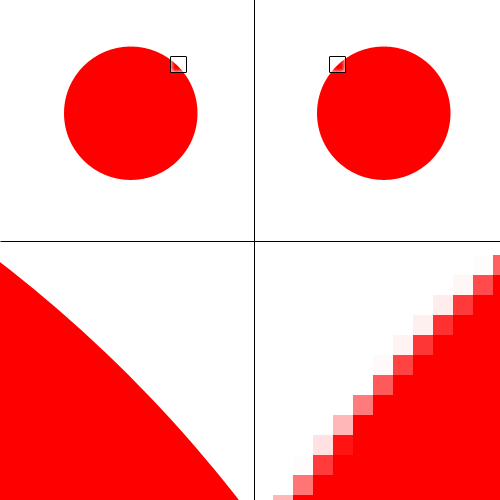
When you draw on a computer, you're usually working with one of two types of images: raster or vector. Raster graphics, like photos, are made of tiny dots called pixels. When you zoom in, they get blurry and blocky. This is fine for photos, but not ideal for creating clean, sharp lines.
Vector graphics are different. Instead of pixels, they use mathematical equations to define points, lines, and shapes. This means you can scale a vector image to any size, from a tiny icon to a massive billboard, and it will always stay perfectly crisp. For creating logos, illustrations, and precise line drawings, vectors are the way to go.
Vector Graphic
noun
An image created using points, lines, and curves based on mathematical formulas rather than a grid of pixels. This allows it to be scaled infinitely without losing quality.
Your Digital Toolkit
Vector editors come packed with tools, but for clean line work, you only need to master a few. The most important are the Pen tool and the basic Shape tools.
The Pen tool is your primary instrument for drawing custom lines and curves. It works by creating a sequence of points, called nodes or anchor points, which are connected by lines called paths.
Straight lines are simple: click to create a node, move your mouse, and click again to create the next one. For curves, you click and drag. This pulls out handles from the node, which let you control the shape of the curve. It takes a little practice, but mastering these Bézier curves is the key to drawing anything you can imagine.
Shape tools are more straightforward. They let you create perfect geometric shapes like rectangles, ellipses, and polygons with a simple click and drag. These are great starting points for more complex drawings. You can create a basic shape and then use other tools to modify its path.
Setting Up Your Workspace
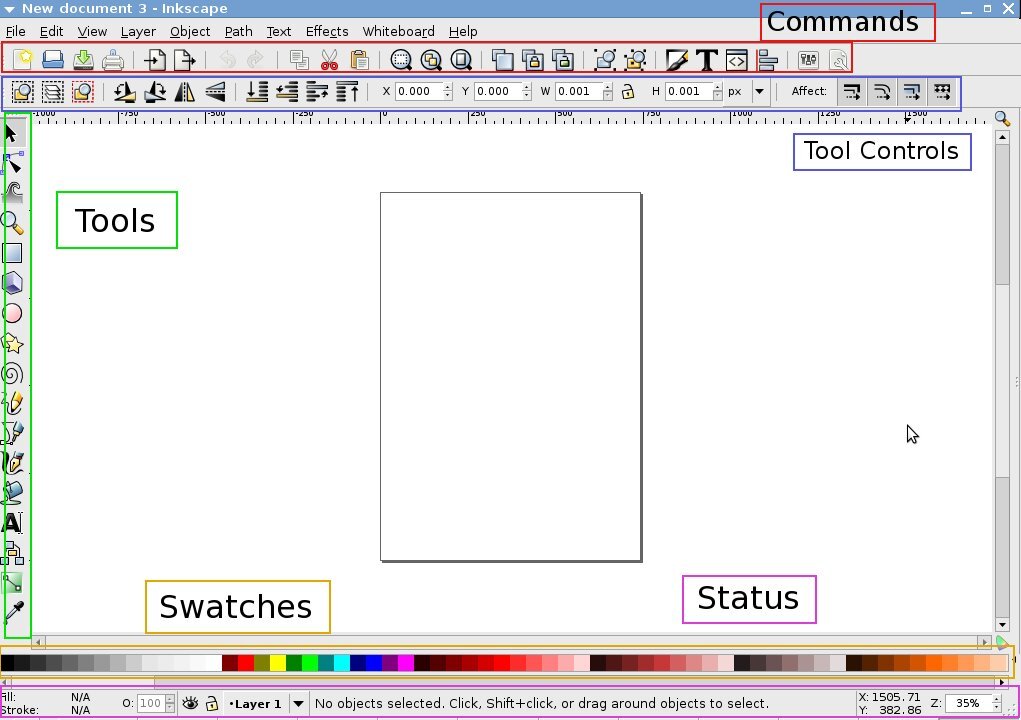
A typical vector editor's interface has a few key areas. The large central area is your canvas, where you create your drawing. Along the side, you'll find the toolbox, which contains the Pen tool, Shape tools, and others. There are also panels or dialogs for managing colors, layers, and object properties.
Once you've drawn a path, you aren't stuck with it. You can edit it by selecting the path and then manipulating its nodes. You can move nodes to change a shape, convert sharp corners into smooth curves, or adjust handles to fine-tune a curve's arc. This is where the real power of vector drawing lies: you can endlessly refine your lines until they are perfect.
Choosing Your Software
You don't need expensive software to get started with vector graphics. There are excellent free and browser-based options perfect for beginners.
Inkscape: A powerful, open-source, and completely free desktop application. It has a comprehensive set of tools that rivals professional software. It's available for Windows, Mac, and Linux.
Boxy SVG: A streamlined and user-friendly editor that runs directly in your web browser or as a simple desktop app. Its clean interface makes it less intimidating for newcomers.
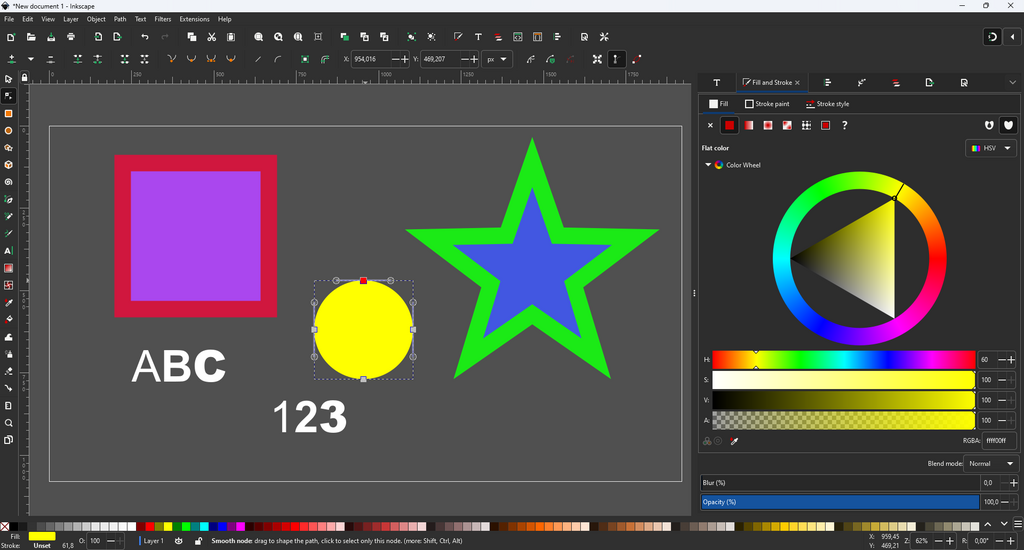
Both are great choices for learning the fundamentals of vector drawing. The concepts you learn in one—like working with paths, nodes, and handles—will apply to any other vector editor you use in the future.
Ready to check your understanding?
What is the primary advantage of using vector graphics over raster graphics for logos and illustrations?
When using a vector Pen tool, clicking and dragging creates a node with ____ that allow you to control the shape of a curve.
Now that you're familiar with the basic tools and concepts, you're ready to start putting them into practice.