Small Sculptures with a Rotary Tool
Dremel Rotary Tool Basics
Meet Your Rotary Tool
A rotary tool, often called by the popular brand name Dremel, is a handheld powerhouse. It doesn't use brute force like a drill. Instead, it relies on high speed, spinning a small bit thousands of times per minute. This speed allows it to cut, grind, sand, polish, and carve with precision.
Think of it as a versatile artist's tool. Instead of a brush tip, it has a spinning head that accepts hundreds of different accessories. By changing the accessory, you change the tool's function entirely. Let's look at the basic parts you'll need to know.
The Motor Housing is the main body you hold. The Variable Speed Control dial lets you adjust the rotations per minute (RPM). The Shaft Lock Button stops the shaft from spinning so you can change accessories. Finally, the Collet Nut is what you loosen and tighten to secure the accessory bit.
Changing Accessories
Swapping out bits is a fundamental skill. It's a simple process, but it's important to do it correctly to ensure the bit is secure and the tool operates safely.
- Unplug the tool. This is the most important safety step. Never change a bit while the tool is plugged in.
- Press and hold the shaft lock button. This prevents the shaft from rotating while you loosen the collet nut.
- Unscrew the collet nut. You can usually do this by hand. Some models come with a small wrench for extra torque. Loosen it just enough to pull the old bit out.
- Insert the new bit. Slide the shaft of the new accessory into the collet.
- Tighten the collet nut. While still holding the shaft lock button, hand-tighten the collet nut. Give it a final snug turn with the wrench if you used one to loosen it. Don't overtighten.
Once the bit is secure, you can release the shaft lock button. Give the bit a gentle tug to make sure it's firmly in place before plugging the tool in.
A World of Attachments
The real magic of a rotary tool lies in its vast array of attachments. Each one is designed for a specific task, transforming your tool in seconds. Learning what each bit does is key to unlocking the tool's full potential.
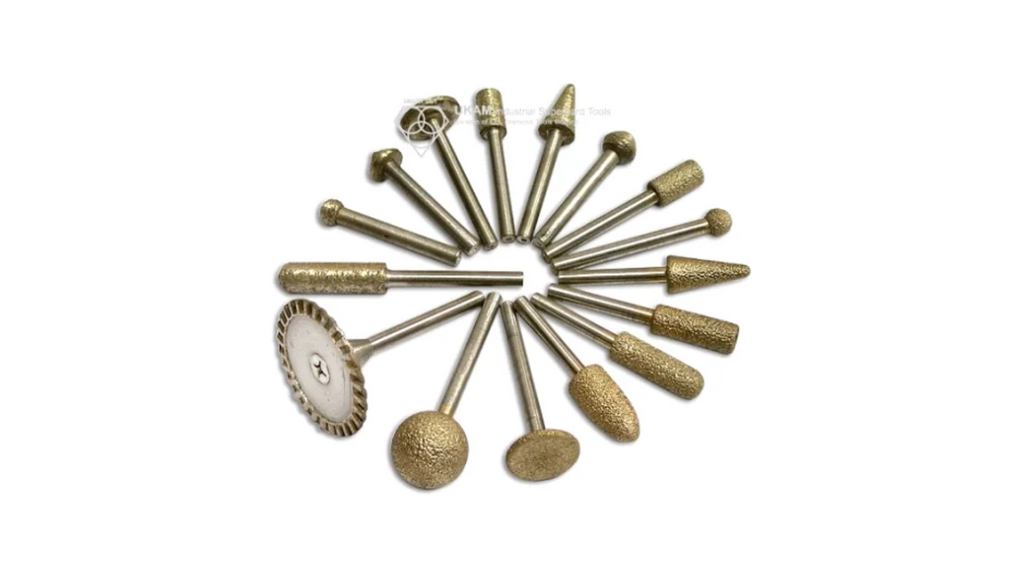
While there are hundreds of specialized bits, most fall into a few main categories.
| Category | Common Bits | Primary Use |
|---|---|---|
| Cutting | Cut-off wheels | Slicing through metal, plastic, or wood. |
| Grinding & Sharpening | Grinding stones, chain saw sharpening stones | Shaping metal, removing rust, sharpening blades. |
| Sanding | Sanding drums, sanding discs | Smoothing wood, shaping materials, removing paint. |
| Cleaning & Polishing | Felt wheels, bristle brushes | Polishing metal, cleaning surfaces, removing tarnish. |
| Carving & Engraving | Engraving cutters, diamond wheel points | Etching designs, carving details into wood or metal. |
Always start with the lowest speed setting that effectively works the material. Using too high a speed can burn the material or wear out the accessory prematurely. It's better to make several light passes than one heavy, aggressive one.
What is the primary function of the Shaft Lock Button on a rotary tool?
According to best practices, what speed setting should you generally start with when using a rotary tool on a new material?
Now you know the basic anatomy of a rotary tool and the functions of its core attachments. Getting comfortable with these fundamentals is the first step toward using it effectively in your projects.