Sewing Fundamentals
Sewing Machine Basics
Meet Your Machine
A sewing machine might seem complicated, but it's really just a collection of simple parts working together. Let's get to know the key players you'll interact with every time you sew. Understanding these parts is the first step to feeling confident at the machine.
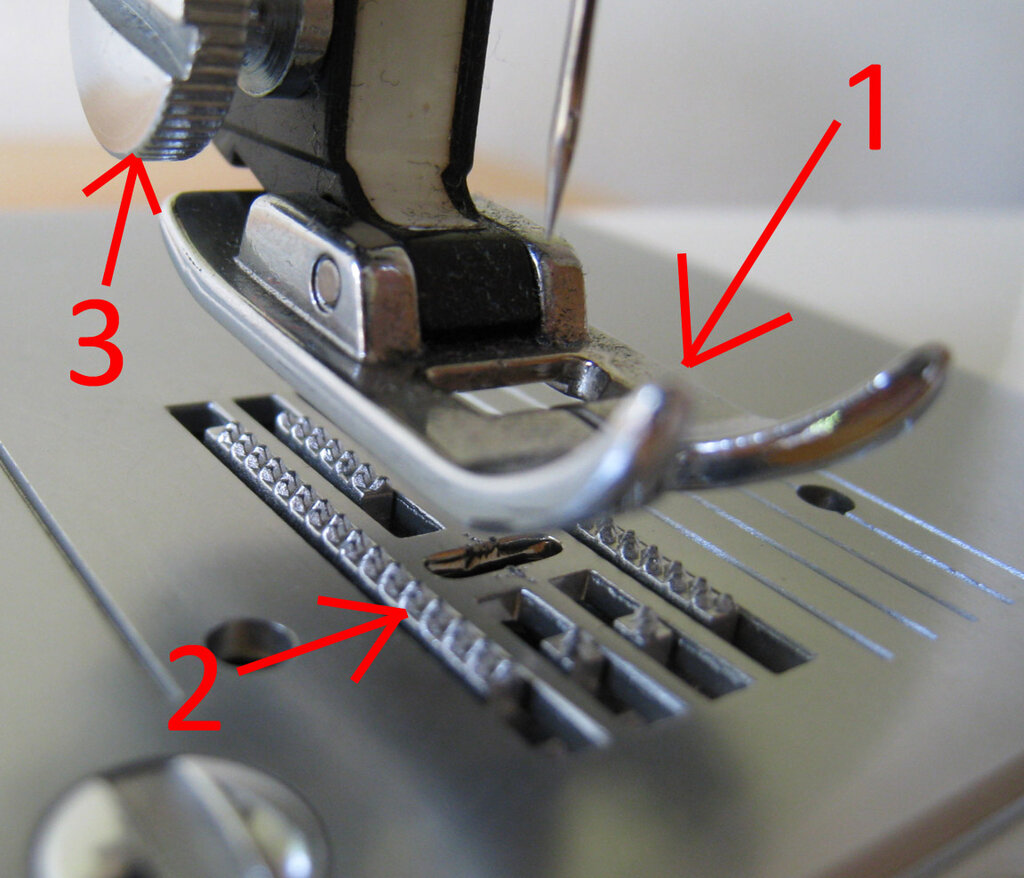
The needle, of course, does the stitching. But it doesn't work alone. Directly underneath it, you'll find the parts that hold and move your fabric.
Presser Foot
noun
A small, ski-shaped attachment that holds the fabric flat against the machine as you sew. Different feet are used for different tasks, like sewing zippers or buttons.
Feed Dogs
noun
The small, toothed metal bars that stick up from the plate under the presser foot. They grip the bottom of the fabric and pull it through the machine.
The Bobbin System
A sewing machine stitch isn't just one thread. It's two threads—one from the top spool and one from a small spool underneath called a bobbin—locking together in the middle of the fabric. This is called a lockstitch. Your first task before sewing is almost always preparing the bobbin.
Think of the bobbin as the anchor. It supplies the bottom thread that locks each stitch in place, making your seams strong.
First, you'll need to wind thread from your main spool onto the bobbin. Most machines have a bobbin winder on top. You'll place the bobbin on a small pin, wrap the thread around it a few times, and engage the winder. It will spin the bobbin, filling it evenly with thread. Stop when it's full but not overflowing.
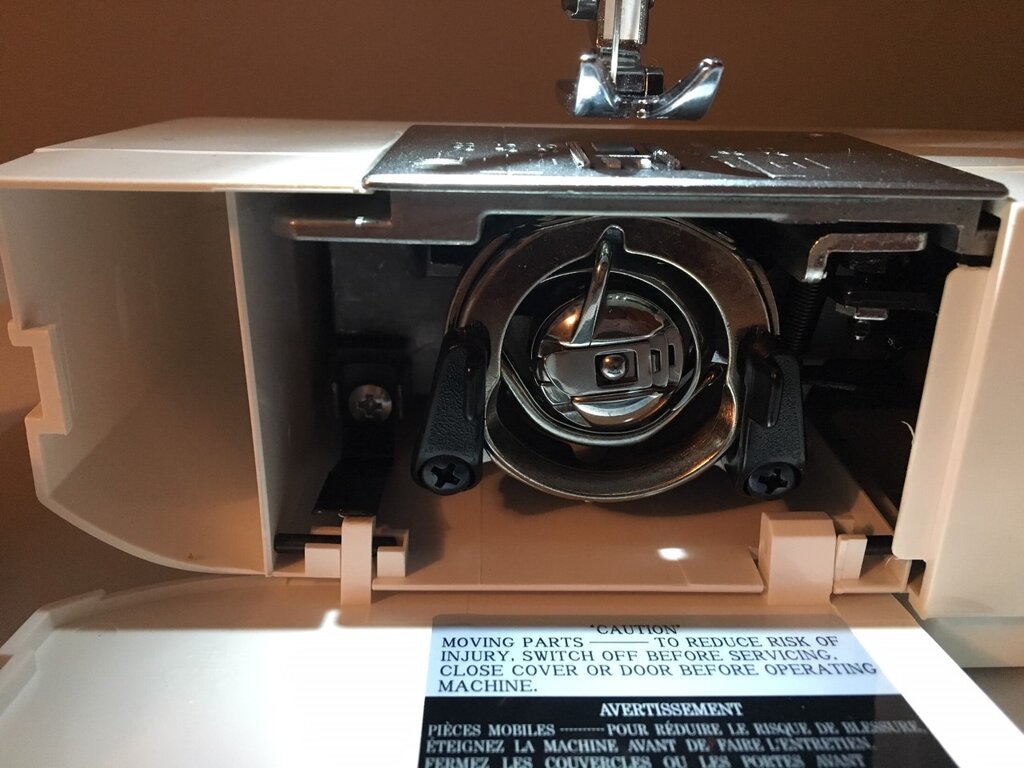
Once wound, the bobbin goes into the bobbin case, a small chamber located under the needle. Depending on your machine, this might be a front-loading case that you remove or a top-loading, drop-in style.
Threading the Machine
With the bobbin in place, it's time to thread the top part of the machine. This path looks confusing at first, but it's designed to guide the thread smoothly and apply the right amount of tension. Every machine is different, but they all follow a similar sequence. Most modern machines have numbers printed on them to guide you through the steps.
The general path is:
- Place your spool of thread on the spool pin.
- Guide the thread through one or two thread guides.
- Pull the thread down and around the tension discs, which control how tightly the thread is pulled.
- Loop the thread up and through the eye of the take-up lever. This lever moves up and down, pulling the thread to form the stitch.
- Bring the thread back down to the needle and thread it from front to back.
After threading, turn the handwheel toward you to drop the needle down and back up once. This will catch the bobbin thread and pull a loop of it to the surface. Use a small tool or your fingers to pull both thread tails under the presser foot and toward the back of the machine.
Adjusting Your Stitches
You're almost ready to sew. The last step is to choose your stitch settings. For now, we'll focus on the basic straight stitch.
Stitch Length controls how long each individual stitch is. A shorter length (e.g., 1.5mm) creates a tight, strong seam. A longer length (e.g., 4mm) creates a looser seam, often used for gathering fabric or temporary basting.
Stitch Width adjusts the side-to-side motion of the needle. For a straight stitch, you'll want this set to 0. It becomes important when you start using decorative stitches like a zigzag.
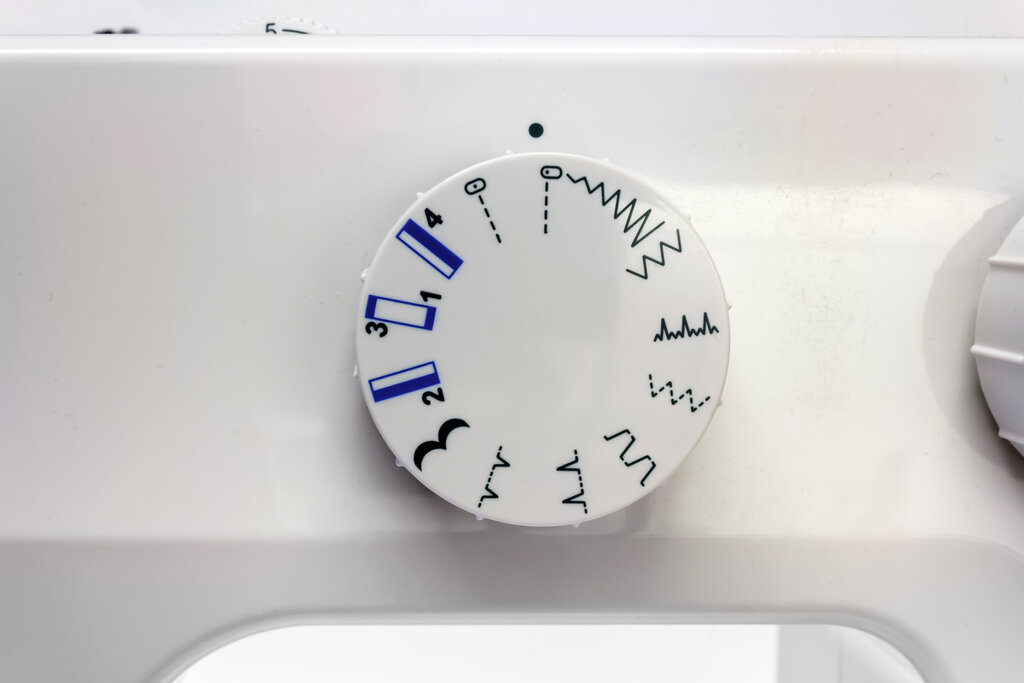
Tension is the most crucial setting for a healthy stitch. It's a measure of how tightly the machine pulls the top and bottom threads. The goal is balanced tension, where the top and bottom threads meet perfectly in the middle of the fabric layers. If your top tension is too high, it will pull the bobbin thread up to the top. If it's too low, you'll see loops of the top thread on the bottom of your fabric.
| Tension Problem | Appearance on Top | Appearance on Bottom |
|---|---|---|
| Too Tight (Top) | Seam may pucker, bottom thread is visible. | Smooth, straight top thread. |
| Too Loose (Top) | Smooth, straight bottom thread. | Loops of top thread are visible. |
| Balanced | Stitches look even and identical. | Stitches look even and identical. |
Always make sure that your presser foot is down before beginning to sew.
Finally, a quick word on safety. Keep your fingers away from the needle area when the machine is on. Turn the machine off completely when changing needles or the presser foot. Regular maintenance, like cleaning out lint from the bobbin area and changing your needle every 8-10 hours of sewing, will keep your machine running smoothly and prevent skipped stitches or fabric snags.
Ready to test what you've learned? Let's check your understanding of these core concepts.
What is the primary function of the bobbin in a sewing machine?
If you see loops of the top thread appearing on the bottom side of your fabric, what is the most likely issue with your settings?
Getting comfortable with your machine is all about practice. Don't be afraid to take a scrap of fabric and just sew straight lines until you get a feel for controlling the speed with the foot pedal.