Practical Digital Forensics Investigation
Evidence Acquisition
The First Rule: Do No Harm
In digital forensics, the primary directive is to preserve the integrity of the original evidence. Any action that changes the data on a source device, like a hard drive or smartphone, can contaminate the evidence and render it inadmissible in court. Even simply booting up a computer can alter hundreds of files. To prevent this, investigators use a specialized tool called a write-blocker.
The core principle of data acquisition is to capture a perfect copy of the digital evidence without altering the original source in any way.
Write-blockers act as a one-way street for data. They allow an investigator's computer to read data from the evidence drive but physically prevent any data from being written back to it. There are two main types:
- Hardware Write-Blockers: These are physical devices that sit between the evidence drive and the forensic workstation. They are generally considered the most reliable method because they operate independently of the workstation's operating system.
- Software Write-Blockers: These are programs that run on the forensic workstation. They modify the operating system's behavior to prevent it from writing to specified drives. While convenient, they are more susceptible to failure or misconfiguration than their hardware counterparts.
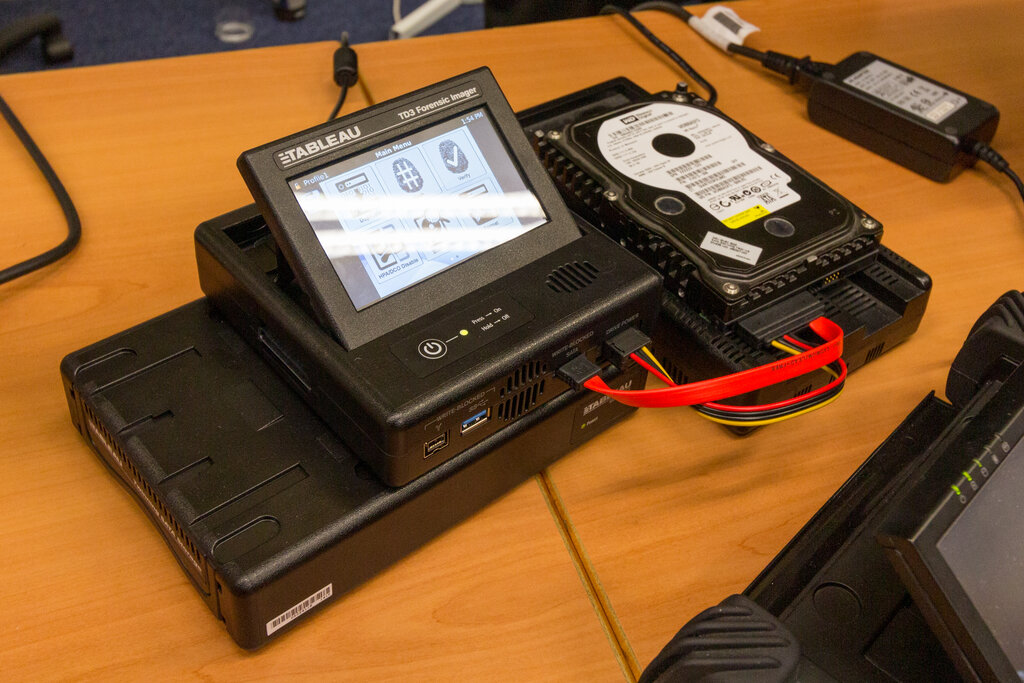
Regardless of the type, using a write-blocker is a non-negotiable first step in the acquisition process. It's the digital equivalent of a crime scene investigator putting on gloves before touching anything.
The Order of Volatility
Not all digital evidence is created equal. Some data is extremely fragile and will disappear the moment a device loses power. This is where the Order of Volatility comes in. It's a prioritized guide for data collection, starting with the most transient data and ending with the most persistent. An investigator working on a live, powered-on system must follow this sequence to avoid losing crucial information.
| Order | Data Location | Example | Volatility |
|---|---|---|---|
| 1 | CPU Registers, Cache | Currently executing instructions | Vanishes in nanoseconds |
| 2 | Routing Tables, ARP Cache | Network connection data | Changes constantly |
| 3 | RAM / System Memory | Running processes, open files, passwords | Lost on power down |
| 4 | Temporary System Files | Paging files, swap space | May be overwritten quickly |
| 5 | Data on Hard Disk | User files, deleted files | Persistent until overwritten |
| 6 | Archival Media | Backups, external drives | Highly stable |
Collecting data from RAM, for example, must happen before the machine is powered down. This memory contains a snapshot of what the computer was doing at that exact moment, including running programs, network connections, and even unencrypted data that is encrypted on the hard drive. Ignoring the Order of Volatility is like arriving at a crime scene and letting the rain wash away all the footprints before you photograph them.
Creating the Forensic Image
Once the scene is secure with a write-blocker, it's time to create a forensic image, which is a bit-by-bit copy of the source media. This is fundamentally different from simply copying and pasting files. There are two primary methods for imaging a drive.
Physical Imaging creates a bit-for-bit, sector-by-sector replica of the entire storage device. This is the most thorough method because it captures everything, including active files, deleted files that haven't been overwritten yet in , and data hidden in normally inaccessible areas of the drive. The output is a single large file or a series of smaller, segmented files.
Logical Imaging is more selective. It copies only the active files and folders from the drive's file system, much like a standard file copy operation. This process is faster and results in a smaller evidence file. It's useful when the scope of an investigation is limited to specific user files or when time and storage space are major constraints. However, it fails to capture deleted data or file fragments, which could be critical.
The choice of image format is also important. Each has its pros and cons:
| Format | Extension | Key Features |
|---|---|---|
| Raw (dd) | .dd, .img | Exact bit-for-bit copy. No compression or metadata. Compatible with most tools. |
| E01 | .e01 | EnCase format. Contains metadata, supports compression, and can be split into smaller chunks. |
| AFF | .aff | Advanced Forensics Format. Open standard, supports compression and metadata, and is not tied to a single commercial tool. |
Verifying the Perfect Copy
How can you be certain that your forensic image is a perfect, unaltered copy of the original? The answer is cryptographic hashing. A hash function is a mathematical algorithm that takes an input (in this case, the entire data of a drive) and produces a fixed-size string of characters. This string, or hash value, is a unique digital fingerprint of the data.
Even the smallest change to the original data, like flipping a single bit from a 0 to a 1, will produce a completely different hash value. Common hash algorithms used in forensics include MD5, SHA-1, and SHA-256. Investigators calculate a hash for both the source media (before imaging) and the resulting image file (after imaging). If the hashes match, the integrity of the evidence is verified. This process is documented and becomes a critical part of the final report.
Tools like FTK Imager and Guymager are industry-standard applications that streamline this entire workflow. They integrate write-blocking capabilities (for some connection types), allow the user to choose between physical and logical acquisition, support various image formats, and automatically perform hash verification, creating a detailed log file to document the process. This combination of specialized hardware, software, and rigorous procedure ensures that the digital evidence collected is a true and accurate reflection of what was on the original device.