Photoshop Fundamentals for Beginners
Photoshop Interface
Welcome to Your Workspace
Opening Photoshop for the first time can feel like stepping into the cockpit of a spaceship. There are buttons, menus, and panels everywhere. But once you know what the main controls do, you'll find it's a well-organized space designed for creativity.
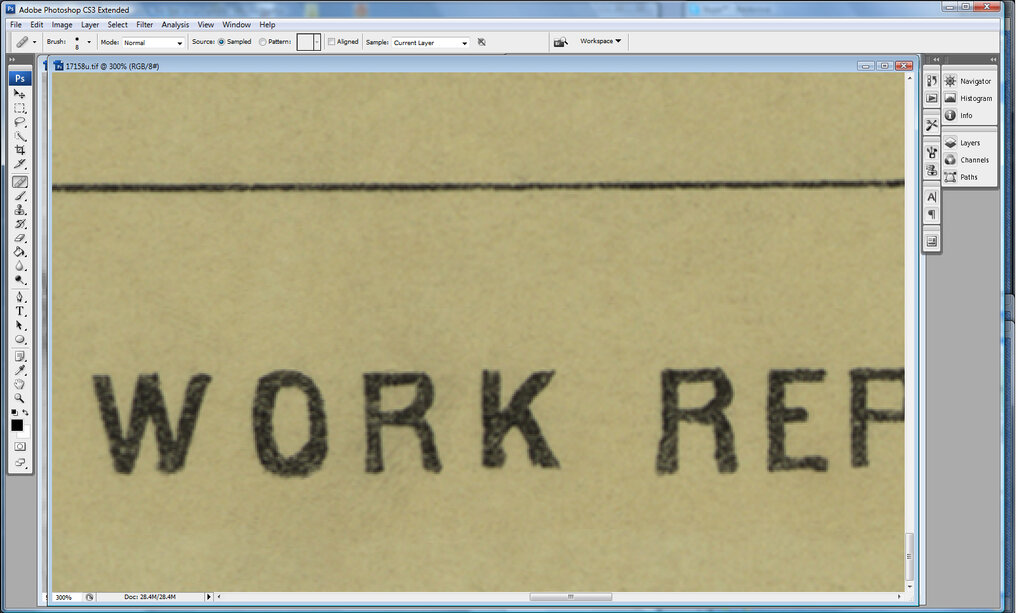
Think of the Photoshop interface as your digital art studio. Everything you need is within reach, organized into a few key areas. The large central area is your canvas, or Document Window. This is where your image lives. Surrounding it are all the tools and controls you'll use to edit that image.
The Main Menu and Options Bar
At the very top of the screen is the Menu Bar. This is standard for most applications. It contains menus like File, Edit, and Image.
- File: For creating new documents, opening existing ones, saving, and exporting your work.
- Edit: Home to essential commands like Undo, Cut, Copy, and Paste, as well as more advanced functions like Transform and Fill.
- Image: Contains adjustments for the entire image, such as changing the color mode or image size.
- Window: This menu is your command center for the interface itself. You can use it to show or hide any panel in your workspace.
Directly below the Menu Bar is the Options Bar. This bar is dynamic, meaning its content changes depending on which tool you have selected. If you choose the Brush tool, the Options Bar will show settings for brush size and hardness. If you switch to the Type tool, it will show options for font, size, and alignment. It's your context-sensitive control panel.
Your Digital Toolkit
The long, vertical bar on the left side of the screen is the Tool Panel, or Toolbox. This holds all of Photoshop's creative and editing tools. You'll find tools for selecting parts of an image, painting, erasing, adding text, and much more.
Many tool icons have a small triangle in the bottom-right corner. This indicates that more tools are nested underneath. Click and hold the icon to reveal the hidden tools. For example, the Rectangle Marquee Tool hides the Elliptical Marquee Tool.
On the right side of the screen, you'll find a collection of other important panels. By default, these usually include:
- Color Panel: For choosing foreground and background colors.
- Properties Panel: Displays information and settings for the currently active element.
- Layers Panel: Perhaps the most important panel in Photoshop. It shows all the layers in your document, which are like transparent sheets stacked on top of each other. We'll dive deep into layers later.
Arranging Your Space
Your workspace is not set in stone. You can completely customize it to fit your workflow. Panels can be dragged by their top tabs and moved around. You can pull a panel out to make it float freely, or dock it with other panels by dragging it to the edge of another panel or the screen until a blue line appears.
You can also save your custom layouts. Go to Window > Workspace > New Workspace... to save your current panel arrangement. Photoshop also comes with several preset workspaces tailored for different tasks, like Photography, Painting, and Graphic and Web. You can switch between these anytime using the same Window > Workspace menu.
If your panels ever get messy and you want to return to the default layout, just go to Window > Workspace > Reset Essentials.
Don't be afraid to experiment. Drag panels around and try different arrangements until you find one that feels comfortable for you.
Now that you have a map of the Photoshop interface, you're ready to start exploring the tools and creating your first project.
If you select the Brush tool and then switch to the Type tool, what happens to the bar located directly below the Menu Bar?
Which menu contains the command to show or hide panels like the Layers or Color panel?