Mobile Application Security and Ethical Tools
Mobile Lab Setup
Building Your Mobile Lab
A professional mobile testing environment is about control and repeatability. To analyse an application's behaviour, you need to isolate it from network noise and observe its traffic cleanly. This lab setup forms the foundation for intercepting, manipulating, and understanding how mobile apps communicate.
We'll focus on two primary platforms: Android and iOS. While the goals are the same, the tools and trade-offs for each are distinct.
The Android Playground
For Android testing, Android Virtual Devices (AVDs) are the industry standard. An AVD is a full-fledged emulator that runs the Android operating system on your computer. It provides a sandboxed environment where you can install apps, manipulate the system, and analyse behaviour without risk to a physical device.
You can create and manage AVDs through the GUI in Android Studio, but the command line offers more granular control. When selecting a system image, it's often better to choose one without Google Play Services. These images provide a cleaner, more open environment and are often easier to gain root access on, which is essential for deeper analysis.
# Example: Create a rooted AVD via command line
# First, list available system images
sdkmanager --list | grep system-images

# Choose an image (e.g., Android 12, x86_64, without Google APIs)
# and create the AVD
avdmanager create avd -n Pixel_5_API_31_no_gapps -k "system-images;android-31;default;x86_64" --device "pixel_5"
iOS: Simulators vs Physical Devices
The iOS ecosystem is more locked down. Apple's official tool, the iOS Simulator, which comes with Xcode, is not a true emulator. It runs iOS applications, but it shares the underlying with your macOS host. This means you can't test for kernel-level vulnerabilities or certain low-level system interactions that a real device would have.
For this reason, serious iOS penetration testing almost always requires a physical, jailbroken iPhone or iPad. Jailbreaking provides the root access needed to install necessary tools and inspect the application's environment without restriction. The choice between a simulator and a physical device involves clear trade-offs.
| Feature | Physical Device | Emulator/Simulator |
|---|---|---|
| Kernel Access | Full, direct access (if jailbroken) | Limited; shares host kernel (iOS) |
| Cost | High (requires hardware) | Free (software-based) |
| Sensor Simulation | Not possible (uses real sensors) | Full (GPS, accelerometer, etc.) |
| App Store Apps | Direct access | Limited/difficult; not on simulators |
| Setup | Complex (requires jailbreaking) | Simple and fast |
| Reproducibility | Difficult; device state can change | Excellent; can reset to a snapshot |
Intercepting Traffic with Burp Suite
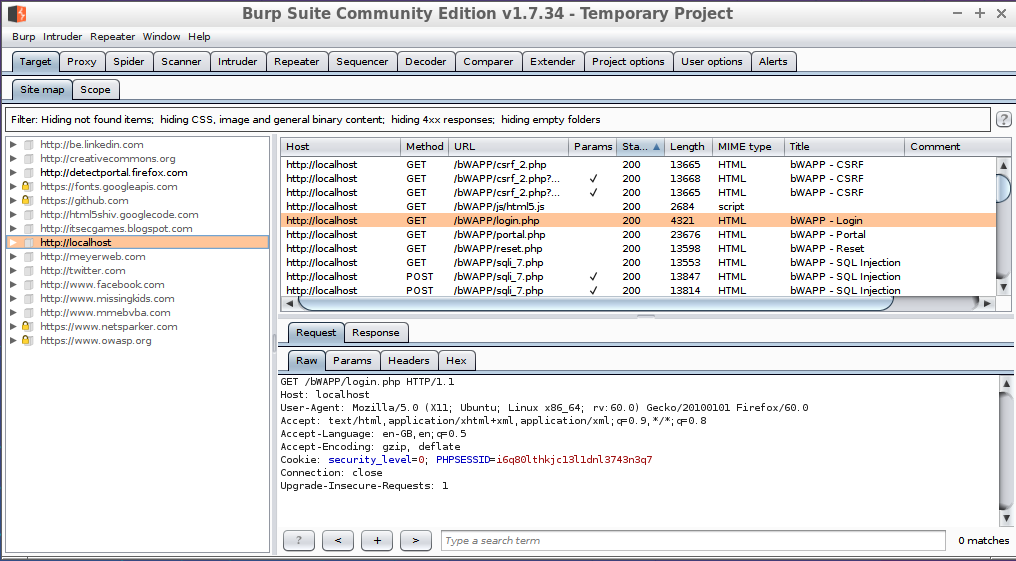
Once your test device is running, the next step is to funnel its network traffic through a tool that lets you inspect and modify it. Burp Suite is the perfect tool for this, acting as a between the mobile app and the internet.
To set this up, you'll configure Burp to listen on a specific port and then point your mobile device's Wi-Fi connection to use your computer's IP address and that port as its HTTP proxy. With this in place, all of the device's web traffic will pass through Burp Suite.
Ensure your computer and the mobile device (or emulator) are on the same Wi-Fi network. This is a common point of failure in proxy setup.
However, just setting the proxy isn't enough. Most apps use HTTPS, which encrypts traffic. To decrypt and read it, the mobile device must trust Burp Suite's certificate authority (CA). You do this by downloading and installing Burp's CA certificate onto the device. Navigate to http://burpsuite in the device's browser and follow the instructions to install the certificate. On newer Android versions, you may need to move the certificate to the system trust store using root privileges.
Bypassing SSL Pinning with Frida
Some applications don't just rely on the device's trust store. They use a technique called to verify that the server's certificate is the exact one they expect. If a proxy like Burp Suite presents its own certificate, the app will refuse to connect. This is a strong security measure, but it gets in our way during testing.
This is where comes in. Frida is a dynamic instrumentation toolkit that allows you to inject scripts into running applications. For our purposes, we can use a pre-written Frida script to 'hook' into the app's code at runtime and disable the SSL pinning checks before they happen. This fools the application into accepting Burp's certificate, allowing us to intercept its traffic.
# Example command to run a pinning bypass script with Frida
# You need a rooted/jailbroken device with the frida-server running

# -U specifies a USB-connected device
# -f specifies the target application's package name
# -l specifies the script to load

frida -U -f com.example.app -l ssl-pinning-bypass.js
With an emulator configured, Burp Suite intercepting traffic, and Frida ready to defeat pinning, you have a robust and professional lab environment. This setup provides the visibility and control needed to perform a thorough security analysis of any mobile application.
When setting up an Android Virtual Device (AVD) for security testing, why is it often recommended to choose a system image WITHOUT Google Play Services?
What is the primary limitation of Apple's iOS Simulator for in-depth security testing compared to a physical, jailbroken iPhone?