Mastering Your Sony ZV-E10 Camera Settings
Camera Body Controls
Getting Acquainted with Your Camera
Before you can master exposure and composition, you need to know your tool. The Sony ZV-E10 is packed with features, but its physical controls are designed to be intuitive. Let's walk through the camera's body so you know exactly where to find the essential buttons and dials without having to look away from your subject.
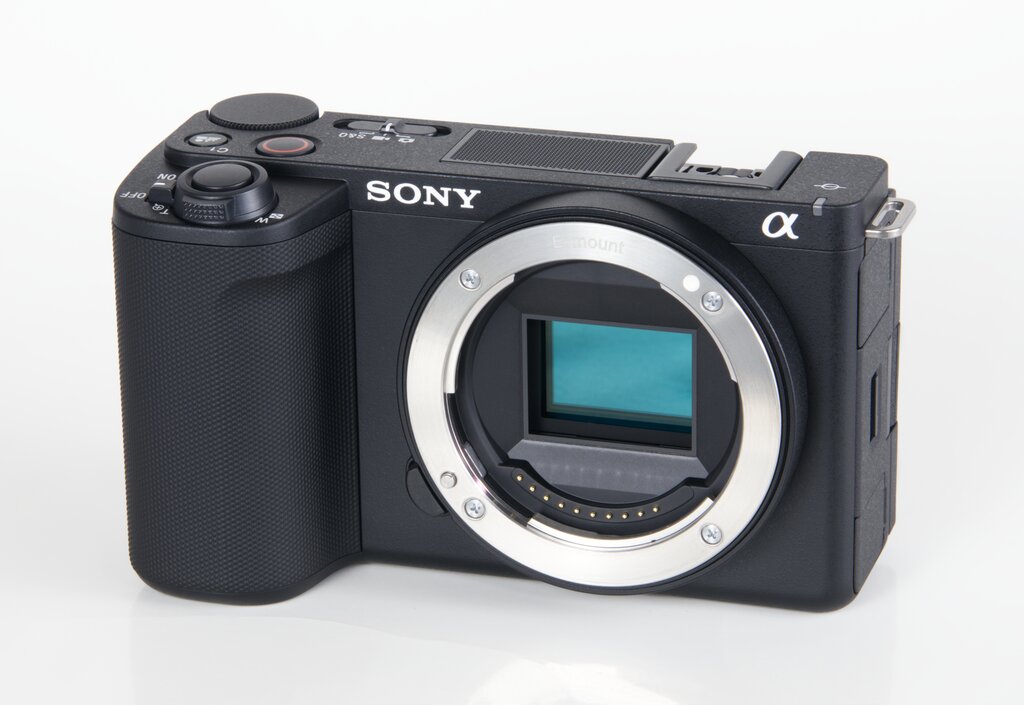
Think of this as building muscle memory. The goal is to make changing settings feel as natural as breathing. We'll start with the most-used controls on the top plate.
Top Plate Controls
The top of your camera is prime real estate for the most critical functions. This is where you'll power on the device, take a picture, and start recording video.
First, locate the ON/OFF switch. It's a lever that surrounds the main . Flick it to ON to power up the camera. The large button in the center of this switch is the shutter release. You'll press this to take a photo.
Next to the shutter is a large, dedicated video record button, marked with a red dot. It's placed for easy access so you can start filming instantly. Nearby, you'll find the Mode button. The ZV-E10 doesn't have a traditional physical mode dial. Instead, you press this button to cycle through shooting modes like Program Auto, Aperture Priority, Shutter Priority, and Manual on the rear screen.
Finally, the top plate features a prominent control dial for adjusting settings like aperture or shutter speed, a zoom lever around the shutter button for power zoom lenses, and the for adding accessories like external microphones or flashes.
The Back Panel
The back of the camera is your command center, dominated by the large LCD screen. This is where you'll compose shots, review images, and navigate the camera's menu system.
The main controls here are clustered for easy thumb access. You'll find a Menu button to access the camera's full settings. Below it is a control wheel that also functions as a four-way directional pad. This wheel is a workhorse; you'll use it to navigate menus, scroll through photos, and often to adjust secondary settings like ISO.
The four directions on the wheel are typically shortcuts to common settings. On the ZV-E10, these are often set to Display (DISP), ISO, Exposure Compensation, and Drive Mode (single, burst, timer). At the bottom, you'll find the Playback button (an icon that looks like a play symbol) to review your photos and videos, and a Delete/C1 button (trash can icon) to erase them. This button also doubles as a custom function button.
The fully articulating screen is a key feature. It can flip out to the side and rotate, which is perfect for shooting at high or low angles and for filming yourself.
Ports, Battery, and Storage
On the left side of the camera, a small door covers the connection ports. Here you'll find a USB-C port for charging and data transfer, a micro HDMI port for connecting to external monitors or TVs, and a 3.5mm microphone input. A separate flap covers the headphone jack for monitoring your audio while recording.
The battery and memory card share a compartment on the bottom of the camera. Slide the latch on the door to open it. The fits in one way and is secured by a small blue or gray clip. You'll need to slide this clip to release the battery for charging.
The is located next to the battery. Pay attention to the diagram inside the compartment to ensure you insert the card in the correct orientation. Push it in until it clicks and stays in place. To remove it, just push it in again gently, and it will pop out.
Now that you know where the key controls are, try operating them without looking. Practice changing modes, adjusting the control dial, and finding the record button. This familiarity is the first step toward taking full creative control of your images.
Where is the ON/OFF switch located on the Sony ZV-E10?
The Sony ZV-E10 lacks a traditional physical mode dial. How do you switch between shooting modes like Program Auto and Aperture Priority?