Mastering the Windows Terminal for Developers
Configuring Windows Terminal
Under the Hood: The settings.json File
Windows Terminal's power lies in a single text file: settings.json. While you can use the graphical interface for many settings, direct manipulation of this file unlocks a higher level of customisation. It's the blueprint for your entire terminal environment, defining everything from shell profiles to keyboard shortcuts.
To open it, launch Windows Terminal, open the dropdown menu by clicking the down arrow in the tab bar, and select "Settings". Then, in the bottom-left corner of the Settings tab, click "Open JSON file". This will open settings.json in your default text editor.
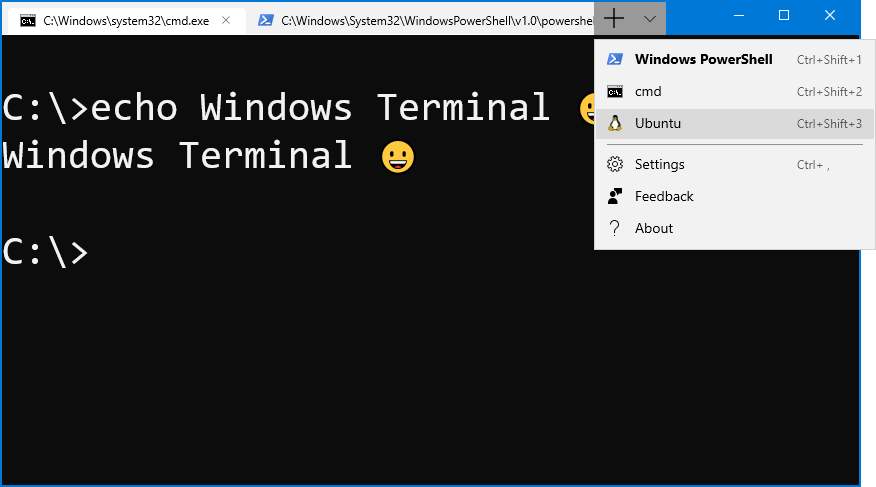
The file contains a series of objects and arrays. The profiles section is where you'll spend most of your time. It contains a list array, where each object represents a single profile you can launch, like Command Prompt, PowerShell, or a distribution.
Crafting Custom Profiles
While Windows Terminal automatically detects installed shells, creating your own profiles gives you fine-grained control. Let's create a dedicated profile for PowerShell 7 that starts in a specific AI project folder.
{
  "guid": "{574e775e-4f2a-5b96-ac1e-a2962a402336}",
  "name": "PowerShell AI Projects",
  "commandline": "pwsh.exe",
  "startingDirectory": "C:\\Users\\YourUser\\Documents\\AI_Projects",
  "suppressApplicationTitle": true,
  "icon": "ms-appx:///ProfileIcons/{574e775e-4f2a-5b96-ac1e-a2962a402336}.png"
}
Here's a breakdown:
guid: A unique identifier for the profile. You can generate one with theNew-Guidcommand in PowerShell.name: The display name in the dropdown menu.commandline: The executable to run.pwsh.exeis for PowerShell 7, distinguishing it from the olderpowershell.exe.startingDirectory: The key to our workflow. Notice the double backslashes (\\), which are necessary to escape the single backslash in the JSON format. This ensures the shell opens exactly where you need it.suppressApplicationTitle: When set totrue, this keeps your tab titles clean and predictable, showing only the profilenamerather than the current running application's title.
To make this our default shell, find the defaultProfile setting at the top of the settings.json file and paste the new profile's GUID as its value.
Layouts and Launch Arguments
One of the most powerful features for developers is the ability to launch complex, multi-pane layouts from the command line using arguments. This allows you to script your entire development setup.
Imagine you're working on a Python project in WSL. You need one pane for your code editor (like Neovim), another for running the server, and a third for git commands. You can create a shortcut or a script with a command like this:
wt.exe -p "Ubuntu" -d /mnt/c/Users/YourUser/Documents/PyProject ; \
       split-pane -p "Ubuntu" -d . -H ; \
       split-pane -p "Command Prompt" -d C:\Users\YourUser\Documents\PyProject -V
This command launches a new Windows Terminal window with three panes:
-p "Ubuntu" -d ...: Opens an Ubuntu profile in your project directory. Note the Linux-style path, which is crucial for WSL.split-pane -H: Splits the window horizontally (-H) and opens another pane with the same profile and directory (.means current directory).split-pane -V: Splits the second pane vertically (-V) and opens a Command Prompt profile, this time using the Windows-style path.
The semi-colon acts as a command separator, letting you chain actions together to build your perfect layout on the fly.
Mastering Keybindings
Speed is essential. Customising keybindings helps you navigate your terminal without touching the mouse. All keybindings are defined in the actions array within your settings.json file. While many useful defaults exist, the is your central hub for discovering and executing actions.
By default, Ctrl+Shift+P opens the Command Palette. From there, you can type to find any action, such as "Split Pane" or "Focus Pane Down".
For frequently used actions, like switching between panes, you can use the default Alt + Arrow Key combination. Or, you can define your own. For example, to bind Ctrl+Tab to move focus to the next pane, you'd add this object to the actions array:
{
  "command": "moveFocus.next",
  "keys": "ctrl+tab"
}
By thoughtfully editing your settings.json, you can transform Windows Terminal from a simple command-line interface into a tailored and highly efficient development environment.
What is the name of the primary configuration file for Windows Terminal?
In settings.json, which property is used to set a specific profile as the one that opens by default when you launch Windows Terminal?