Mastering the Oboe
Oboe Assembly
Meet the Pieces
Before you can assemble your oboe, you need to know its main parts. Most oboes come in three sections, plus the reed. Let's lay them out.
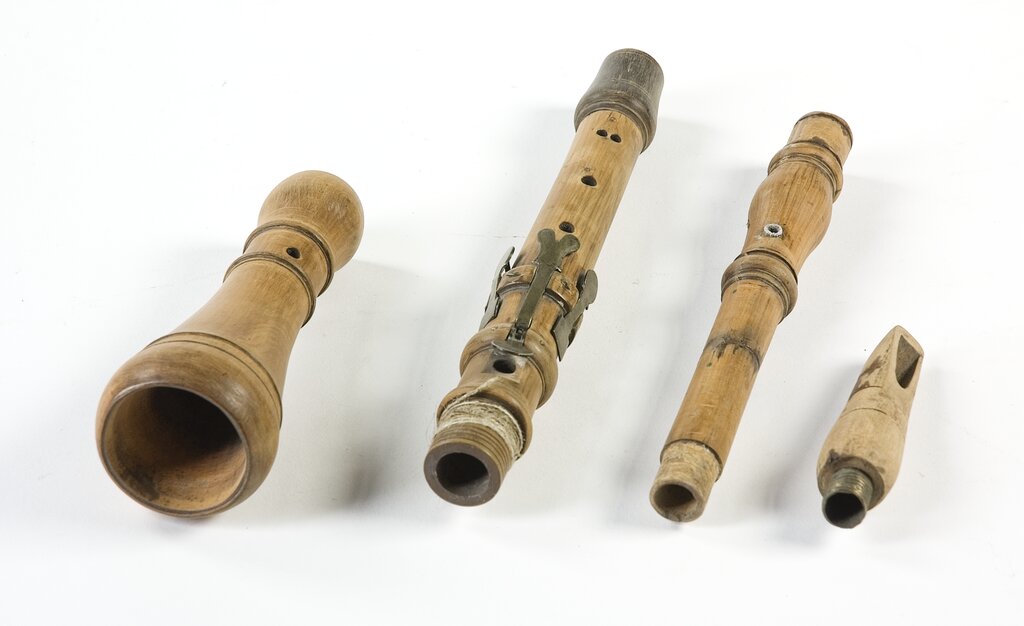
The largest piece is the bell, which flares out at the bottom. Next are the two main body pieces: the lower joint (the longer one) and the upper joint (the shorter one). These sections are covered in a complex system of keys and rods. Finally, there's the reed, the delicate part you blow into to create sound.
Each section connects using cork-wrapped ends called tenons. These allow for a snug, air-tight fit.
Putting It All Together
Assembling an oboe requires a gentle but firm touch. The goal is to connect the joints without bending any of the delicate keywork. Always handle the instrument over a soft surface, like your lap or a bed, just in case.
First, take the bell and the lower joint. Hold the bell in one hand and the lower joint in the other. Grip the lower joint in a section where there are no keys. Gently twist the two pieces together until the connection is secure. You'll need to align the bridge key on the lower joint with its corresponding mechanism on the bell.
A tiny dab of cork grease on the tenons can make assembly smoother if the parts are tight. Don't overdo it, though.
Now for the trickiest part: connecting the upper and lower joints. This is where most damage can happen if you're not careful. The keys on these two sections have to link up perfectly.
Look at the top of the lower joint and the bottom of the upper joint. You'll see small metal tabs that need to overlap. These are called the bridge keys. To connect them safely, you must lift the bridge key on the upper joint out of the way. Do this by pressing down the correct key on the upper joint (it's often a small, flat key near the top). This raises the connecting bridge key at the bottom. While holding it up, you can carefully twist the upper and lower joints together. Once they are aligned, release the key.
Once the body is assembled, you can add the reed. The reed is extremely fragile, so handle it only by the cork at its base. Gently insert the reed into the top of the upper joint with a slight twisting motion until it feels secure. Don't force it.
Taking It Apart Safely
Disassembly is simply assembly in reverse. The same care is required.
- Remove the reed first. Hold it by the cork and twist gently to pull it out. Place it in its protective case immediately.
- Separate the main joints. Just as you did during assembly, press the correct key on the upper joint to lift the bridge key. With the key held up, gently twist the joints apart. Never force them.
- Remove the bell. Twist the bell off the lower joint.
After playing, it's a good habit to use a silk or feather swab to clean the moisture from the inside of each joint before putting them away. This helps keep the wood in good condition.
Because the oboe has so many parts and they are all complexly interrelated, several days are required to assemble and adjust a single instrument.
Taking the time to assemble and disassemble your oboe correctly is a fundamental skill. It protects your instrument from damage and ensures it's always ready to play at its best. With a little practice, this process will become a quick and easy routine.
What is the name of the largest piece of the oboe that flares out at the bottom?
What is the crucial step when connecting the upper and lower joints of the oboe?