Mastering the Business of Fitness Media
Cinematic Lighting for Physique
Sculpting with Light
Forget flat, boring gym lighting. To create a premium, cinematic look for physique photography, you need to think like a sculptor. Your lights are your chisels. Instead of just making someone visible, your job is to use light and shadow to carve out muscle definition, create depth, and tell a story of strength and dedication.
The secret is moving away from simply illuminating a subject and toward strategically placing light to reveal form. We'll start with a foundational two-light setup that can create dramatic, professional results.
The Two-Light Foundation
Your primary light is the key light. This is your main source of illumination and does most of the heavy lifting. Its placement is the single most important decision you'll make.
For defining musculature, placing the key light at a 45-degree angle to your subject is a classic and effective technique. This position creates what is often called 'split lighting' because it illuminates one side of the body while letting the other side fall into shadow. These shadows are what reveal depth and texture.
With only a key light, your subject might blend into a dark background. To solve this, we add a second light: the rim light. Also known as a 'kicker' or 'hair light', its job is to separate the subject from the background.
Placed behind the subject and often pointing towards the camera, the rim light traces the subject's outline with a sliver of bright light. This adds a polished, three-dimensional feel and prevents your image from looking flat.
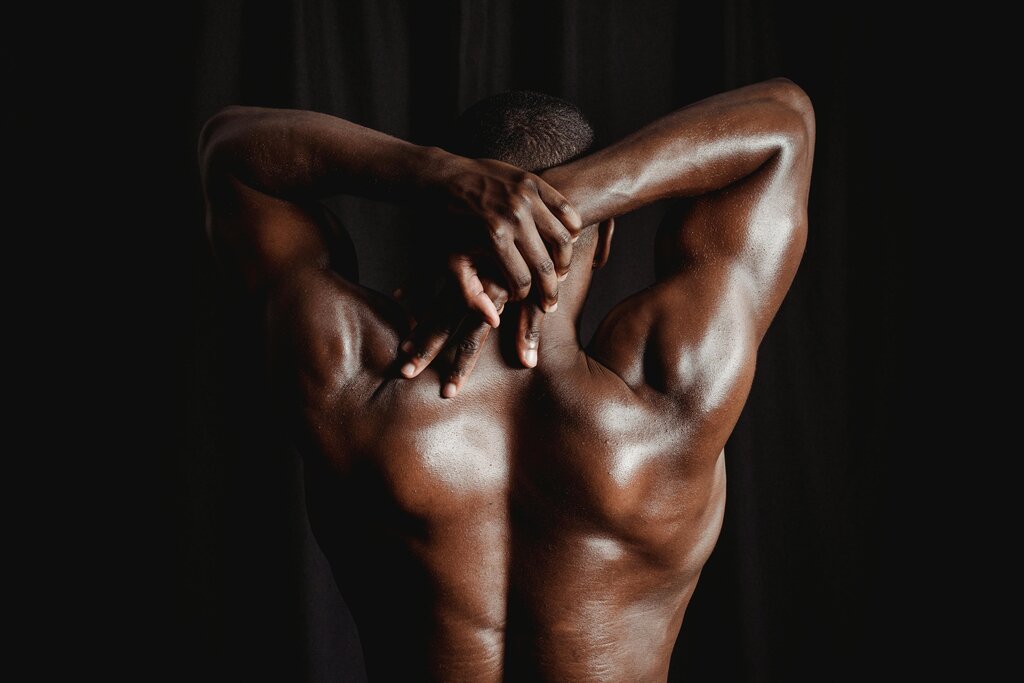
This key-plus-rim combination is the bedrock of cinematic physique lighting. It gives you shape, depth, and separation—the three essential ingredients for a powerful image.
Hard Light, Sharp Definition
The quality of your light is just as important as its position. Light can be either 'hard' or 'soft'.
Hard light comes from a small, direct source (like the sun on a clear day or a bare bulb). It creates sharp, well-defined shadows.
Soft light comes from a large, diffused source (like an overcast sky or a light shining through a large softbox). It creates gentle, feathered shadows.
For maximum muscle definition, vascularity, and striations, hard light is your best tool. Its sharp shadows act like a fine-tipped pen, drawing precise lines around every muscle group.
While soft light can be flattering for portraits, it often smooths over the very details you want to emphasize in physique photography. To get harder light, use smaller light sources or remove the inner diffusion panel from your softbox. This creates higher contrast and a more chiseled look.
Controlling the Shadows
Once you've placed your lights, your final task is to control the shadows. Sometimes, ambient light in the room can bounce around and fill in the shadows, reducing contrast and softening the look you've worked to create.
This is where negative fill comes in. Instead of adding more light, you add darkness. By placing a large black object—like a black foam board, flag, or even a piece of fabric—on the shadow side of your subject, you can absorb stray light. This prevents light from bouncing back into the shadows, making them deeper and richer.
For an even more dramatic, 'shredded' look, try positioning your key light directly above the subject. This top-down lighting creates deep shadows in the crevices of the musculature, especially around the abs and shoulders, powerfully enhancing definition.
Three-point lighting is a standard setup that uses a key light (main source), fill light (softens shadows), and backlight (separates subject from background) to create depth and dimensionality in the subject's face
Finally, always set a custom white balance on your camera. Auto white balance can be fooled by different light temperatures and can render skin tones inaccurately—making them look too orange, blue, or green. Setting a custom white balance using a grey card ensures that skin tones are captured naturally and accurately, which is critical for a professional result.
In a classic two-light setup for physique photography, what is the primary function of the key light?
What is the main purpose of using a rim light (or 'kicker') in physique photography?
By combining these techniques, you move beyond simple documentation and begin to craft powerful, cinematic portraits that do justice to the physique.