Mastering the Art of Touch Typing
Home Row Mastery
Finding Your Home Base
Forget looking at the keyboard. Your sense of touch is your new guide. Run your index fingers along the middle row of keys. You'll feel a small, raised bump on two of them: the F key and the J key. These aren't manufacturing defects; they're your anchors. These tactile markers are the foundation of touch typing, allowing your fingers to find their starting positions without a single glance downward.

This central row of keys is called the home row for a reason. It's the neutral, resting position your fingers will always return to. Think of it as a home base in a game of tag. No matter where your fingers travel to strike other keys, they always come back here. This consistency is what builds speed and accuracy.
Proper Finger Placement
Let's get your hands into position. Place your left index finger on the F key (with the bump) and your right index finger on the J key (the other bump). Now, let the rest of your fingers fall naturally onto the adjacent keys.
Your left hand will cover A, S, D, and F. Your right hand will cover J, K, L, and the semicolon (;). Your thumbs should hover lightly over the space bar. This is the one and only starting position. From here, each finger is responsible for a specific set of keys, but for now, we're focusing only on this home base.
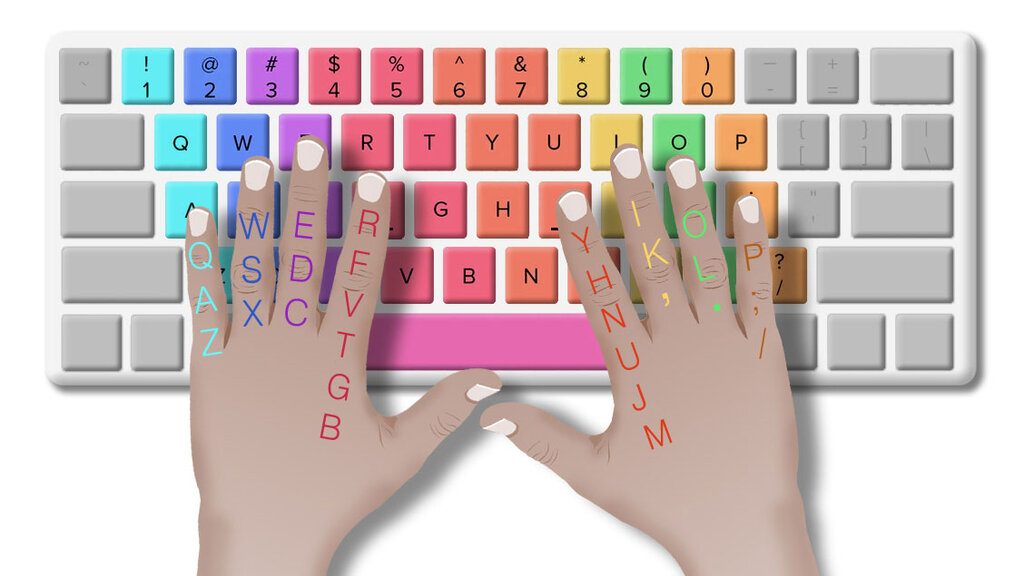
Home row position: Touch typing is based on placing your fingers on the “home row” keys (ASDF for the left hand and JKL; for the right hand).
Notice how your hands feel. They shouldn't be tense or flat. Your fingers should be gently curved, as if you're holding a ball. This relaxed, curved position allows for quick, precise movements and prevents strain. Your wrists should be straight, floating just above the keyboard, not resting on the desk. All movement should come from your fingers, not your hands or wrists. Keeping your hands stationary is crucial for developing —the automatic, unconscious skill that makes touch typing possible.
Making Your First Moves
With your fingers in position, let's practice the basic movements. Type the following sequence, saying each letter out loud as you press the key. Don't look down!
asdf jkl;
Press each key with a light, quick tap. After each keystroke, ensure your finger immediately returns to its home key. The goal isn't speed, but precision and the rhythmic return to the home position. Once you feel comfortable with the individual letters, try some simple combinations.
ask; fad; all; fall;
For the space between words, use the thumb that feels most natural. Most people use their dominant thumb, but either is fine. The key is to be consistent. The space bar is the only key the thumbs are responsible for.
The entire process is about building a habit. Your fingers will feel clumsy at first. You'll be tempted to look. Resist. Every time you find your place using the bumps on F and J, you are reinforcing the correct in your brain. Trust your sense of touch. It will become your most reliable guide.
Key habit: Return to home row between words to maintain efficiency.
Now, let's test what you've learned about your new home base.
What is the primary purpose of the raised bumps on the 'F' and 'J' keys?
The central row of keys where your fingers rest is called the home row. Which keys does your right hand cover in the correct starting position?