Mastering the Art of Aari Embroidery
Advanced Silk Filling
Achieving the Silk Sheen
You've mastered the basic chain stitch. Now, we move beyond simple lines to creating flawless, expansive fields of colour. The goal of advanced filling isn't just to cover fabric; it's to create a surface so smooth and uniform that it reflects light like a pool of liquid silk. This is the foundation of luxury embroidery, where texture and light are as important as the design itself.
This technique, often called Flat Silk Loading, requires meticulous control over stitch direction, length, and tension. Every stitch must lie perfectly next to its neighbour without pulling the fabric or creating ridges. The result is a lustrous, painterly effect that feels impossibly smooth to the touch.
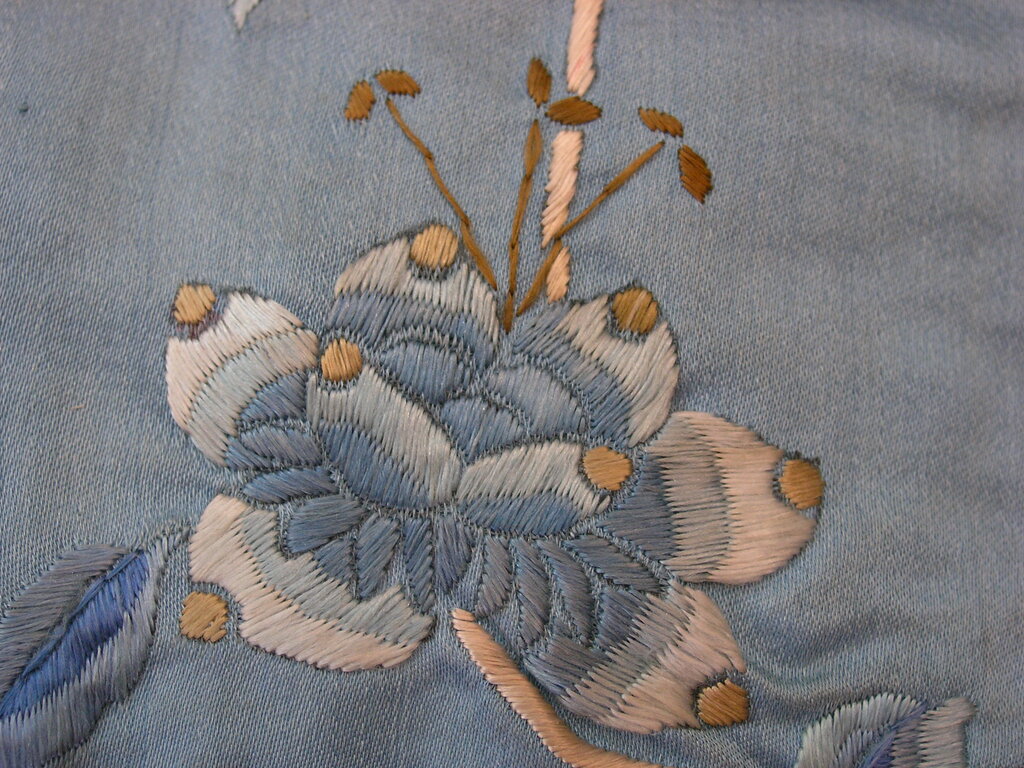
Pani Work or Water Filling
The most fundamental technique for achieving a flawless fill is Pani Work, which translates to 'Water Filling'. The name perfectly captures the goal: to create an area of silk that flows like water, with no discernible start or end to the stitches. It's achieved by working tiny, interlocking chain stitches in an undulating, wave-like pattern across a motif.
Instead of working in straight, parallel lines, you guide the Aari needle in gentle curves, back and forth. Each new line of stitches nestles tightly into the curve of the one before it. This staggering of stitches is crucial. It breaks up any potential seams or gaps, tricking the eye into seeing a single, solid block of shimmering colour. It’s a test of patience and rhythm, requiring thousands of consistent stitches to fill even a small area.
The key is to keep your stitches incredibly small and consistent. Larger stitches will create a rougher texture and fail to interlock properly. This technique is the workhorse of Indian couture, used to fill everything from large floral motifs to the intricate backgrounds of a wedding lehenga.
Blending and Shading
Once you can create a flat, single-colour surface, you can introduce shading and gradients. This is where the artistry truly begins.
Long and Short Filling: This classic technique is adapted for the Aari needle to create soft, natural shading. You work rows of alternating long and short stitches. The next row of a new colour then stitches into the gaps left by the shorter stitches of the previous row. This breaks up the hard line between colours, allowing them to blend seamlessly. It's perfect for creating the soft gradations of colour on a flower petal or a bird's feather.
Double Colour Gradient Filling: For a bolder gradient effect, you can work with two different coloured threads in the needle at once. You begin filling from one side of the motif with the first colour. About a third of the way across, you introduce the second colour, working it alongside the first. Then you drop the first colour and finish the motif with the second. This creates a soft, yet distinct, transition from one hue to another, all within a continuous fill.
When creating a gradient, always place the darker shade at the edge or base of the motif. This creates a sense of depth and realism.
The final technique in flat filling is a style borrowed from a different craft: embroidery. In traditional Zardosi, metal threads are laid across the fabric and couched down with a finer thread. We can replicate this effect with silk to create a 'loaded' or 'laid' stitch look. You lay down a long strand of silk floss across the design area and then use the Aari needle to create tiny chain stitches over the top of it, securing it to the fabric below. This method is fast and creates a uniquely smooth, satin-like finish that is distinct from the texture of interlocking chain stitches.
Let's review the core techniques we've discussed.
Now, test your understanding of these advanced filling methods.
What is the primary goal of the 'Pani Work' (Water Filling) technique in Aari embroidery?
In the Long and Short Filling technique, how are different colours blended together?
Mastering these flat-filling techniques is the key to professional, high-end embroidery. Practice them until you can create a surface that is flawless to both the eye and the touch. From here, you can move on to creating even more complex, three-dimensional textures.