Mastering Real World Computer Vision with OpenCV
Complex Spatial Transformations
The Rules of Bending Images
When we transform an image, we're not just resizing or rotating it. We're applying a set of mathematical rules that map every pixel from an old position to a new one. Some transformations are simple and rigid, while others can create complex, 3D-like distortions. The two most important types for computer vision are Affine and Perspective transformations. Choosing the right one depends entirely on what you're trying to achieve.
Keeping Lines Parallel
An Affine transformation is a geometric transformation that preserves lines and parallelism. If two lines are parallel in the original image, they will remain parallel after an affine transformation. This makes them perfect for tasks like scaling, rotating, shearing, and translating an image without introducing any perspective distortion. Think of it as sliding a photograph around on a tabletop. You can stretch it or tilt it, but you can't lift one corner to make it look like it's receding into the distance.
These transformations are defined by a 2x3 matrix. To calculate this matrix, you only need to know how three points in the original image map to three corresponding points in the transformed image. OpenCV can then figure out the rules for every other pixel based on those three pairs.
import cv2
import numpy as np

# Assume 'image' is a loaded NumPy array
# image = cv2.imread('your_image.jpg')
rows, cols, ch = image.shape

# Define 3 points from the source image
pts1 = np.float32([[50, 50],
                   [200, 50],
                   [50, 200]])

# Define where those 3 points should be in the output image
# This will create a shear effect
pts2 = np.float32([[10, 100],
                   [200, 50],
                   [100, 250]])

# Calculate the 2x3 affine transformation matrix
M = cv2.getAffineTransform(pts1, pts2)

# Apply the transformation
affine_image = cv2.warpAffine(image, M, (cols, rows))

# The 'affine_image' now contains the transformed result
Breaking Parallelism for Realism
Affine transformations are powerful, but they have a crucial limitation: they can't model 3D perspective. In the real world, parallel lines, like the edges of a long road, appear to converge at a vanishing point on the horizon. To simulate this effect, we need a Perspective transformation, also known as a .
This transformation does not preserve parallelism, allowing it to correct for camera angles and create realistic 3D warping. A key property it does preserve, however, is —points that lie on a straight line in the original image will still lie on a straight line after the transformation. This is essential for applications like scanning a document with your phone. The page might look trapezoidal in the photo, but a perspective transform can warp it back into a perfect rectangle.
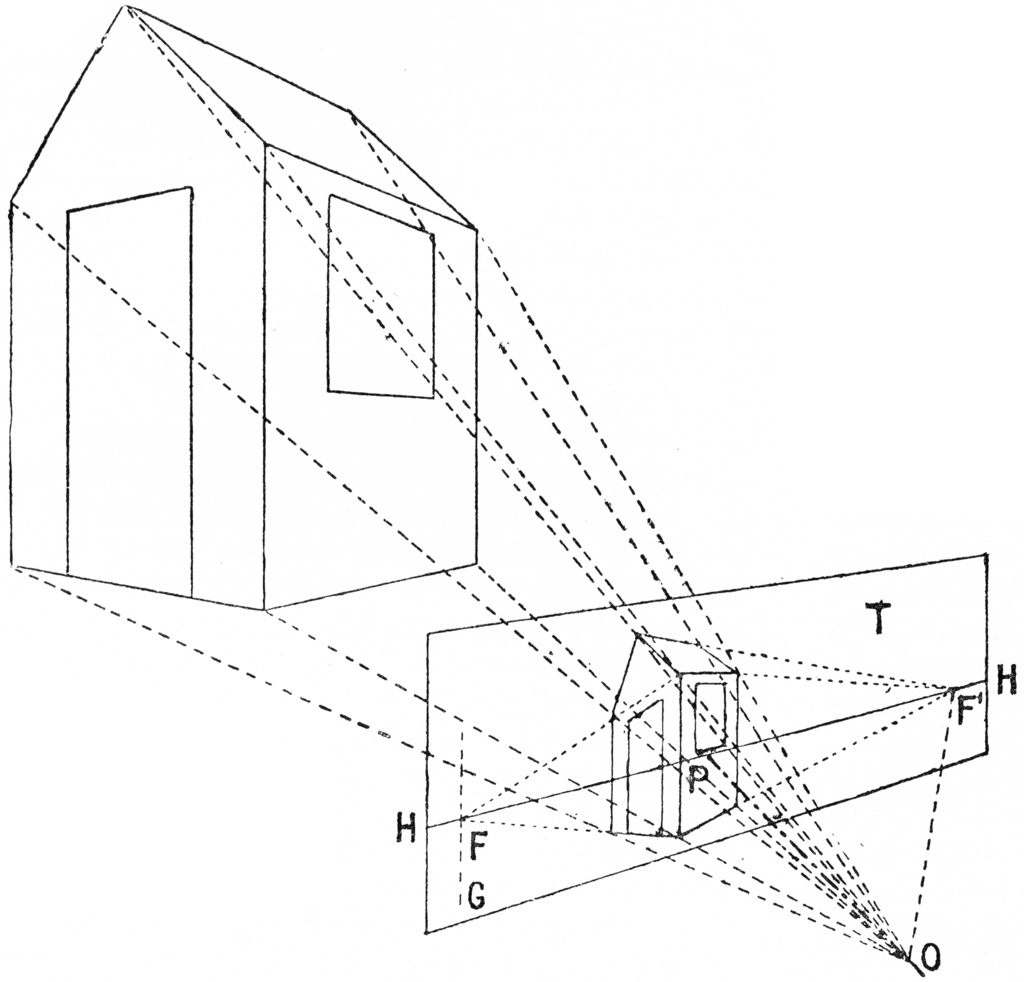
Unlike affine transforms that need three point-pairs, a perspective transform requires four. You need to identify four points in the source image that form a quadrilateral and specify the four corner points of the desired output rectangle. This is how document scanners and top-down mapping applications work: they find the four corners of the object of interest and warp them to fill the screen.
import cv2
import numpy as np

# Assume 'doc_image' is a photo of a skewed document
# image = cv2.imread('document_photo.jpg')

# Coordinates of the 4 corners of the document in the photo
# These would typically be found using an algorithm
pts1 = np.float32([[56, 65], [368, 52], [28, 387], [389, 390]])

# The desired output size
width, height = 250, 350

# The 4 corners of the destination image (a perfect rectangle)
pts2 = np.float32([[0, 0], [width, 0], [0, height], [width, height]])

# Calculate the 3x3 perspective transformation matrix
M = cv2.getPerspectiveTransform(pts1, pts2)

# Apply the transformation
deskewed_image = cv2.warpPerspective(doc_image, M, (width, height))

# 'deskewed_image' now shows a top-down, rectangular view
Transformation Trade-Offs
So, which one should you use? The choice comes down to the problem you're solving and the geometric properties you need to preserve.
Behind the scenes, the math is also slightly different. A perspective transformation involves a division step for each pixel to correctly calculate its new position, which introduces a tiny amount of computational overhead compared to the simpler multiplication and addition of an affine transform. For most applications, this difference is negligible, but it's a good reminder of the added complexity involved in creating that 3D effect.
| Feature | Affine Transformation | Perspective Transformation |
|---|---|---|
| Matrix Size | 2x3 | 3x3 |
| Parallel Lines | Remain Parallel | Can Converge |
| Points Needed | 3 Pairs | 4 Pairs |
| Best For | Rotation, scaling, shear | Correcting camera angle, 3D effects |
| Overhead | Lower | Slightly Higher (due to division) |
Understanding when to use an affine versus a perspective transformation is key to manipulating images effectively, whether you're building a simple photo editor or a complex augmented reality system.
You are developing a feature to scan a document with a phone camera. The user might take the picture from an angle, making the rectangular document appear as a trapezoid. Which transformation is best suited to correct this distortion and produce a flat, rectangular image?
What is the minimum number of corresponding point pairs needed to define a perspective transformation?