Mastering Git and GitHub
Git Basics
Why Use Version Control?
Imagine you're writing an important paper. You save the first draft as report.doc. Then you make some changes and save it as report_v2.doc. Soon, your folder is a mess of files like report_final.doc, report_final_for_real.doc, and report_final_i_swear.doc.
This is a common problem, and version control is the solution. It's a system that records changes to a file or set of files over time so you can recall specific versions later. It's like a time machine for your project. You can see who made what changes, when they made them, and why.
Git is the most popular version control system. It's a distributed version control system, which means that every developer working on a project has a full copy of the project's history on their own computer. This makes it fast and allows people to work offline.

Setting Up Your Workspace
First things first, you need to install Git. You can download it for free from the official Git website. The installation is straightforward on all major operating systems like Windows, macOS, and Linux.
Once installed, open your command-line tool (like Terminal or Command Prompt) and introduce yourself to Git. This information is attached to every change you make.
git config --global user.name "Your Name"
git config --global user.email "youremail@example.com"
Now, you can create a new project. Navigate to a folder where you want to store your project and run the init command. This command creates a new Git repository.
mkdir my-new-project
cd my-new-project
git init
This creates a hidden subdirectory named .git that contains all the necessary repository files. Your project is now officially under version control.
The Basic Workflow
The core Git workflow involves three main states for your files. Think of it like preparing a package for shipping.
- Working Directory: This is your workshop. It's the single checkout of one version of the project where you can create, edit, and delete files.
- Staging Area: This is the packing station. When you've finished a specific change, you move the file to the staging area. It's a list of changes you want to include in your next package.
- Repository: This is the shipped package. Once you've packed everything you want in the staging area, you commit it to the repository. This takes a permanent snapshot of the staged files and stores it in your project's history.
Let's walk through it. First, create a new file in your project directory.
# On macOS/Linux
touch README.md

# On Windows
echo. > README.md
If you check the status of your repository, Git will tell you it sees a new, untracked file.
git status
To start tracking this file, you need to move it to the staging area. This is done with the git add command.
git add README.md
Now the file is staged. It's ready to be permanently saved. The git commit command takes that snapshot. You must include a -m flag followed by a descriptive message in quotes.
Good commit messages are crucial. They act as a log of your work, explaining the why behind a change, not just the what.
git commit -m "Initial commit: Add README file"
That's it! You've made your first commit. You've modified a file, staged the change, and committed it to the project history.
Viewing Project History
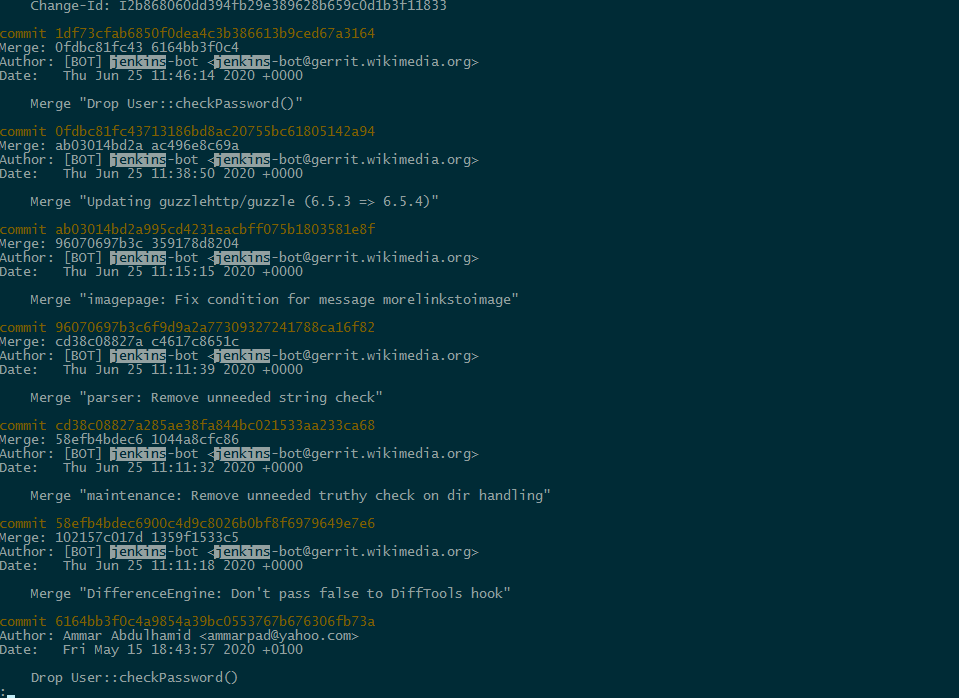
How do you see the commits you've made? The git log command shows a history of all the commits in the repository, starting with the most recent.
git log
The output for each commit includes a unique ID (called a hash), the author's name and email, the date, and the commit message. This log is your project's official timeline.
Time to review what we've covered.
Let's check your understanding of these core concepts.
What is the primary purpose of a version control system like Git?
You have just modified an existing file in your Git repository. What is the role of the 'staging area' in this context?
You now know the most fundamental workflow in Git. You can create a repository, make changes, and save snapshots of your work. This forms the basis for everything else you'll do with Git.