Mastering Epoxy Table Construction
Slab Preparation
Choosing the Right Slab
The foundation of any great river table is the wood itself. When selecting a slab, you're looking for a piece with character, but also one that's structurally sound. Inspect the wood for major cracks, particularly those that run all the way through the slab. While small checks and cracks can be filled and stabilized, a large, unstable crack can compromise the entire project. Also, consider the grain. A dynamic, swirling grain will create a much more interesting 'riverbank' than a straight, uniform one.
Most importantly, check the moisture content. Wood is a living material that expands and contracts with humidity. If your slab is too wet when you pour the epoxy, it will continue to dry and move over time, potentially cracking the resin or pulling away from it. Use a moisture meter to ensure the content is below 12%. If it's higher, you'll need to let it acclimate in your workspace for weeks or even months until it stabilizes.
Cleaning and Stabilizing
Once you have your slab, the real prep work begins. First, all the bark must come off. It's soft, porous, and will eventually decay, which could ruin your table. Use a chisel, a drawknife, or a stiff wire brush to remove it, taking care not to gouge the actual wood of the live edge. After the bark is gone, clean the edge thoroughly with a nylon wheel on a drill or grinder. This smooths the surface without being overly aggressive and prepares it for sealing.
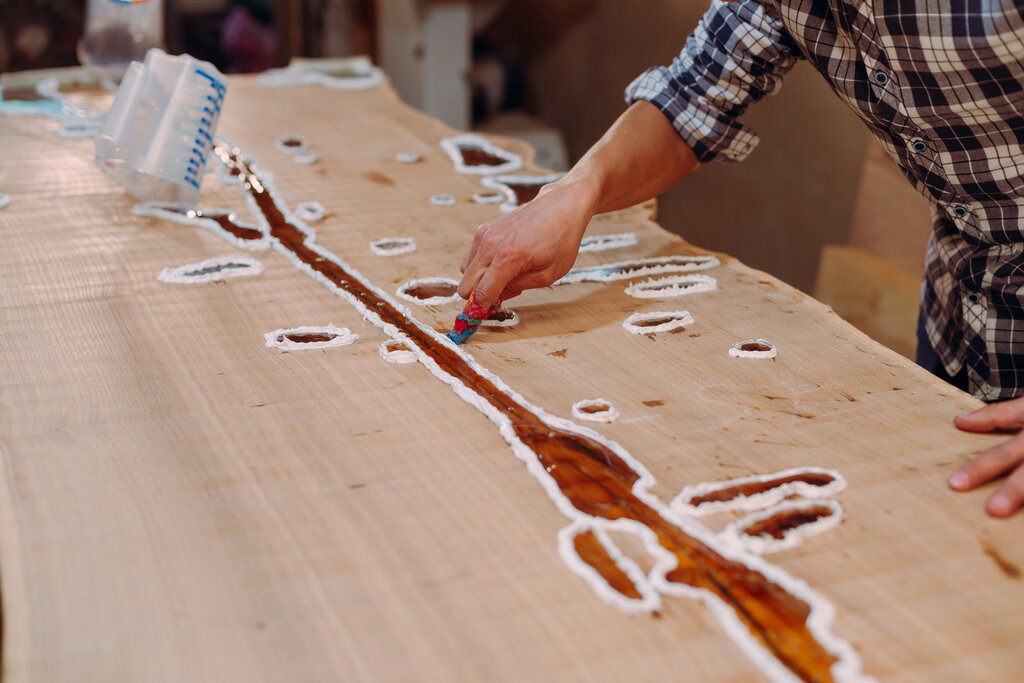
Now, address any cracks. For small checks or voids, a thin CA glue works well to stabilize the wood fibers. For larger cracks that threaten the slab's integrity, you can use a more structural and decorative solution: a bowtie inlay (also known as a butterfly key). This small, bowtie-shaped piece of wood is inset across the crack, physically holding the two sides together and preventing the crack from widening. It adds both strength and a beautiful visual detail.
90% of epoxy failures come from poor prep. The surface must be clean enough to eat off.
Before you can seal the slab, you need to make sure its underside is perfectly flat. This is non-negotiable. If the bottom isn't flat, the slab won't sit flush in your mold, leading to an uneven epoxy pour and a wobbly final table. You can flatten it using a large jointer, a planer, or a router on a flattening sled. The goal is to create a smooth, level surface that will make a perfect seal against the bottom of your form.
Sealing the Edges
Wood is porous, like a bundle of tiny straws. When you pour a large volume of epoxy, it generates heat as it cures. This heat will warm the air trapped inside the wood's pores, causing it to expand and escape as a stream of bubbles right into your pristine epoxy river. This is a nightmare to fix after the fact.
The solution is to seal the wood first. This is arguably the most critical step of slab preparation.
Mix a small batch of the same epoxy you'll use for the main pour. Using a brush, apply a thin but thorough seal coat to the live edges and into any cracks, knots, or voids. You might see bubbles form and pop during this step; that's the air escaping. Let this seal coat cure completely. This thin, hardened layer of epoxy creates an airtight barrier, trapping any remaining air in the wood and preventing it from ruining your deep pour later on.
What is the primary reason for applying a seal coat to the live edge of a slab before a deep epoxy pour?
According to the text, what is the ideal moisture content for a wood slab before it's used for a river table?