Mastering DaVinci Resolve Latest Version
Introduction to DaVinci Resolve
Meet DaVinci Resolve
DaVinci Resolve is a complete post-production studio packed into one application. It combines video editing, color correction, visual effects, and audio post-production in a single workflow. This integrated approach means you don't have to switch between different programs to finish a project.
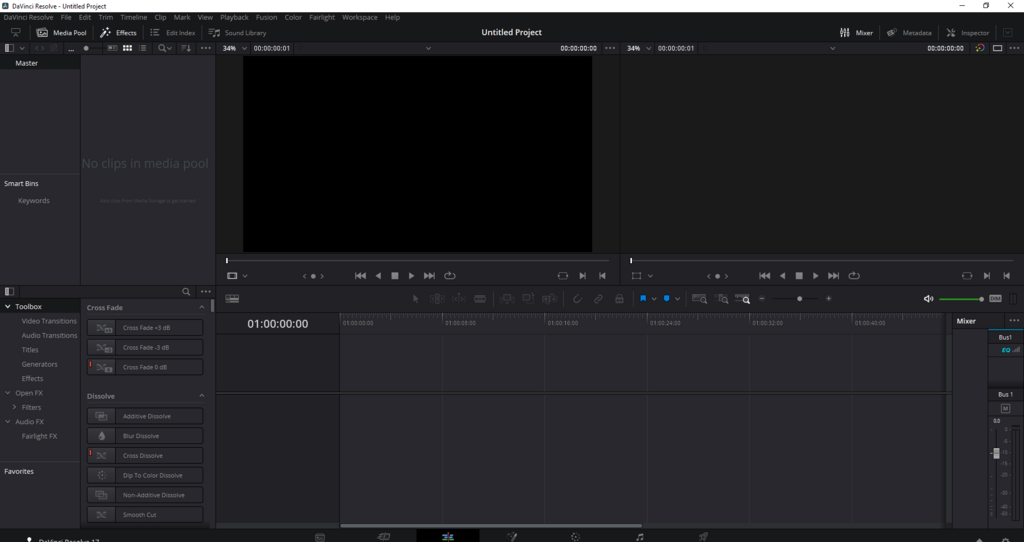
The Workspace Pages
At the bottom of the screen, you'll find a series of buttons that take you to different 'pages'. Each page is a dedicated workspace for a specific part of the post-production process. You'll move from left to right as your project progresses from importing media to final export.
| Page | Purpose |
|---|---|
| Media | Import and organize your video clips, audio files, and images. |
| Cut | Quickly assemble a rough edit of your footage. |
| Edit | Perform detailed, precise edits on a traditional timeline. |
| Fusion | Create cinematic visual effects and motion graphics. |
| Color | Grade and correct the color of your video. |
| Fairlight | Mix and master your audio. |
| Deliver | Export your finished project for sharing. |
For now, we'll focus on the first three: Media, Cut, and Edit.
Importing Your Media
Before you can edit, you need to bring your files into the project. This is done in the Media Pool, which is your library for the current project. You can access it from the Media page or within the Edit and Cut pages.
The easiest way to import is to navigate to your files on the Media page and drag them directly into the Media Pool below. To stay organized, you can create 'bins'—which are just folders—to group related clips together. For example, you might make bins for 'Interviews,' 'B-Roll,' and 'Audio'.
Pro tip: If your footage has a different frame rate than your project settings, Resolve will ask if you want to change them. It's usually best to click 'Change' to match the project to your primary footage.
Making the First Cut
Resolve offers two pages for editing: Cut and Edit. They serve different purposes.
The Cut page is designed for speed. It's perfect for quickly assembling a rough cut. The interface is simplified, with tools like the 'Source Tape' view that stitches all your clips together into one long virtual tape. This makes it easy to scrub through all your footage and quickly pull the best parts.
The Edit page is a more traditional, highly precise non-linear editor (NLE). This is where you'll refine your rough cut, trim clips with single-frame accuracy, add titles, and work with multiple layers of video and audio.
The Timeline is the heart of both pages. It's where you arrange your clips in sequence. To add a clip to the timeline, simply drag it from the Media Pool. Once there, you can use basic tools to manage it.
Here are a few fundamental tools to get you started:
- Selection Tool (A): This is your standard cursor for selecting, moving, and trimming clips on the timeline.
- Blade Tool (B): This tool lets you cut a clip into two separate pieces. Just click anywhere on a clip to split it.
- Snapping (N): Toggling snapping on (the magnet icon will be highlighted) makes clips automatically 'snap' to the edges of other clips or the playhead. This is incredibly useful for avoiding accidental gaps.
You can switch between these tools by clicking their icons or using the keyboard shortcuts in parentheses.
What is the primary purpose of the different 'pages' (e.g., Media, Cut, Edit) in DaVinci Resolve?
When is the Cut page a better choice than the Edit page?
This covers the basic orientation of DaVinci Resolve. You now know how to navigate the interface, manage your media, and perform simple edits on the timeline.