Mastering Artistic Expression and Advanced Drawing
Advanced Observational Techniques
Seeing, Not Just Looking
You already know how to draw lines and shapes. The next step is a mental one: learning to bypass your brain's assumptions. Our minds love shortcuts. We see a face and our brain serves up a generic symbol for an eye, a nose, a mouth. But to draw accurately, you need to draw what is actually there, not the symbol.
This means learning to see the world as a collection of abstract shapes, angles, and relationships. The techniques that follow are designed to trick your brain into seeing like an artist. They are methodical, deliberate, and will form the bridge between sketching what you think you see and drawing what is truly in front of you.
The Sight-Size Method
The most disciplined way to achieve a one-to-one scale drawing is the . The setup is key: you place your easel and drawing surface directly alongside your subject. Then, you stand back at a consistent viewing distance where your drawing and the subject appear to be the same size.
From this fixed vantage point, you can take direct measurements. Extend your arm, holding a pencil or knitting needle, and close one eye. Align the tip of your pencil with the top of the subject and use your thumb to mark the bottom. Without changing your arm's position, you can then carry this exact measurement over to your paper to check your work. This method removes all guesswork from capturing proportions, forcing a direct comparison between reality and your drawing.
The main benefit of Sight-Size is its objectivity. If a line on your paper doesn't match the measurement you just took, it's wrong. There's no room for interpretation. It’s an excellent training exercise for developing a precise eye.
Flexible Proportions
The Sight-Size method is powerful but requires a specific studio setup. A more versatile technique is . This approach allows you to draw any subject at any scale, whether you're sketching a teacup or a skyscraper.
The process starts with choosing a Basic Unit, or BU. This is one distinct, easy-to-measure feature on your subject. For a human figure, the head is a classic BU. For a building, it might be a window or a door.
Once you have your BU, every other part of the subject is measured in relation to it. You'd ask yourself: "How many heads tall is this figure?" or "How many windows wide is this facade?" You hold your pencil out at arm's length, marking the size of your BU. Then, you pivot your arm to see how many of those units fit into other parts of the composition.
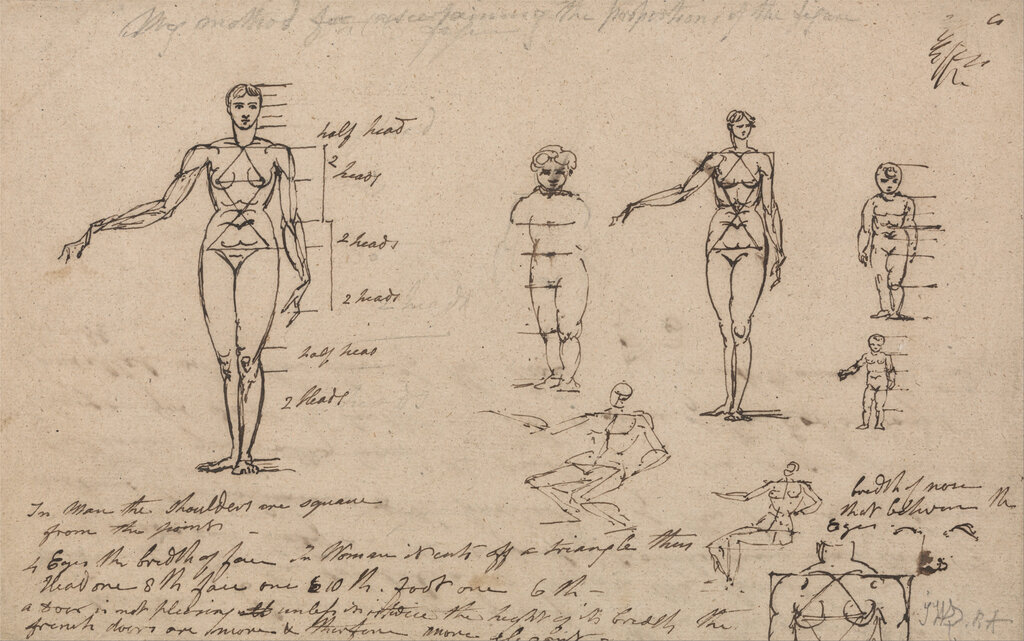
This method forces you to see relationships. You stop thinking, "that's an arm," and start thinking, "that upper arm is one and a half heads long." It transforms the subject into a puzzle of interlocking proportions.
Drawing What Isn't There
One of the most powerful tools for accuracy is focusing on negative space, the area around and between objects. Beginners tend to focus only on the outlines of the object itself (the positive space). But the shapes of the empty spaces are just as important and often much simpler to draw correctly.
Look at the triangular shape created by a bent arm and the torso. Look at the complex shape of the sky visible between two tree branches. These abstract shapes are free from your brain's preconceived notions. You don't have a mental symbol for "the space between a chair leg and the floor," so you're forced to observe it honestly.
If you draw the negative spaces correctly, the positive space will automatically take care of itself.
To find these shapes, squint your eyes. This simplifies the scene, flattening it into interlocking areas of light and dark. Pay close attention to where objects meet the edge of your paper. The shapes created at these intersections are crucial anchors for your composition.
Finding Your Bearings
When faced with a complex subject, it's easy to get lost. The key is to find landmarks and check their alignment. Start by identifying a few key points, the most prominent corners or intersections on your subject. Once you've placed one landmark on your paper, you can find the others by checking their alignment relative to the first.
This is where and horizontal alignments come in. A plumb line is a perfectly vertical reference line. You can create one by holding your pencil up and letting it hang straight down. By aligning it with a landmark on your subject, you can see what other features fall directly above or below it. For example, does the corner of the eye line up vertically with the edge of the mouth?
Similarly, hold your pencil perfectly horizontally to check side-to-side alignments. Are the tops of the ears level with the bottom of the nose? This constant cross-referencing builds a reliable scaffold for your drawing, ensuring all the pieces fit together correctly.
These techniques aren't shortcuts; they are foundational practices. They train your eye to see the world not as a collection of things, but as a series of interconnected shapes and proportions. Mastering them is the key to drawing with confidence and accuracy.
According to the text, what is the fundamental mental shift an artist must make to learn to draw accurately?
Which drawing technique requires the artist to set up their easel directly alongside the subject, so the drawing and the subject appear the same size from a fixed viewpoint?