Master MS Excel From Basic to Advanced
Excel Basics
Getting Around Excel
Opening Excel for the first time can feel like looking at the cockpit of an airplane. There are buttons and panels everywhere. Let's break down the main parts so you know what you're looking at.
The big grid of boxes is your main workspace. Each box is called a cell. Each cell has a unique address, like a street address, based on its column letter (A, B, C...) and row number (1, 2, 3...). So, the cell in the top-left corner is A1.
Above the grid is the Ribbon, which is the wide toolbar at the top. It's organized into tabs like Home, Insert, and Page Layout. Each tab holds groups of related commands. Most of the basic tools you'll need live in the Home tab.
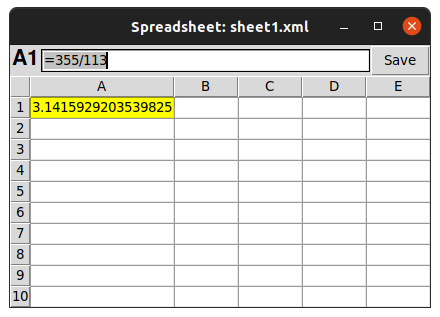
Just below the Ribbon is the Formula Bar. This shows you the actual content of the selected cell, which is handy because sometimes a cell might show a number (like 10), but the formula bar reveals it's actually the result of a calculation (like =5+5).
An entire Excel file is called a workbook. Think of it as a digital binder. Inside that binder, you have individual pages called worksheets (or just "sheets"). You can see tabs for your sheets at the bottom-left of the window, usually starting with "Sheet1".
You can have many worksheets in a single workbook. To add a new one, just click the little plus sign (+) next to the sheet tabs. To switch between them, simply click on the tab you want to view. This is great for organizing related information, like keeping monthly budgets on separate sheets within the same yearly budget workbook.
Entering and Formatting Data
Getting data into Excel is straightforward. Click on any cell to select it, and just start typing. When you're done, press Enter to move to the cell below, or Tab to move to the cell to your right. You can enter text, numbers, dates, or times.
Let's try creating a simple grocery list. You could have one column for the item, another for how many you need, and a third for the estimated price.
| Item | Quantity | Price (each) |
|---|---|---|
| Milk | 1 | $3.50 |
| Bread | 1 | $2.75 |
| Eggs | 12 | $4.25 |
Plain data works, but a little formatting makes it much easier to read. You can change how the text and cells look using the tools in the Home tab of the Ribbon.
First, click the cell (or click and drag to select multiple cells) that you want to change. Then, you can apply formatting. The most common options are in the Font and Alignment groups.
- Bold, Italic, or Underline text.
- Change the font style or size.
- Change the text color or the cell's background color (called Fill Color).
A key tip: Always select the cell or cells you want to format before you click the formatting button.
Saving and Opening Files
Once you've entered some data, you'll want to save your work. It's a good habit to save early and often.
To save for the first time, go to the File tab and select Save As. This lets you choose a location on your computer and give your workbook a name. By default, Excel saves files in the .xlsx format. This format preserves all your data, formulas, and formatting.
After you've saved it once, you can just click the floppy disk icon in the top-left corner or press Ctrl + S (Cmd + S on a Mac) to quickly save any changes.
To open a file you've already saved, go to File and click Open. Then, you can browse your computer to find and select the workbook you want to continue working on.
Ready to check your understanding? Let's try a few questions.
What is the unique address of the cell located in the very top-left corner of a worksheet?
An entire Excel file is called a ______, and an individual page within that file is called a ______.
With these fundamentals, you're ready to start organizing and working with your own data.