Java Programming Fundamentals
Java Development Environment
Setting Up Your Workspace
Before you can start writing Java programs, you need to set up your digital workshop. This involves installing a couple of essential tools that will help you write, compile, and run your code. Think of it like a mechanic getting their garage ready before working on a car. You need the right tools for the job.
The first and most important tool is the Java Development Kit, or JDK.
The Java Development Kit
The JDK is the core foundation for building Java applications. It includes two critical components:
- The Java Compiler: This tool takes the human-readable code you write and translates it into bytecode, a special language that the computer can execute.
- The Java Virtual Machine (JVM): This is what actually runs your compiled Java code. The beauty of the JVM is that it acts as a middle-layer, allowing the same Java code to run on different operating systems like Windows, macOS, or Linux without any changes. This is Java's famous "write once, run anywhere" philosophy in action.
You'll need to download and install the JDK on your computer. You can get it directly from Oracle or choose a popular open-source alternative like OpenJDK. The installation process is straightforward, much like installing any other software.
Your Coding Command Center
While you could technically write Java code in a simple text editor, it's not very efficient. A far better approach is to use an Integrated Development Environment, or IDE. An IDE is a software application that combines all the tools a programmer needs into one convenient package. It typically includes a smart code editor, tools for compiling and running your code, and a debugger for finding and fixing mistakes.
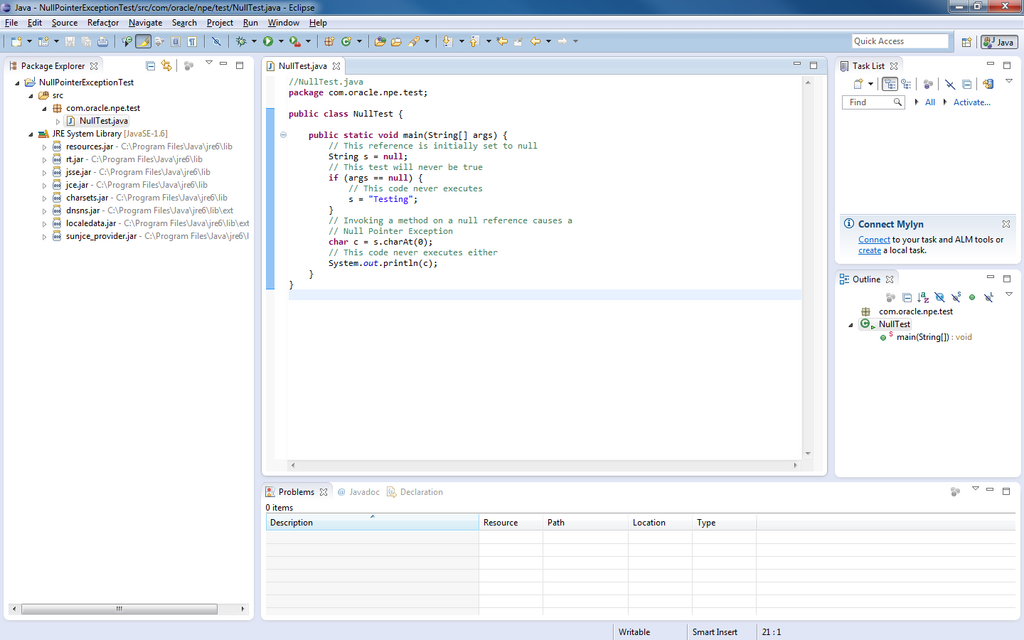
Using an IDE makes programming much smoother. It provides features like syntax highlighting (coloring your code to make it more readable) and code completion (suggesting code as you type).
There are several excellent IDEs for Java. Some of the most popular are:
- IntelliJ IDEA: A powerful and widely used IDE with a great free community edition.
- Eclipse: A long-standing, open-source IDE that is very popular in the Java community.
- Visual Studio Code: A lightweight but powerful code editor that can be configured for Java development with extensions.
Choose one, download it, and follow the installation instructions. Most IDEs will automatically detect your installed JDK, making the setup process simple.
Writing Your First Program
With your JDK and IDE installed, it's time to verify that everything works correctly. The traditional way to do this is by writing a simple program that prints "Hello, World!" to the screen.
Open your IDE and create a new Java project. Inside that project, create a new Java class file. You can name it HelloWorld. Then, type or paste the following code into the editor.
public class HelloWorld {
    public static void main(String[] args) {
        // This line prints the text to the console
        System.out.println("Hello, World!");
    }
}
Don't worry about understanding every piece of this code right now. The key part is System.out.println("Hello, World!");, which is the instruction to print the message.
Now, run the program. In most IDEs, you can do this by right-clicking in the code editor and selecting "Run" or by clicking a green play button in the toolbar. If your setup is correct, you should see the words Hello, World! appear in a console or output window at the bottom of your IDE.
Congratulations! You've just set up your development environment and run your first Java program.
Now let's test your understanding of these setup steps.
What is the primary purpose of the Java Development Kit (JDK)?
The component that allows the same Java code to run on different operating systems is known as the ________.
With your environment ready, you now have the tools you need to start exploring the Java language in depth.