Introduction to Oboe Playing
Oboe Basics
Meet the Oboe
The oboe is a member of the woodwind family, known for its distinct, singing tone. Unlike a clarinet or flute, it's a double-reed instrument. This means the sound starts with two small pieces of cane vibrating together. Before you can play a note, you need to know your way around the instrument's components.
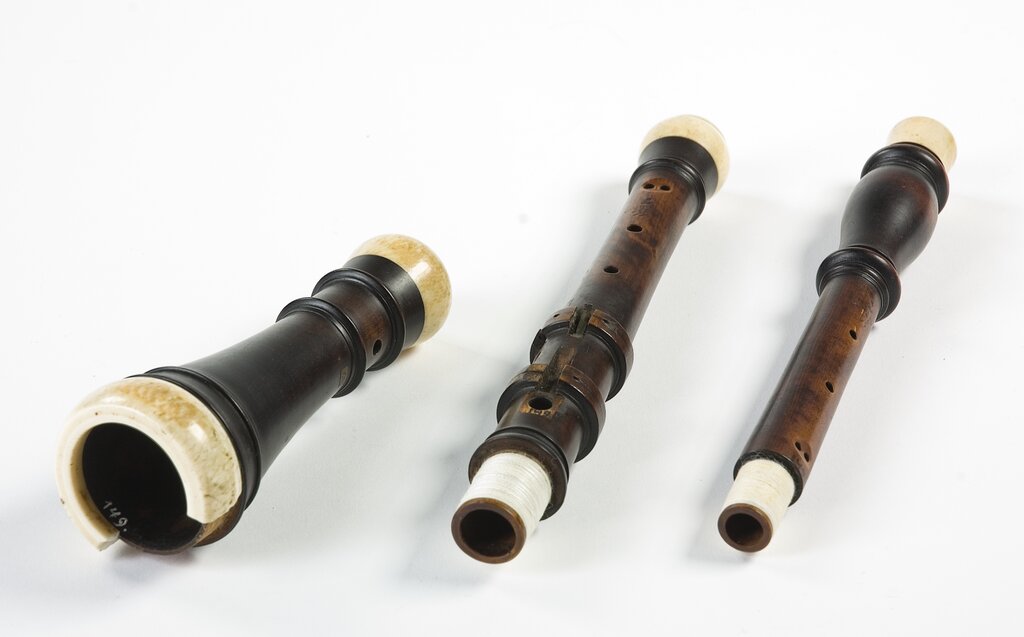
The oboe breaks down into three main sections, plus the all-important reed. Understanding each part is the first step to becoming a confident player. Each piece has a specific role, and they must fit together perfectly for the instrument to work correctly.
Let's break down these parts:
- The Bell: This is the flared end of the oboe. It helps project the sound and affects the tone of the lowest notes.
- The Lower Joint: The middle section of the oboe, which you'll hold with your right hand. It has a complex web of keys that your fingers will eventually learn to navigate.
- The Upper Joint: The top section of the oboe, held by your left hand. This part connects to the reed.
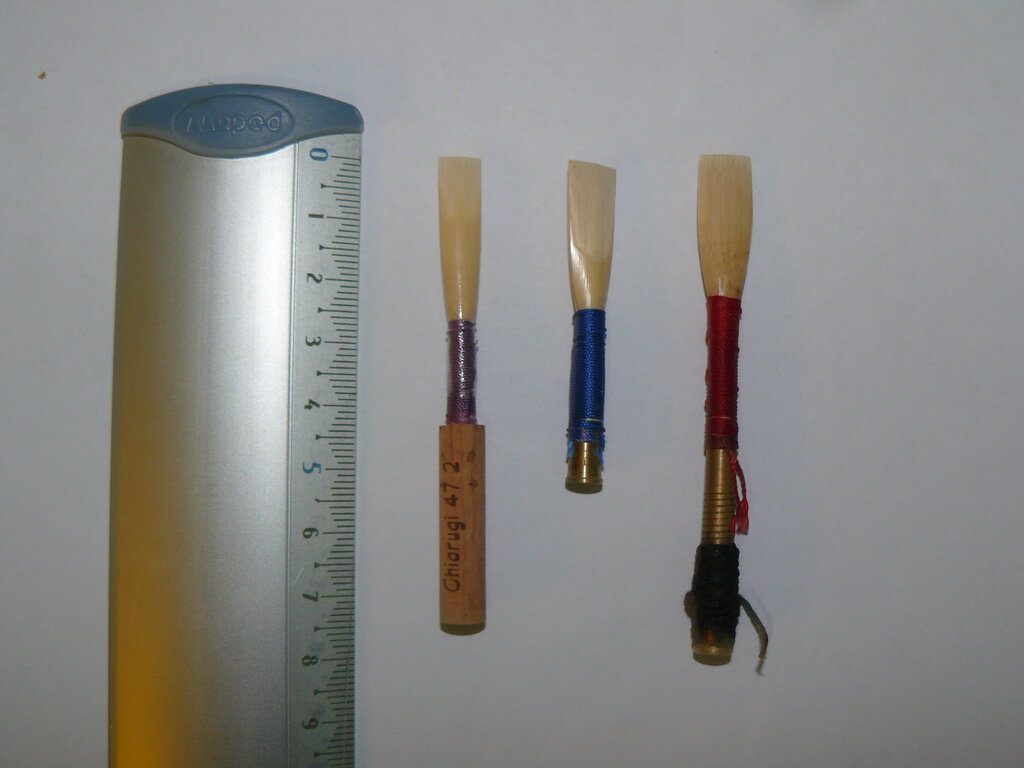
- The Reed: This is the sound source. It's made of two thin pieces of cane tied together. When you blow air through it, the pieces vibrate to create the oboe's unique sound. Reeds are extremely delicate.
Putting It All Together
Assembling an oboe is a precise process. Rushing can damage the delicate keywork, so always take your time. A little cork grease on the joint corks will help the pieces slide together smoothly, but don't overdo it. A thin, light coating is all you need.
- Bell and Lower Joint: Gently twist the bell onto the bottom of the lower joint. Don't force it. The connection should be snug, not tight.
- Upper and Lower Joints: This is the most critical step. Look at the connecting keys, called the bridge keys. Hold the upper joint in your left hand and the lower joint in your right. Carefully press the keys needed to lift the bridge keys so they don't get bent as you connect the sections. Align the bridge keys and gently twist the two joints together.
- Insert the Reed: Before playing, you'll need to soak the tip of the reed in water for a minute or two. Once it's ready, carefully insert the cork end of the reed into the top of the upper joint. It should fit snugly. Don't push it in too far.
Disassembly is just these steps in reverse. Remove the reed first, then separate the upper and lower joints, and finally, remove the bell. Always be mindful of the bridge keys.
When connecting the upper and lower joints, always make sure the bridge keys are aligned and not grinding against each other. This is the most common way oboes get damaged.
Keeping Your Oboe Healthy
Proper care is essential for keeping your oboe in good playing condition. Because it's made of wood, moisture from your breath can cause serious damage over time if it's not removed.
Here are the fundamentals of oboe care:
- Swab After Playing: Every single time you finish playing, you must swab out the inside of the instrument. Use a silk or feather oboe swab and drop it through each joint, from top to bottom, to absorb all the moisture.
- Wipe It Down: Use a soft cloth to gently wipe your fingerprints off the keys. This prevents tarnish and keeps the mechanism clean.
- Handle Reeds with Care: Oboe reeds are fragile and expensive. Always store them in a sturdy reed case that allows air to circulate. Never leave a reed on the instrument when you put it away.
- Avoid Extreme Temperatures: Don't leave your oboe in a hot car or a cold room. Sudden changes in temperature and humidity can cause the wood to crack.
Taking a few minutes for maintenance after each practice session will protect your investment and ensure your oboe is always ready to play its best.
Now, let's test your knowledge on putting it all together and keeping it in top shape.
What is the sound source of the oboe?
Which part of the assembly process is described as the most critical to avoid damaging the instrument?
With these basics down, you're ready to handle your instrument with confidence.