Introduction to GLTF
Introduction to 3D Graphics
Placing Objects in Space
To create a 3D scene on a 2D screen, we first need a way to describe where everything is. Imagine an empty room. To tell someone where to place a chair, you could say, "ten feet from the back wall, five feet from the left wall, and on the floor." You've just used a 3D coordinate system.
In computer graphics, we do the same thing with the Cartesian coordinate system. It uses three perpendicular axes: X, Y, and Z. Think of the corner of a room: the line along the floor to your right is the X-axis, the line along the floor to your left is the Z-axis, and the line going up the wall is the Y-axis. This is a common setup called a "Y-up" system. Any point in the room can be described with three numbers, or coordinates: .
With this system, we can precisely place any object, or even any part of an object, in our digital world. The center of this world, where the axes meet, is called the origin, and its coordinates are .
Moving Things Around
Once an object has a position, we need ways to move and adjust it. These actions are called transformations. The three most basic transformations are translation, rotation, and scaling.
Translation is just a fancy word for moving an object from one place to another. We add values to the object's coordinates. To move something 5 units along the X-axis, we add 5 to its x-coordinate.
Rotation spins an object around an axis. You can rotate an object around the X, Y, or Z-axis. Imagine a plane flying; it can roll (rotate on its forward axis), pitch (nose up or down), and yaw (turn left or right). These are all rotations.
Scaling changes an object's size. To make an object twice as big, you multiply all its coordinates by 2. To make it half as big, you multiply by 0.5. You can also scale along a single axis to stretch or squash an object.
These simple transformations are the building blocks for all movement and animation in 3D graphics. By combining them, we can create complex motions, like a character walking or a planet orbiting a star.
From Model to Screen
So we have objects placed and transformed in a 3D world. How does that become the 2D image we see on our screens? This process is called the rendering pipeline. It’s a series of steps the computer follows to turn 3D data into a final picture.
Think of it like taking a photograph. First, you arrange the objects in your scene (that's the modeling and transformation part we just discussed). Then, you decide where to put your camera and where to point it. This is called setting the view transformation.
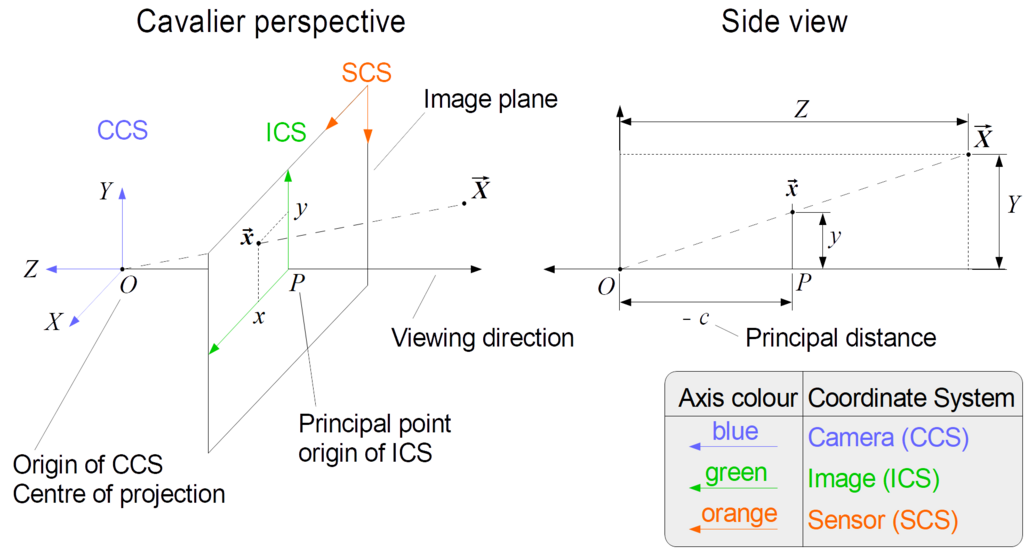
Next, the computer needs to figure out what the camera can actually see. It creates a view volume, often shaped like a pyramid with the top cut off, called a frustum. Anything inside this volume might be visible. Anything outside is ignored.
Then comes projection. This is the magic step where the 3D world is flattened into a 2D image, just like a real camera lens projects a 3D scene onto a flat film or sensor. Objects farther away from the camera appear smaller, creating the illusion of depth.
Finally, the computer determines the color of each pixel in the 2D image. It calculates how light from virtual light sources interacts with the surfaces of the objects, considers their materials and textures, and figures out if any objects are in shadow. This last stage, called shading or rasterization, produces the final image you see.
Ready to check your understanding?
In a 3D Cartesian coordinate system, what is the special name for the point with coordinates ?
Which fundamental transformation would you use to simply move an object from one location to another without changing its size or orientation?
These core ideas—coordinate systems, transformations, and rendering—are the foundation of every 3D application, from video games to architectural visualization.