Intermediate Bass Guitar Techniques
Ergonomics and Fingerstyle
Refining Your Plucking Hand
A clean bassline isn't just about the notes you play. It's also about the notes you don't play. Unwanted string noise, or sympathetic resonance from open strings, can muddy your sound and make even the simplest groove sound unprofessional. To get that tight, punchy tone of a pro, you need to master the art of muting with your plucking hand. This involves turning your hand into a dynamic muting machine, using specific techniques to silence strings you aren't actively playing.
The first technique is the floating thumb. Instead of anchoring your thumb on a pickup or the lowest string permanently, you let it glide across the strings. The rule is simple: your thumb rests on all strings lower (in pitch) than the one you are currently playing.
If you're playing a note on the D string, your thumb rests lightly on the E and A strings, silencing them. When you move to the G string, your thumb slides down to rest on the D, A, and E strings. This technique ensures that only the note you intend to hear rings out, giving you incredible sonic clarity. It feels awkward at first, but with practice, it becomes second nature.
Anchoring and Alternating
Muting doesn't stop with the thumb. Your plucking fingers play a crucial role, too. The 'moving anchor' technique, also known as a rest stroke, involves letting your plucking finger come to rest on the next adjacent, higher-pitched string after it has plucked a note.
For example, if you pluck the A string with your index finger, that finger continues its motion until it gently stops on the D string. This does two things: it mutes the D string, preventing it from ringing out, and it places your finger in a ready position, promoting economy of motion.
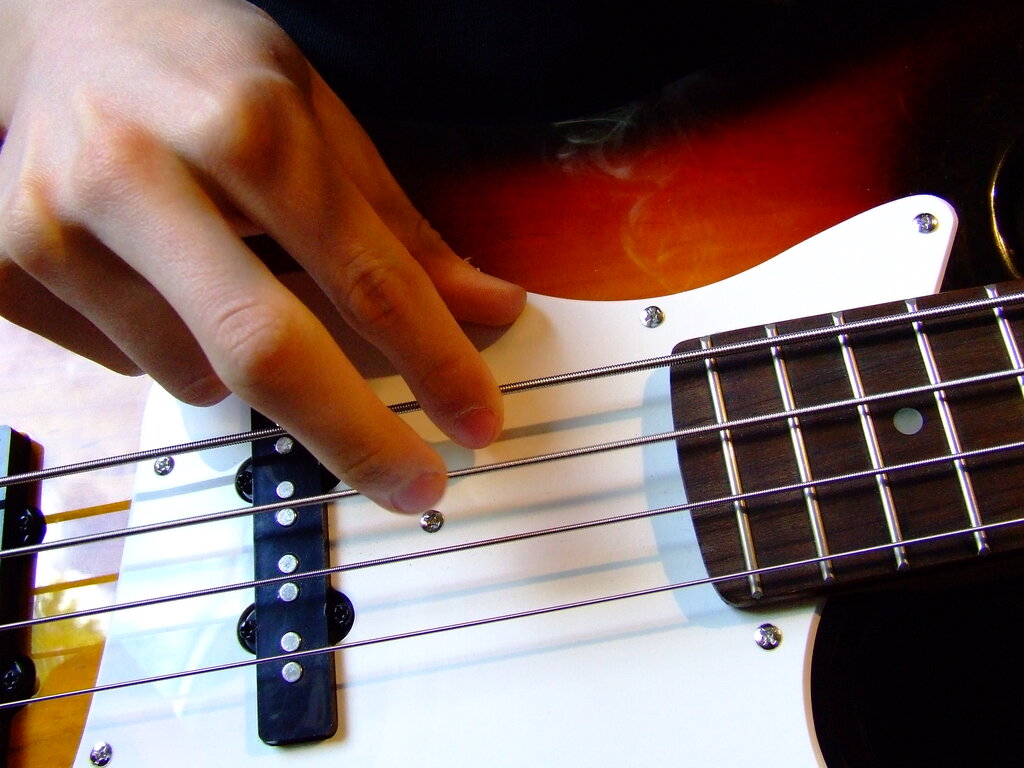
As you practice this, focus on alternating strictly between your index (i) and middle (m) fingers. The goal is to achieve a perfectly consistent attack. Each note should have the same volume, tone, and duration, regardless of which finger plucked it. Record yourself playing a simple scale and listen back. Can you tell which notes were plucked by your index finger versus your middle finger? If you can't, you're on the right track.
Your goal is for a listener to be unable to tell which finger plucked which note.
Efficient String Crossing
Once you have a consistent attack, you can optimize your movement between strings. When you need to play a note on a lower-pitched string followed by a note on a higher-pitched string (e.g., A string then D string), the alternating i-m pattern and moving anchor work perfectly.
But what about moving in the other direction, from a higher-pitched string to a lower-pitched one (e.g., D string to A string)? Here, you can employ a technique called raking.
Raking is using the same finger to pluck two consecutive notes on adjacent strings in one fluid, downward motion. Imagine you just played a note on the G string with your index finger. The next note is on the D string. Instead of lifting your finger and resetting, you simply let your index finger 'rake' across the D string, plucking it as part of the same continuous movement.
This technique is highly efficient and can help you play faster passages with less effort. However, it's a tool, not a rule. Some players prefer to maintain strict i-m alternation for rhythmic consistency, even when it's less economical. Experiment with both approaches to see what works best for different musical contexts. The most versatile players master both.
Let's put it all together. Here's a simple exercise to practice floating thumb, moving anchors, and raking. Play the following G major arpeggio, ascending and descending. Focus on the mechanics of each note.
| String | Fret | Ascending Finger | Descending Finger | Muting Action |
|---|---|---|---|---|
| E | 3 | Index (i) | Middle (m) | Thumb floats. Finger rests on A string. |
| A | 2 | Middle (m) | Index (i) - RAKE! | Thumb moves to E string. Finger rests on D. |
| D | 5 | Index (i) | Middle (m) | Thumb moves to A string. Finger rests on G. |
| G | 4 | Middle (m) | Index (i) - RAKE! | Thumb moves to D string. Finger lands free. |
As you play, consciously think about where your thumb is and where your plucking finger is landing after each note. The goal is to make these muting techniques an unconscious habit, freeing you up to focus on the music.
What is the primary purpose of using plucking-hand muting techniques on the bass guitar?
When using the 'floating thumb' technique and playing a note on the D string of a standard 4-string bass (E-A-D-G), where should your thumb be resting?