Git for Scientific Research
Basic Git Operations
The Basic Git Workflow
Think of managing your project with Git as a three-step process. First, you make changes to your files. Next, you select which of those changes you want to save in the next snapshot. Finally, you save that snapshot permanently. This is the core rhythm of working with Git: modify, stage, and commit.
This cycle is what allows you to create a clean, step-by-step history of your project. Each commit is a logical checkpoint you can always return to.
Staging Files with git add
Before you can save a snapshot of your work, you need to tell Git exactly which changes to include. This is called staging. The staging area is like a loading dock for your next commit. You place all the changes you want to include on the dock before the truck (the commit) takes them away.
The command to add a file to the staging area is git add.
git add protocol_v2.txt
This command tells Git to track the current version of protocol_v2.txt and include it in the next commit. If you modify the file again after adding it, you'll need to run git add again to stage the new changes.
To save time, you can stage all modified and new files in your current directory with a single command.
# The dot represents the current directory
git add .
Committing Changes with git commit
Once you've staged all the changes for your snapshot, you can save them permanently to your repository's history. This is called a commit.
Each commit has a unique ID and is accompanied by a message describing the changes. Writing clear, descriptive commit messages is crucial. A good message explains why you made a change, providing context for your future self or collaborators. To commit your staged files, you use git commit with the -m flag for the message.
git commit -m "Update buffer concentration in lysis protocol"
This command takes all the files from the staging area and bundles them into a commit with your message. Now, this version of your project is saved in its history.
Checking Your Work
How do you know what's staged, what's not, and what you've already committed? Git gives you simple tools to check the status and history of your repository.
Your most-used command will likely be git status. It shows the current state of your project: which files have been modified but not staged, which are staged and ready to be committed, and which files Git isn't tracking at all.
git status
To review the history of commits you've made, use git log. This command displays a chronological list of every commit, showing the unique commit ID (a long string of characters), the author, the date, and the commit message.
git log
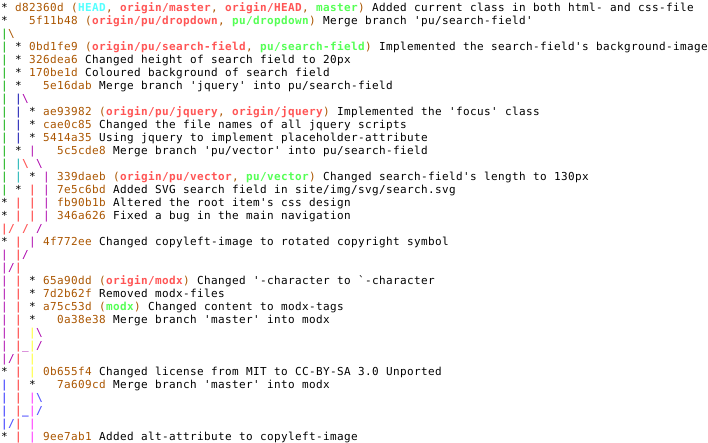
The output can be long, so a useful variation is git log --oneline, which shows a condensed version of the history, with just the commit ID and the message.
git log --oneline
One thing to note is that you’ll be using git status, git add, and git commit very often during your time using Git, so it’s important to practice these commands.
Now that you know the basic workflow, let's test your understanding.
What is the correct order of the core Git workflow for saving changes to your project history?
Which command is used to add all modified and new files in the current directory to the staging area?
With these commands, you can track the evolution of your research files, creating a reliable history of your work one commit at a time.