Digital Painting Fundamentals
Digital Painting Software
Choosing Your Digital Canvas
Every digital artist needs a studio, and that's exactly what painting software is. It’s the space where you'll mix your colors, choose your brushes, and create your art. There are many options out there, but most artists gravitate toward one of a few powerful programs. Each has its own strengths, and the best one for you depends on your goals and budget.
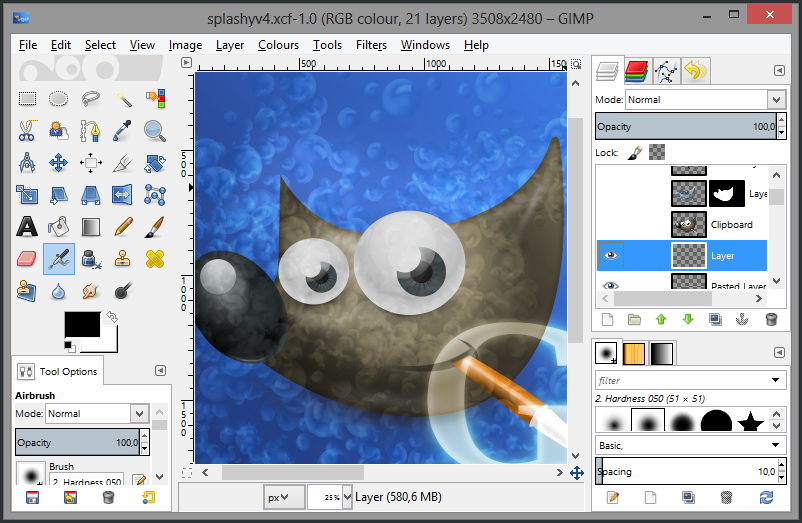
Adobe Photoshop is the industry standard for a reason. It’s an all-in-one powerhouse for photo editing, graphic design, and painting. Its brush engine is versatile, and its selection and layering tools are top-notch.
Corel Painter is built specifically to mimic traditional media. If you want digital brushes that behave like real oil paints, watercolors, or chalk, Painter is unmatched. It feels incredibly natural for artists coming from a traditional background.
For those looking for a free yet professional-grade option, Krita is a fantastic choice. It's an open-source program designed for illustrators and concept artists, packed with features like a brush stabilizer, a wide array of brush engines, and helpful drawing assistants.
| Software | Best For | Cost |
|---|---|---|
| Adobe Photoshop | All-around image editing & painting | Subscription |
| Corel Painter | Mimicking traditional media | One-time purchase |
| Krita | Free, professional-grade painting | Free |
Setting Up Your Workspace
Once you've chosen your software, the first step is always the same: creating a new canvas. This is like picking the size and type of paper you're going to work on. When you create a new file, you'll be asked for a few key settings.
Your canvas settings determine the quality and size of your final image. It's important to get them right from the start.
Width and Height: This is the size of your canvas, measured in pixels, inches, or centimeters. Think about what you're creating. Is it a square social media post or a wide landscape?
Resolution: This is the density of pixels in your image, measured in pixels per inch (PPI). For artwork you plan to display on screens, like web graphics, 72 PPI is standard. If you want to print your art, you'll need a much higher resolution to ensure it looks sharp. 300 PPI is the standard for high-quality prints.
Setting a high resolution from the beginning is crucial. You can always shrink a large, high-quality image without losing detail, but you can't make a small, low-resolution image larger without it looking blurry and pixelated.
Your Brushes and Tools
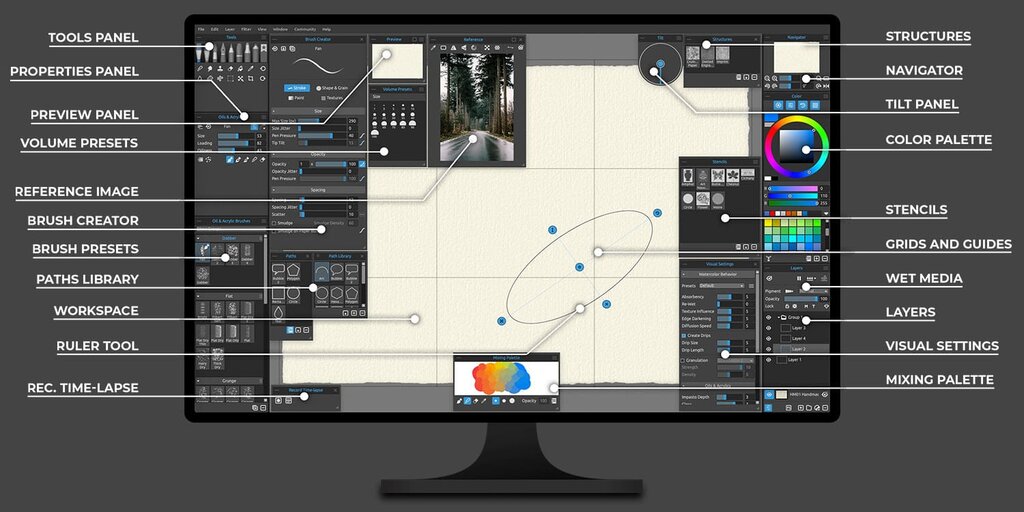
Your software comes with a collection of digital tools, but your most important one will be the Brush tool. Digital brushes are incredibly flexible. You can change their size, shape, and texture with a few clicks. Most programs let you adjust three basic settings for any brush:
Size: How large the brush stroke is. Hardness: Whether the brush has a crisp, sharp edge or a soft, blurry one. Opacity: How transparent the brush stroke is. 100% opacity is solid color, while a lower opacity lets the colors underneath show through.
Beyond the brush, you'll constantly use the Color Picker. This tool lets you select any color you want to paint with, often from a color wheel or a set of sliders. Many artists also use the Eyedropper tool, which lets you click anywhere on your canvas to pick up a color that's already there.
Selection Tools, like the Marquee (for rectangular or circular selections) and the Lasso (for freehand selections), let you isolate a specific part of your canvas. Once an area is selected, you can only paint or edit inside of it. This is perfect for filling in shapes with clean edges or protecting parts of your drawing from accidental changes.
The Magic of Layers
Layers are one of the biggest advantages of digital painting. Imagine you're drawing on a stack of clear, transparent sheets. You could draw your background on the bottom sheet, the main character on the middle sheet, and small details on the top sheet. If you want to move the character, you just move the middle sheet without disturbing the background or details.
That's exactly how layers work. Each layer is a separate, independent part of your image. This system is incredibly powerful.
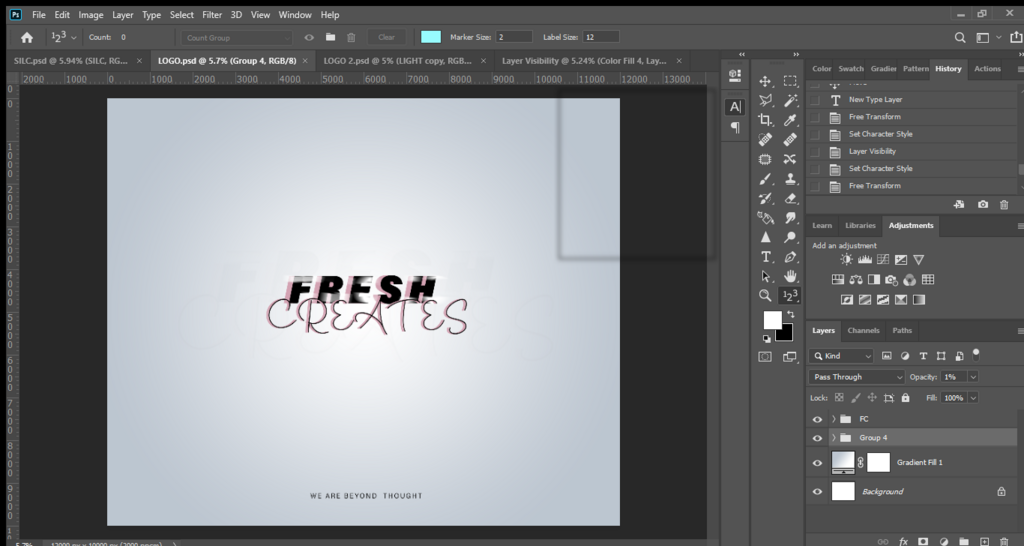
A common workflow is to create separate layers for different parts of your artwork. You might have one layer for your initial sketch, another for your clean line art, and several more for colors, shadows, and highlights.
This separation gives you complete freedom. Don't like the color of a character's shirt? You can change it on its own layer without having to repaint anything else. Need to adjust the position of a tree in the background? Just move its layer. Working with layers is non-destructive, meaning you can experiment freely without ever ruining your original work.
Now that you understand the basic setup of a digital painting environment, let's test your knowledge.
An artist accustomed to traditional painting wants a digital program that best simulates the feel of real oil paints and watercolors. Which software would be the most suitable recommendation?
You are creating a digital illustration that is intended to be printed as a high-quality poster. What is the standard resolution (PPI) you should set for your canvas?
Getting comfortable with your chosen software is the first big step. The tools and concepts we've covered here—the canvas, brushes, basic tools, and layers—are the foundation for everything you'll create.