DaVinci Resolve Video Editing
Getting Started
Your First Steps in Resolve
DaVinci Resolve is a powerful tool for video editing, used on everything from YouTube videos to Hollywood films. What makes it special is that it combines editing, color correction, visual effects, and audio post-production all in one application.
Before we dive in, it's good to know there are two versions. The standard DaVinci Resolve is completely free. The paid version, DaVinci Resolve Studio, adds more advanced features like collaboration tools and extra effects. For now, the free version has everything you'll need.
Configuring basic settings in DaVinci Resolve is like laying the foundations of a house.
Installation and Setup
To get started, head to the official Blackmagic Design website. You'll find the download link for both the free and Studio versions. The installation process is straightforward. Just run the installer and follow the on-screen prompts.
When you open Resolve for the first time, you'll see the Project Manager. This is where all your projects live. Think of it as your digital filing cabinet. For now, it will be empty. Let's change that.
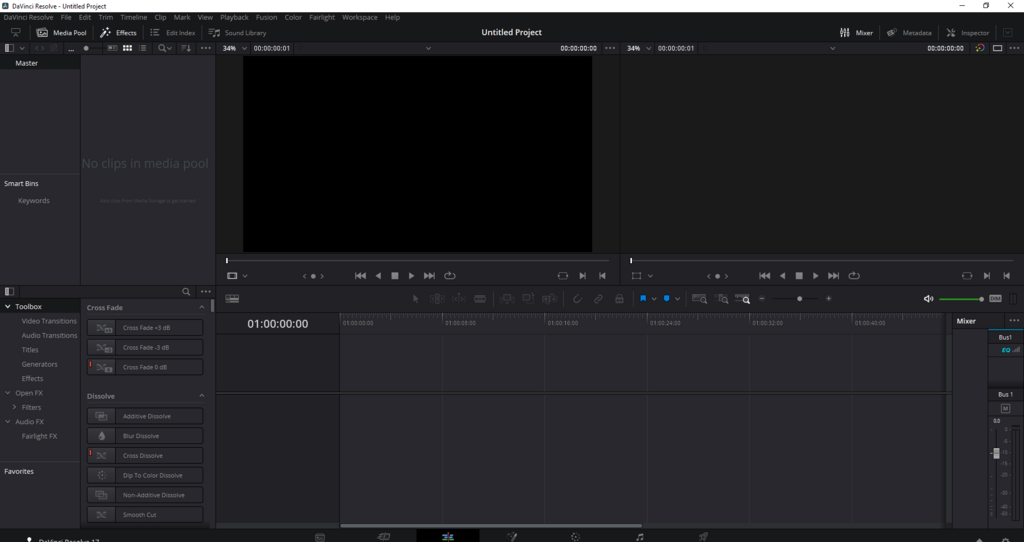
Double-click on "Untitled Project" to open it. Before you import any footage, the first and most important step is to check your project settings. Go to the bottom-right corner and click the gear icon to open them. Here, you'll set the foundation for your entire project.
Two key settings are Timeline Resolution and Timeline Frame Rate.
- Resolution is the size of your video, like 1920x1080 (HD) or 3840x2160 (4K).
- Frame Rate is how many individual images, or frames, are displayed per second. Common rates are 24, 30, or 60 fps.
It's best to match these settings to your source footage. If you're not sure, 1920x1080 resolution and 29.97 fps are common starting points for many digital videos.
Always set your resolution and frame rate before you start editing. Changing them later can cause unexpected problems.
A Tour of the Interface
DaVinci Resolve is organized into different workspaces called "Pages." Each page is designed for a specific task in the video creation process. You can switch between them using the buttons at the bottom of the screen.
| Page | Purpose |
|---|---|
| Media | Import and organize all your video clips, audio, and images. |
| Cut | A streamlined interface for quickly assembling a rough edit. |
| Edit | The main editing workspace for refining your timeline with precision. |
| Fusion | For creating visual effects and motion graphics. |
| Color | Where you perform color correction and grading to perfect the look. |
| Fairlight | A complete digital audio workstation for mixing and mastering sound. |
| Deliver | Export your finished video in various formats. |
You'll work through these pages from left to right as you create your video. For now, we'll focus on the first few: Media, Cut, and Edit. Understanding this workflow is the key to navigating Resolve efficiently.
What is the main distinction between the free DaVinci Resolve and the paid DaVinci Resolve Studio?
According to the recommended workflow, what is the very first step you should take after creating and opening a new 'Untitled Project'?
Now that you're familiar with the basic layout and have your first project set up, you're ready to start bringing your creative vision to life.