Creative Photography for Young Creators
Mastering Exposure Triangle
Beyond the Basics
You already know the three pillars of exposure: aperture, shutter speed, and ISO. Think of them as three sides of a triangle. Change one, and you have to adjust another to maintain the same overall brightness. But getting the right exposure is only half the story. The real art of photography lies in understanding the creative trade-offs each setting introduces.
The exposure triangle, which consists of ISO, shutter speed, and aperture, controls how light or dark your photo looks.
Let's move beyond just letting light in and start shaping what that light does to your image. We'll explore how each setting affects not just brightness, but also the style, feel, and quality of your final photo.
Aperture and Depth of Field
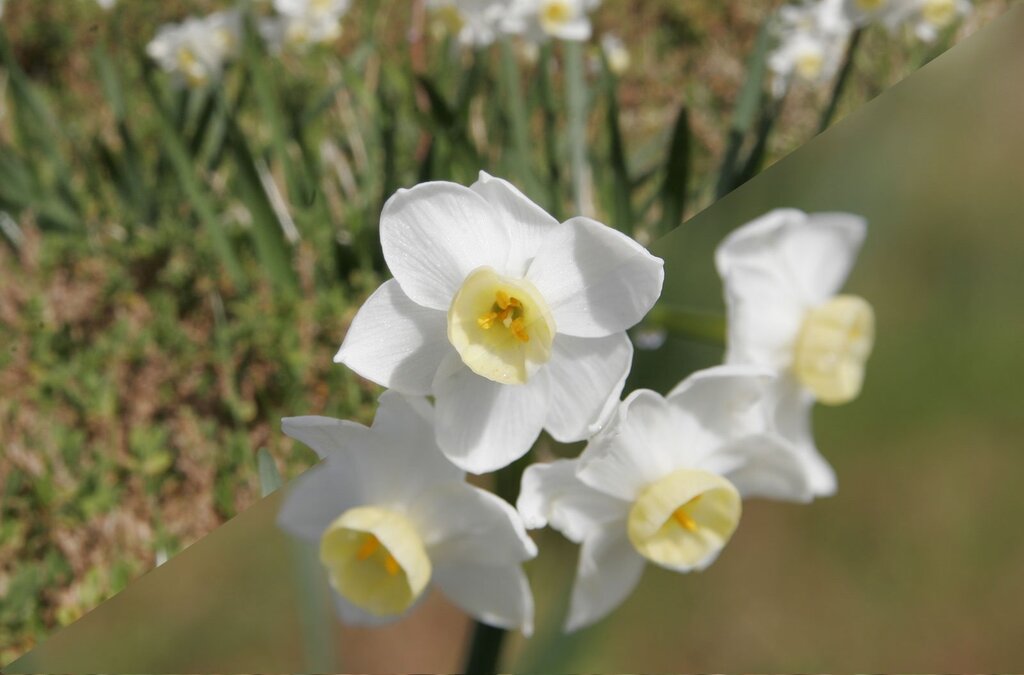
Aperture, measured in f-stops (like f/1.8, f/8, f/16), controls how much light enters the lens. But its creative superpower is managing depth of field (DoF), which is the range of your image that appears acceptably sharp. A wide aperture (small f-number like f/1.8) creates a shallow DoF, making your subject sharp while beautifully blurring the background. This is a classic technique for portraits, as it isolates the person from their surroundings.
Conversely, a narrow aperture (large f-number like f/16) produces a deep DoF. Everything from the foreground to the distant mountains can be in focus. This is ideal for landscape photography where you want the entire scene to be crisp and detailed. The choice isn't about right or wrong, but about intention. Do you want to isolate a subject or show the whole context?
Shutter Speed and Motion
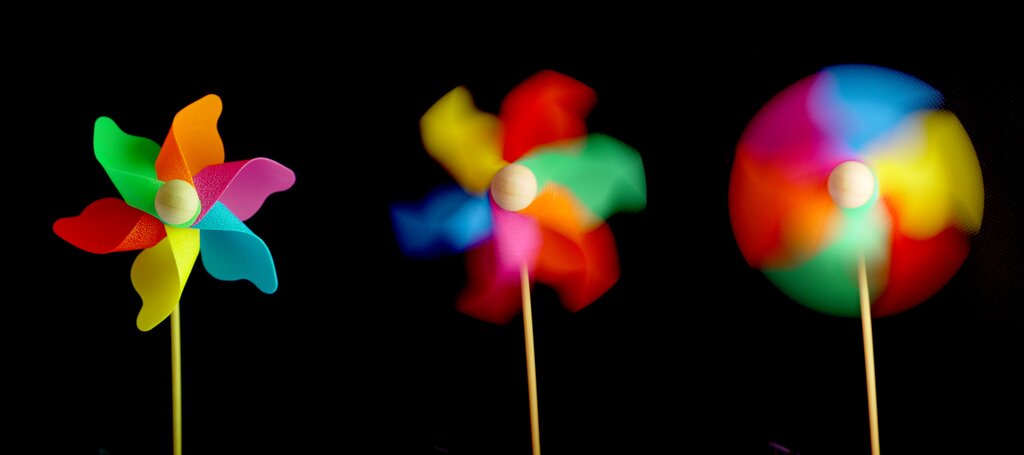
Shutter speed dictates how long the camera's sensor is exposed to light. Its creative side effect is controlling motion. A fast shutter speed, like 1/1000s, freezes action. Think of a splashing wave, a racing car, or a bird in flight, all captured with crystal clarity. This is essential for sports or wildlife photography where stopping motion is key.
A slow shutter speed, like 1/2s or even several seconds, does the opposite. It introduces motion blur, turning moving objects into artistic streaks. This is perfect for capturing the silky flow of a waterfall or the light trails of cars at night. The trade-off is stability; slow shutter speeds require a tripod to keep the stationary parts of your image sharp. Any camera shake will blur the entire photo, not just the moving elements.
ISO and Digital Noise
ISO represents your camera sensor's sensitivity to light. A low ISO (e.g., 100 or 200) is the least sensitive, producing the cleanest, highest-quality images. You should always aim to use the lowest ISO possible for the available light.
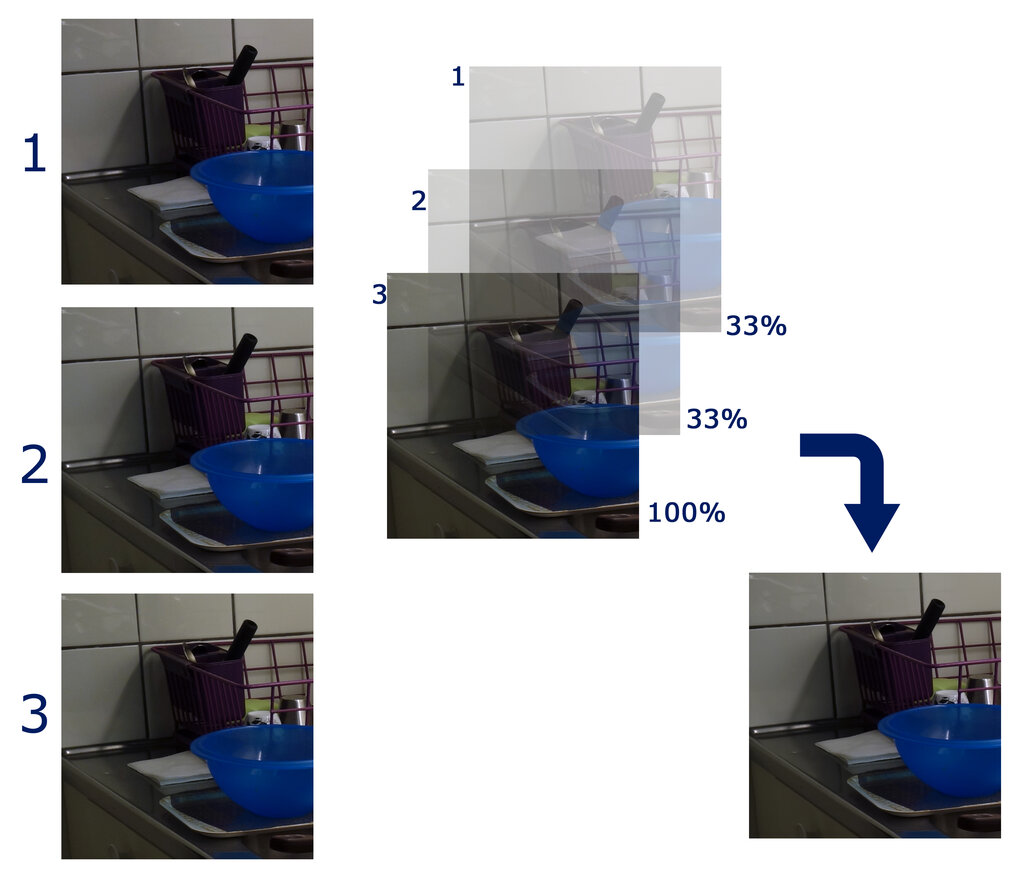
However, in low-light situations where a wide aperture and slow shutter speed still don't provide enough exposure, you must increase the ISO. This artificially boosts the signal from the sensor, but it comes at a cost: digital noise. appears as a grainy, speckled texture, particularly in the darker areas of your photo, and can reduce detail and color accuracy.
Modern cameras handle high ISOs much better than older ones, but the trade-off always exists. A noisy photo is often better than a blurry, unusable one, but it’s a compromise you make when light is scarce.
Putting It All Together
Mastering manual mode is about balancing these three elements for both technical correctness and creative effect. Each full 'stop' of light doubles or halves the amount of light reaching the sensor. For example, changing your aperture from f/4 to f/2.8 is one stop brighter. Changing your shutter speed from 1/100s to 1/200s is one stop darker. Changing your ISO from 200 to 400 is one stop brighter.
This system of stops allows for reciprocal exposures – different combinations of settings that result in the exact same brightness. This is the key to creative control.
| Aperture | Shutter Speed | ISO | Resulting Image Effect |
|---|---|---|---|
| f/16 | 1/15s | 100 | Deep depth of field, motion blur |
| f/8 | 1/60s | 100 | Medium depth of field, sharp |
| f/4 | 1/250s | 100 | Shallow depth of field, frozen action |
| f/4 | 1/125s | 200 | Shallow depth of field, more noise |
Notice how each row in the first three examples represents the same total exposure, but would produce a vastly different image. The first captures a blurry stream in a sharp landscape. The third freezes a fast-moving bird against a soft background. The fourth example shows how increasing ISO allows for faster shutter speeds or narrower apertures in the same light.
To check if your exposure is correct, don't just trust the camera's screen. Learn to read the .
A histogram is your most objective tool. The camera's LCD screen can be misleading depending on its brightness setting and the ambient light. The histogram shows you the raw data.
To get out of auto mode, switch your camera to Manual (M). Start with a base ISO of 100 or 200. Then, decide on your creative priority. Do you need a specific depth of field? Set your aperture first. Do you need to freeze or blur motion? Set your shutter speed first. Then, adjust the other two settings until the light meter in your viewfinder reads '0' and the histogram looks balanced. This is the essence of taking full creative control.
Ready to test your understanding of these trade-offs?
You are taking a portrait and want to make your subject stand out by blurring the background. Which aperture setting would be most effective for achieving this look?
To capture the smooth, silky motion of a waterfall, a photographer should primarily use a slow shutter speed.
Practice is key. Go out and experiment with different settings in various lighting conditions. See how changing one variable forces you to adapt the others, and observe the creative impact each change has. That's how you'll truly master the exposure triangle.