Crafting Realistic Wooden Models
Introduction to Wooden Model Construction
From Blueprint to Reality
Every wooden model, from a simple toy car to a complex architectural replica, begins as an idea on paper. This plan, called a working drawing or blueprint, is your roadmap. It translates a three-dimensional object into a two-dimensional format you can follow.
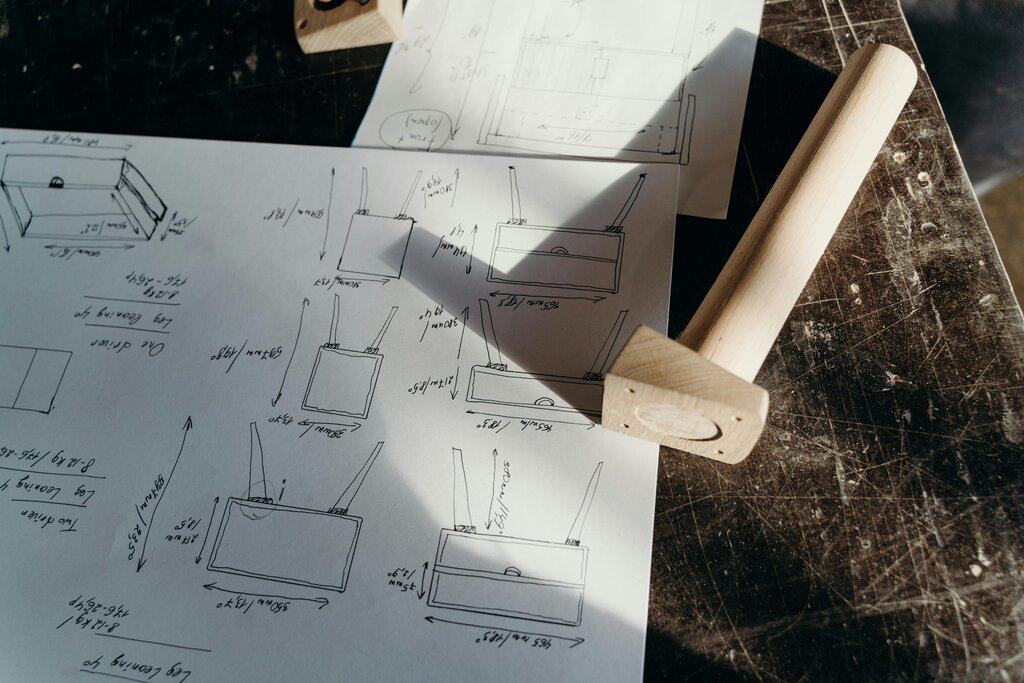
At first, a blueprint might look like a confusing jumble of lines and numbers. The key is to understand that it shows the object from several different angles, most commonly the top, front, and side. This is called orthographic projection. Imagine you have a small wooden block. The top view shows what you see looking straight down at it. The front view is what you see looking at it head-on, and the side view is what you see from the side.
Together, these views provide a complete picture of the object's shape and size. The lines with numbers on them are dimensions. They tell you the exact length, width, and height of each part. Always pay close attention to these; accuracy is everything in model building.
Drawings also include notes that specify the type of wood to use or other important details. Think of a working drawing as a recipe: the views and dimensions are your ingredients and measurements, and the notes are your instructions.
Choosing Your Wood
With your plan understood, it's time to select your material. The type of wood you choose will affect how easy the model is to build and how it looks when finished. For beginners, it's best to start with woods that are soft and easy to work with.
Look for wood that is straight and free of defects. Check the board for knots, which are hard, dense spots that can be difficult to cut. Also, sight down the edge of the board to see if it's warped or twisted. A flat, straight piece of wood is a much better starting point.
Always buy a little more wood than you think you'll need. Mistakes happen, and it's better to have extra material than to run out midway through a project.
Three popular choices for model making are basswood, balsa, and pine. Each has its own characteristics.
| Wood Type | Hardness | Grain | Best For |
|---|---|---|---|
| Basswood | Soft | Very fine, even | Detailed carving, architectural models |
| Balsa | Very Soft | Coarse, open | Lightweight models like airplanes |
| Pine | Soft | Pronounced, can have knots | General projects, blocky models |
Prepping for the First Cut
You have your plans and your wood. Before you can start cutting out your pieces, you need to prepare the raw material. This process is often called preparing the workpiece or milling. The goal is simple: to make your rough piece of wood perfectly flat, square, and dimensioned to a specific size.
Even wood that looks straight from the store is rarely perfect. Preparing it properly ensures that all your cuts will be accurate and all your pieces will fit together as they should. You'll need a ruler or measuring tape and a square to check your work.
Begin with small model-building projects and gradually tackle increasingly complex challenges.
The basic steps for preparing a workpiece are:
-
Establish a Flat Face: Find the most stable, flattest side of your board. This will be your reference face. If needed, use a hand plane or sandpaper on a flat surface to make it perfectly flat.
-
Square an Adjacent Edge: Place your square on the flat face and against an adjacent edge. Make this edge a perfect 90-degree angle to your reference face. This is now your reference edge.
-
Mark the Thickness: Use your reference face to mark your desired thickness on the other three edges.
-
Mark the Width: Use your reference edge to mark the desired width on the faces of the board.
This careful preparation is the foundation of quality work. Rushing this step will only lead to frustration later.
With a properly interpreted drawing, well-chosen material, and a perfectly prepared workpiece, you are ready to begin the rewarding process of building.
What is the primary purpose of a working drawing or blueprint in wooden model making?
An orthographic projection on a blueprint typically shows an object from which three views?