Canva Ebook Design Mastery
Canva Basics
Navigating the Canva Interface
When you first log into Canva, you'll land on your main dashboard. Think of this as your creative command center. At the top, a prominent search bar invites you to find what you need. You can type in anything from "eBook cover" to "presentation" to see relevant templates.
The best part about using Canva is that you don't need to be a professional graphic designer to get started with it.
On the left side, you'll find a navigation menu that takes you to your past projects, templates, and brand kit. The main part of the screen showcases a variety of template suggestions to spark your creativity. To start a new project, you can either click on a suggested template or use the "Create a design" button in the top-right corner. This will open a dropdown menu with different document types, each pre-sized for its purpose.
Starting with Templates
Templates are the fastest way to create a professional-looking design in Canva. They provide a complete layout with placeholder text and images, along with a coordinated color scheme and font pairing. It's much easier to modify an existing design than to start from a blank page.
To find eBook templates, simply type "eBook" or "book cover" into the search bar on the dashboard. Browse the results and click on one that catches your eye to open it in the editor.
You can start from scratch on Canva, or you can pick one of the thousands of templates that the platform offers and modify it according to your needs.
Customizing Design Elements
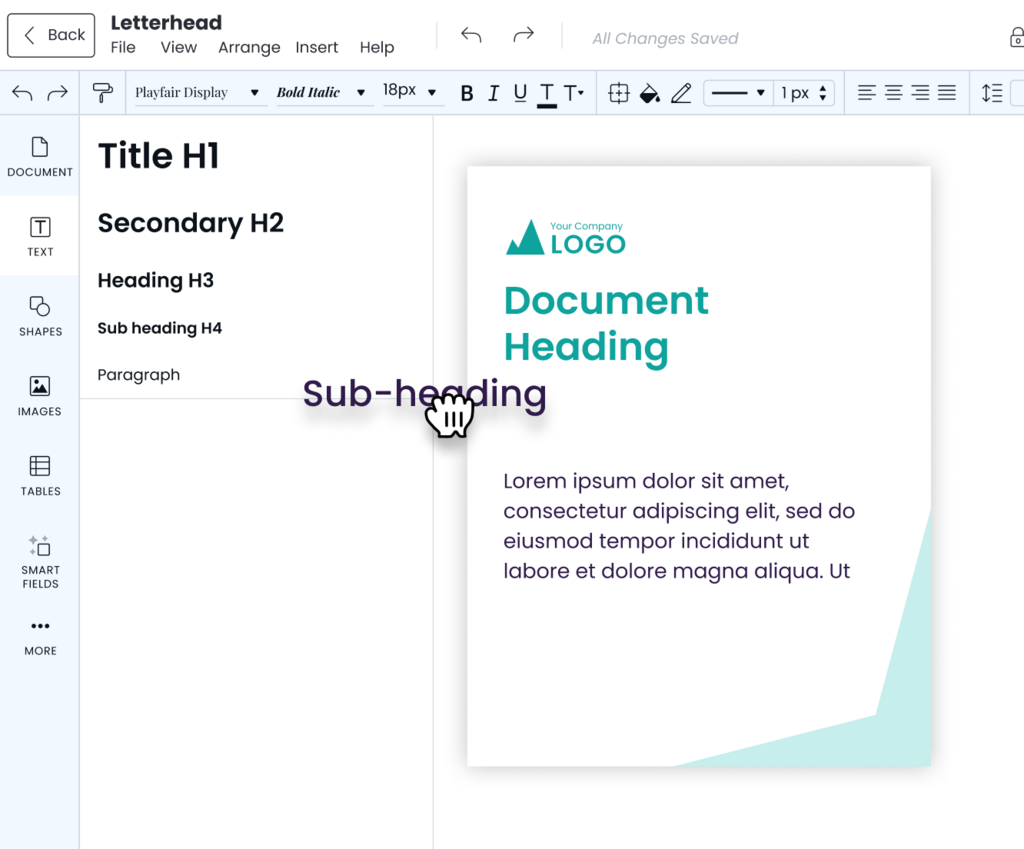
Once you've selected a template and are in the editor, you can change anything you see. The editor itself is straightforward. Your design, or canvas, is in the center. To the left is the object panel, which contains tabs for Templates, Elements, Uploads, Text, and more.
Here’s how to customize the basic components:
- Text: Click on any text box to edit it. A toolbar will appear at the top of the editor, allowing you to change the font, size, color, spacing, and alignment.
- Elements: The Elements tab is where you'll find graphics, shapes, photos, and lines to add to your design. Just click or drag an element onto your canvas. You can then resize it by dragging its corners or change its color using the toolbar at the top.
- Background: To change the background, click on the canvas itself (but not on any element). A color swatch will appear in the top-left corner. Click it to pick a new color or select a background pattern or image from the "Background" tab in the left-side object panel.
Uploading and Managing Assets
Often, you'll want to use your own images, like an author photo or a specific graphic. For this, you'll use the "Uploads" tab in the object panel. Click "Upload files" to select images, videos, or audio from your computer. Once uploaded, they are stored in your Canva account and can be dragged directly onto your design, just like any other element.
This feature is perfect for adding personal branding, such as a logo, or incorporating unique images that aren't available in Canva's stock library.
After you're finished with your design, you need to save and export it. Canva automatically saves your work, so you don't have to worry about losing progress. To download your file, click the "Share" button in the top-right corner, then select "Download." You can then choose the file type you need, such as PDF, PNG, or JPG, and click the download button to save it to your computer.
Now that you're familiar with the essentials, it's time to test your knowledge.
What is the primary function of the 'Create a design' button on the Canva dashboard?
According to the text, what is the main advantage of using a template?