Blender 5.0 Game Asset Creation
Blender 5.0 Interface
Getting Around in Blender
Opening Blender for the first time can feel like stepping into a spaceship's cockpit. There are buttons, panels, and a big window looking out into a 3D universe. It might seem intimidating, but once you know what the main controls do, you'll be flying around in no time.
When you launch Blender, you're greeted by the default scene: a single cube, a light source, and a camera. This all lives inside the largest window, the 3D Viewport. This is your canvas, where you'll build, sculpt, and arrange your creations.
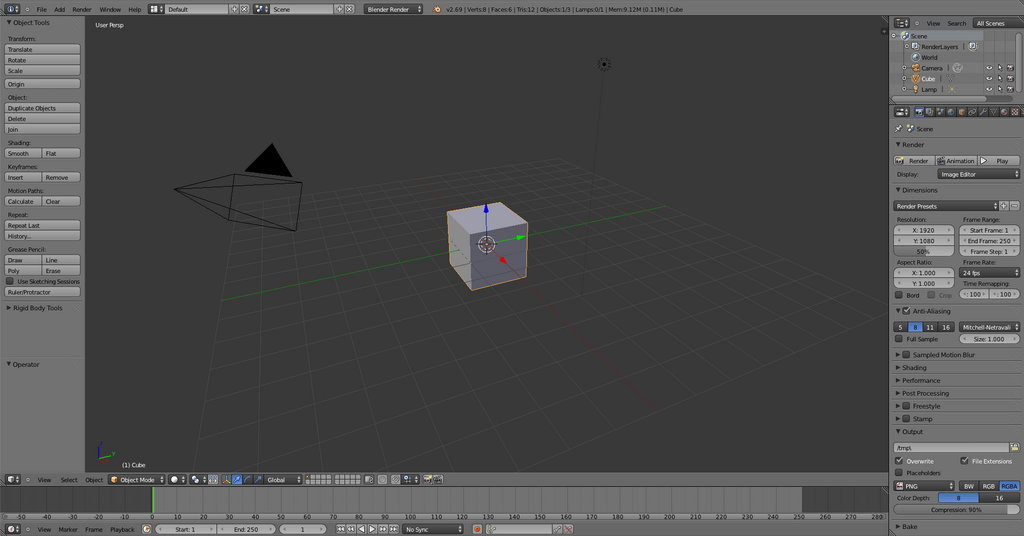
Let's break down the main areas of the screen.
To move your view around this 3D space:
- Orbit: Hold down the middle mouse button and move your mouse to rotate your view around a central point.
- Pan: Hold Shift and the middle mouse button, then move your mouse to slide the view left, right, up, or down.
- Zoom: Scroll the mouse wheel up or down to zoom in and out.
If you don't have a three-button mouse, you can use the navigation gizmo in the top-right corner of the viewport. Just click and drag the colored axes to orbit.
Manipulating Objects
Now that you can navigate, let's interact with that cube. First, select it with a left-click. A yellow-orange outline will appear around it, confirming it's selected.
There are three basic ways to manipulate any object: moving, rotating, and scaling. Blender has simple keyboard shortcuts for these actions, which are essential for a fast workflow.
The three core transformation shortcuts are G for Grab/Move, R for Rotate, and S for Scale.
After pressing one of these keys, you can move your mouse to see the effect. But what if you only want to move the cube along a specific direction? You can lock the transformation to an axis.
Simply press the key for the axis you want: X (red line), Y (green line), or Z (blue line). For example, to move the cube only along the X-axis, you would press G, then X, then move your mouse.
| Action | Shortcut | Axis Lock | Example |
|---|---|---|---|
| Move (Grab) | G | X, Y, or Z | G then X to move along the X-axis |
| Rotate | R | X, Y, or Z | R then Z to rotate around the Z-axis |
| Scale | S | X, Y, or Z | S then Y to scale along the Y-axis |
On the left side of the 3D Viewport is the Toolbar. If you don't see it, press T. This panel has icons for Move, Rotate, and Scale. Clicking one will bring up a visual gizmo on your selected object, which you can drag to perform transformations. It's a great visual way to learn, but mastering the shortcuts will make you much faster.
Your Workspace, Your Rules
Blender's interface is highly customizable. Every panel can be resized, swapped, or removed. You can change the layout by dragging the corners of any panel. When your cursor turns into a crosshair, click and drag to split a panel into two, or drag from one panel into another to join them.
At the top of the screen, you'll see tabs for different workspaces like Layout, Modeling, Sculpting, and Animation. These are pre-configured layouts designed for specific tasks. Clicking on them instantly rearranges the panels to give you the tools you need. As you get more comfortable, you can create and save your own custom workspaces.
Let's review the key terms we've learned.
Ready to test your knowledge?
What is the primary key used to initiate the 'Move' command in Blender?
To rotate your view around a central point in the 3D Viewport, you should hold down the middle mouse button and move your mouse.
That's a quick tour of the Blender interface. The key is to practice. Spend some time just navigating the viewport and manipulating the default cube. The more you use it, the more it will become second nature.