Blender 3D Mastery
Blender Interface
Welcome to Blender
Opening Blender for the first time can feel like stepping into the cockpit of a spaceship. There are buttons, panels, and windows everywhere. Don't worry, it's more organized than it looks. Think of the interface as a collection of specialized areas, each with a specific job.
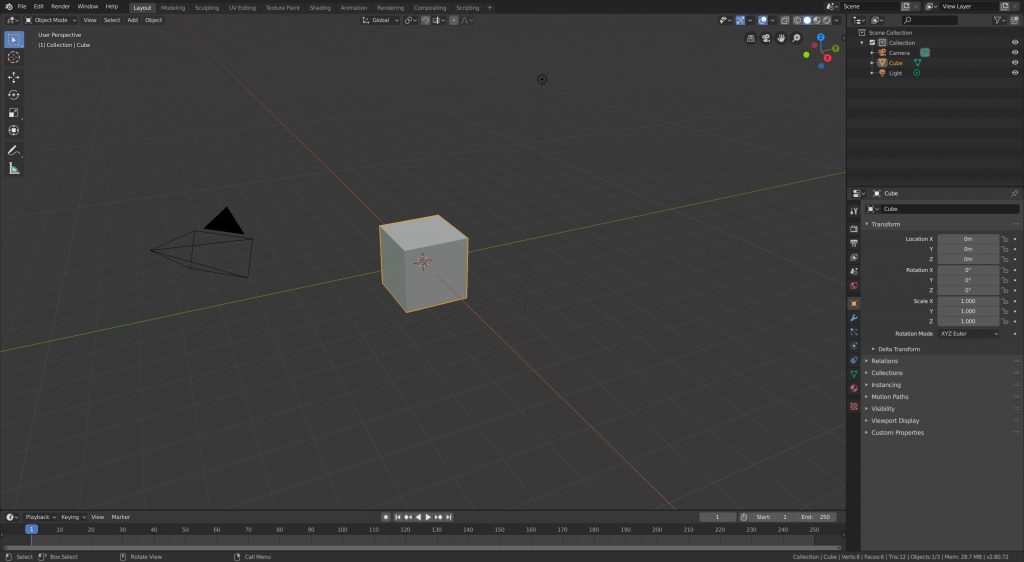
The main window in the center is the 3D Viewport. This is where you'll build and view your creations. The other panels provide you with tools and information to manage your scene. Let's break down the most important ones.
Navigating the 3D Viewport
Your most common task will be moving around in the 3D Viewport. You need to be able to look at your model from all angles. Mastering navigation is the first step to feeling comfortable in Blender. There are three core movements, which are easiest to perform with a three-button mouse.
Orbit: Hold down the middle mouse button and move your mouse to rotate your view around the center point. Pan: Hold Shift plus the middle mouse button and move your mouse to slide your view side-to-side or up-and-down. Zoom: Roll the scroll wheel forward and backward to zoom in and out.
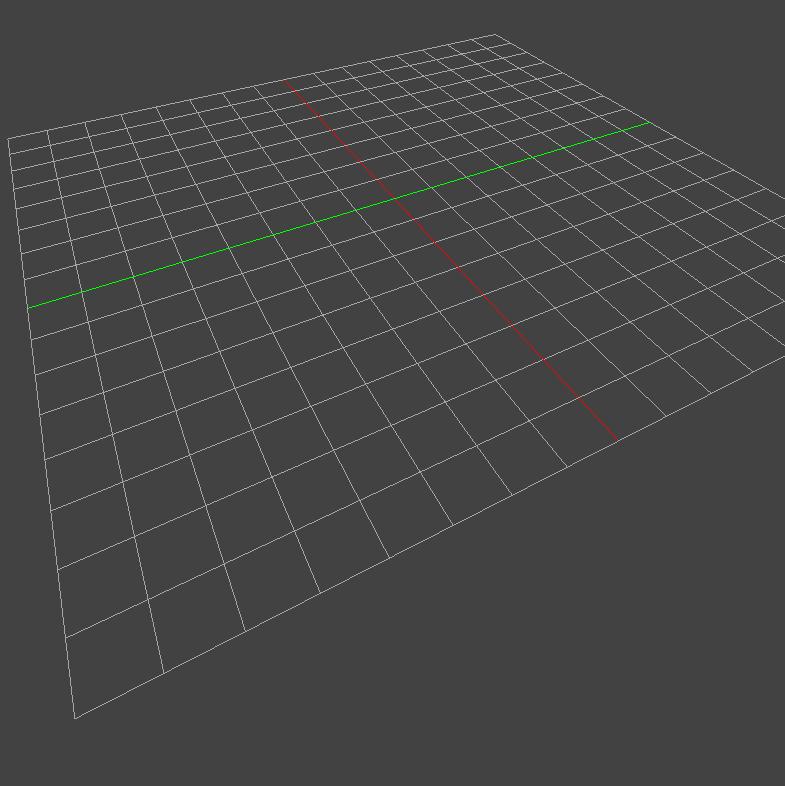
Practice these three motions until they feel like second nature. You'll also see a set of colored lines at the center of the grid. The red line is the X-axis, the green line is the Y-axis, and the implied blue line running up and down is the Z-axis. These help you stay oriented in 3D space.
The Main Panels
Surrounding the 3D Viewport are a few key panels. Understanding their roles is crucial for an efficient workflow.
Outliner
noun
A list of every object and element in your scene.
Look at the top right of the screen. The Outliner gives you an organized, hierarchical view of everything that exists in your project: objects, cameras, lights, and more. You can click on an object's name here to select it in the 3D viewport, which is incredibly useful in crowded scenes. You can also hide objects from view by clicking the eye icon next to their name, or make them unselectable by clicking the cursor icon.
Directly below the Outliner is the Properties Panel. This panel is context-sensitive, meaning its contents change depending on what you have selected. If you select the cube, you'll see options for its location, rotation, and scale. If you select the camera, you'll see camera-specific settings like focal length. This is your main hub for adjusting the details of any item in your scene.
At the very bottom of the screen is the Timeline. As its name suggests, this area is for animation. It shows your animation's frames, with controls to play, pause, and jump to specific points in time. For now, you don't need to worry too much about it, but it's good to know what it is.
Toolbars and Shortcuts
On the left side of the 3D Viewport is the Toolbar. This contains your primary tools for interacting with objects, like Move, Rotate, and Scale. You can switch between them by clicking their icons. When you select a tool, a gizmo (a visual controller with colored handles) will appear on the selected object, allowing you to manipulate it along the X, Y, or Z axes.
While you can click the icons, Blender is built for speed, and that means using keyboard shortcuts. You'll learn many as you go, but here are the essential ones for the basic tools:
| Action | Shortcut Key |
|---|---|
| Move | G |
| Rotate | R |
| Scale | S |
After pressing one of these keys, you can move your mouse to perform the action. You can also constrain the action to a specific axis by pressing X, Y, or Z afterwards. For example, pressing G then X will only move the object along the red X-axis.
It will take time for you to get comfortable with Blender and master your workflow, but these tips should help you get started.
Let's review the key components of the interface.
Which panel provides a hierarchical list of all the objects in your scene, such as cameras, lights, and models?
What is the primary keyboard shortcut to move a selected object in Blender?
Getting familiar with the layout is the first major step. Now you have a map of the essential areas and can begin to explore what they do.