Arduino Soil Health and Irrigation System
Arduino Basics
Meet the Arduino Uno
An Arduino is a small, programmable computer, often called a microcontroller. Think of it as a tiny brain you can tell what to do. The Arduino Uno is a great board for beginners because it's simple, powerful, and has a huge community of users.
Arduino is an open-source electronics platform based on easy-to-use hardware and software.
It's designed to read inputs, like a button press or a light sensor, and turn them into outputs, like turning on an LED or spinning a motor. This ability to interact with the physical world is what makes it so powerful for creating all sorts of projects.
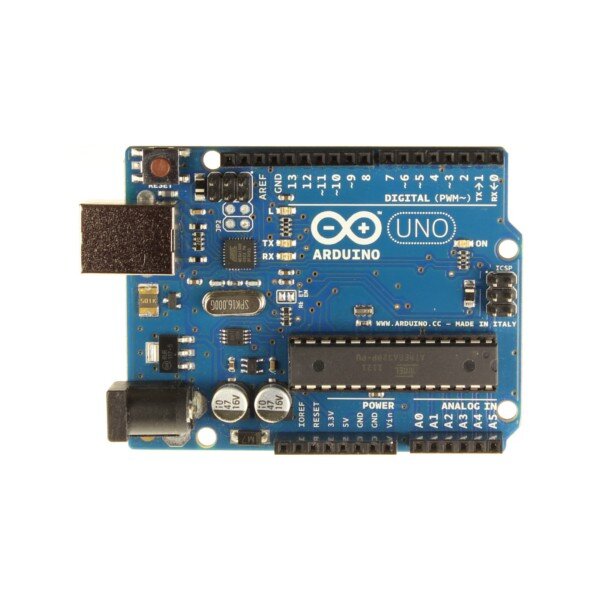
A Tour of the Board
Let's get familiar with the key parts of the Arduino Uno. Knowing what each part does is the first step to using it effectively. The board is covered in pins, which are the connection points for your circuits.
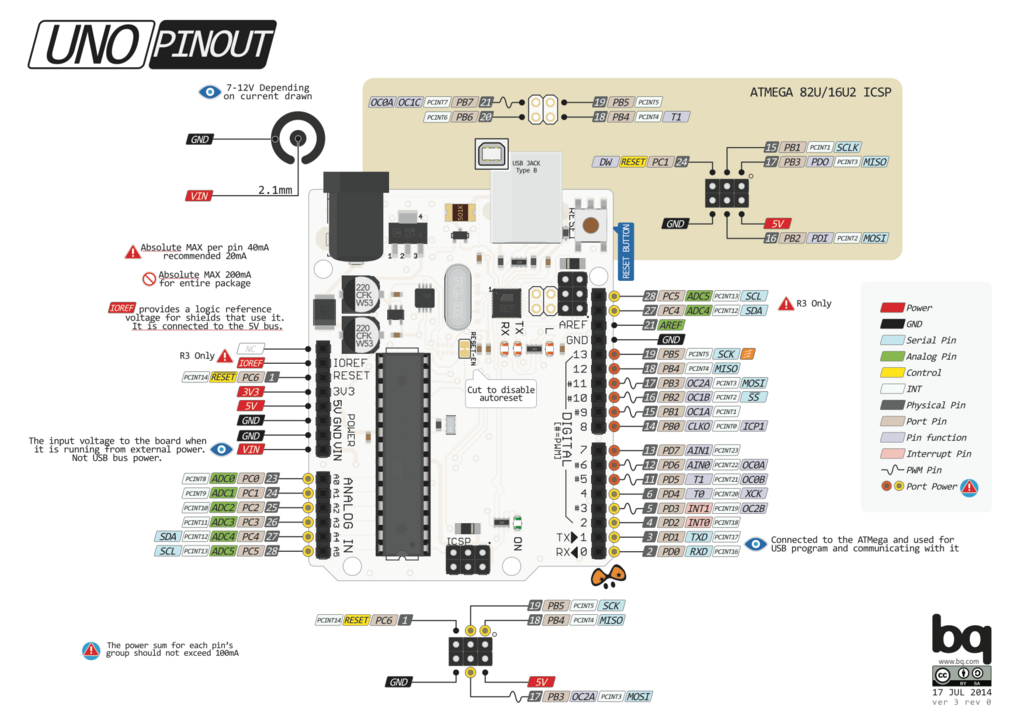
There are two main types of pins you'll be working with: digital and analog.
Digital I/O Pins: Labeled 0 through 13. These pins are like simple on/off switches. They can only be in one of two states: HIGH (on, 5 volts) or LOW (off, 0 volts). Some of these pins, marked with a tilde (~), can also simulate a range of voltages using a technique called Pulse Width Modulation (PWM).
Analog In Pins: Labeled A0 through A5. These pins can read a range of voltage levels, not just on or off. This is useful for reading sensors that provide a continuous signal, like a temperature sensor or a light sensor.
Other important parts include the USB port for connecting to your computer and the barrel jack for an external power supply.
Setting Up Your Workspace
To program your Arduino, you need the Arduino Integrated Development Environment (IDE). It's a free application where you'll write, check, and upload your code.
First, download and install the Arduino IDE from the official website. Once installed, open it up. You'll see a clean, simple interface for writing code.
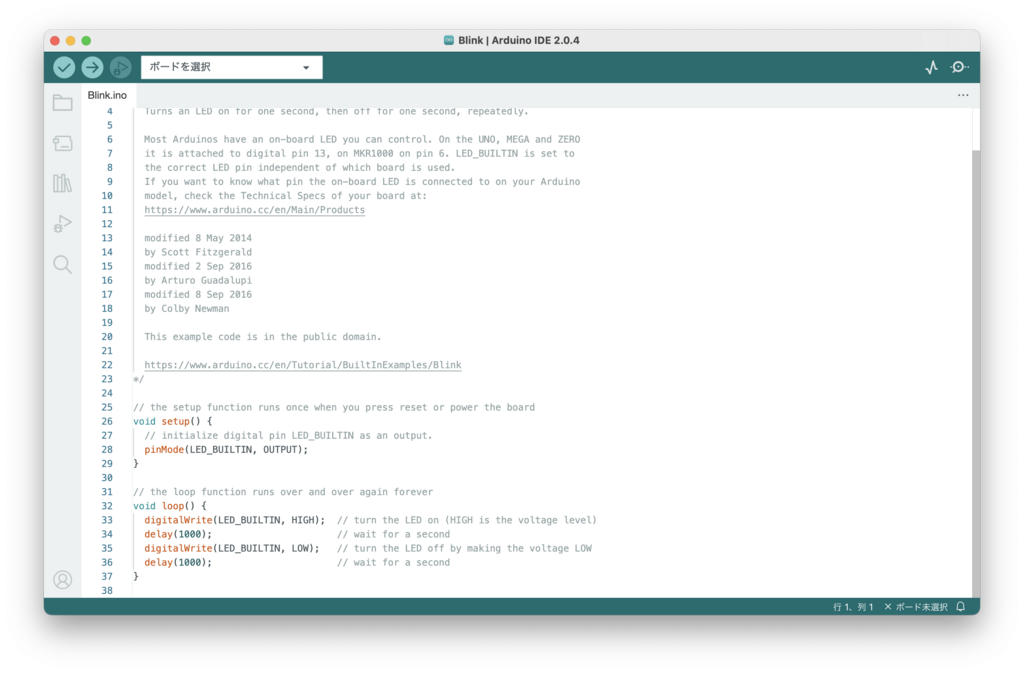
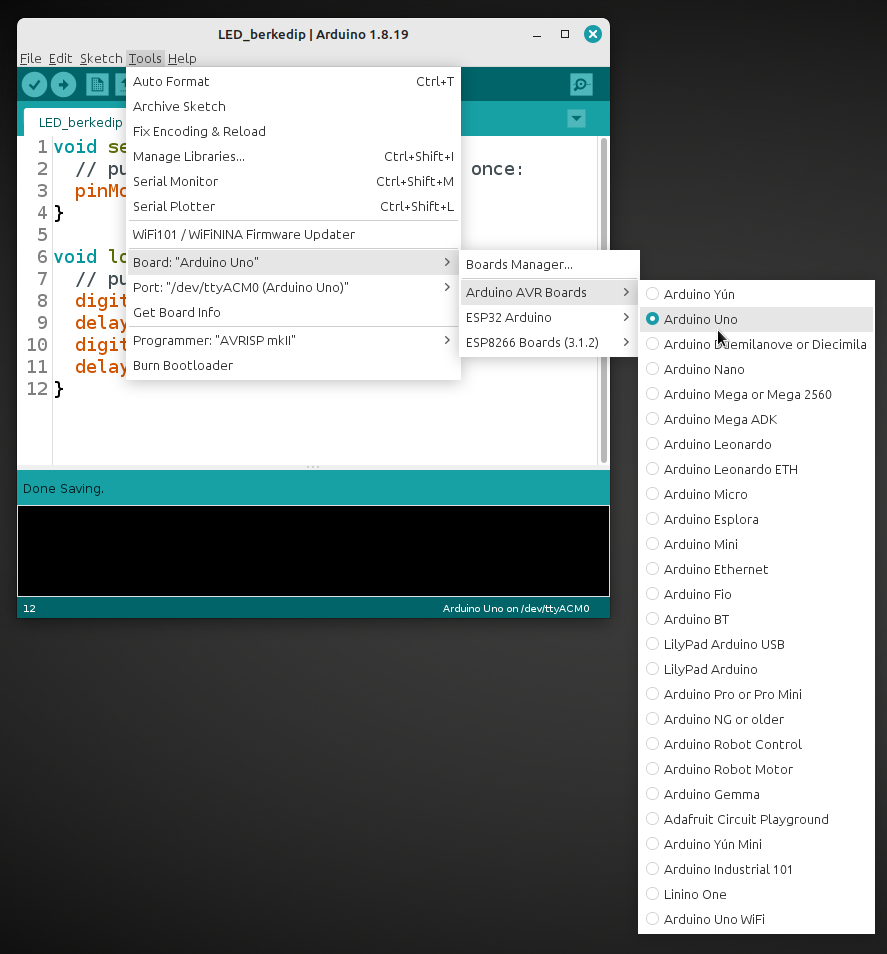
Next, connect your Arduino Uno to your computer using a USB cable. You need to tell the IDE which board you're using and what port it's connected to.
- Go to Tools > Board and select "Arduino Uno".
- Go to Tools > Port and select the port your Arduino is on. It will usually have "(Arduino Uno)" next to it.
Your First Program
In the Arduino world, programs are called "sketches." Every sketch has two essential parts: setup() and loop().
setup()runs once when the sketch starts. It's used for initialization, like telling the Arduino which pins will be inputs and which will be outputs.
loop()runs over and over again, forever. This is where the main logic of your program goes.
Let's write a sketch to make the built-in LED on the board blink. This LED is connected to digital pin 13.
// The setup function runs once when you press reset or power the board
void setup() {
  // Initialize digital pin LED_BUILTIN as an output.
  pinMode(LED_BUILTIN, OUTPUT);
}

// The loop function runs over and over again forever
void loop() {
  digitalWrite(LED_BUILTIN, HIGH);   // turn the LED on (HIGH is the voltage level)
  delay(1000);                       // wait for a second
  digitalWrite(LED_BUILTIN, LOW);    // turn the LED off by making the voltage LOW
  delay(1000);                       // wait for a second
}
In setup(), pinMode() configures the pin as an output. In loop(), digitalWrite() sets the pin to HIGH (on) or LOW (off), and delay() pauses the program for a specified number of milliseconds. This simple on-off-wait cycle creates the blinking effect.
To upload the sketch, click the arrow icon in the IDE. The lights on the Arduino will flash, and then the small LED labeled "L" should start blinking.
Now let's try reading a value. The analog pins can read voltage as a number between 0 (for 0 volts) and 1023 (for 5 volts). We can read a value from an analog pin and print it to the computer using the Serial Monitor, a built-in tool in the IDE for communication.
This sketch reads the voltage on pin A0. If nothing is connected, it will read random "floating" electrical noise.
void setup() {
  // Initialize serial communication at 9600 bits per second:
  Serial.begin(9600);
}

void loop() {
  // Read the input on analog pin 0:
  int sensorValue = analogRead(A0);

  // Print out the value you read:
  Serial.println(sensorValue);

  delay(1);  // Delay slightly for stability
}
Upload this sketch. Then, click the magnifying glass icon in the top right of the IDE to open the Serial Monitor. You'll see a stream of numbers, showing the value being read from pin A0 in real-time.
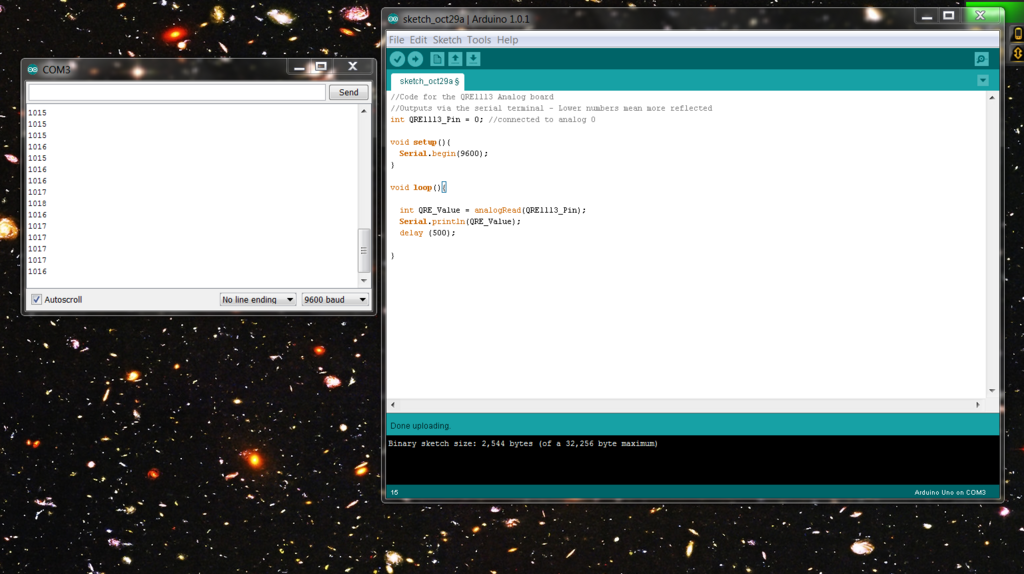
You've just learned the fundamentals: how to control a digital output and how to read an analog input. These two operations, digitalWrite() and analogRead(), are the building blocks for thousands of amazing projects.
What is the primary role of an Arduino microcontroller?
In an Arduino sketch, the setup() function runs once, while the loop() function runs repeatedly.
With these basics, you're ready to start exploring the world of physical computing.