Arduino Programming Essentials
Arduino Hardware
Meet the Board
At the heart of many electronics projects is a small blue board called an Arduino. Think of it as the brain. It's a tool that lets you build interactive objects, from simple blinking lights to complex robots, by reading information from the world and controlling things in response.
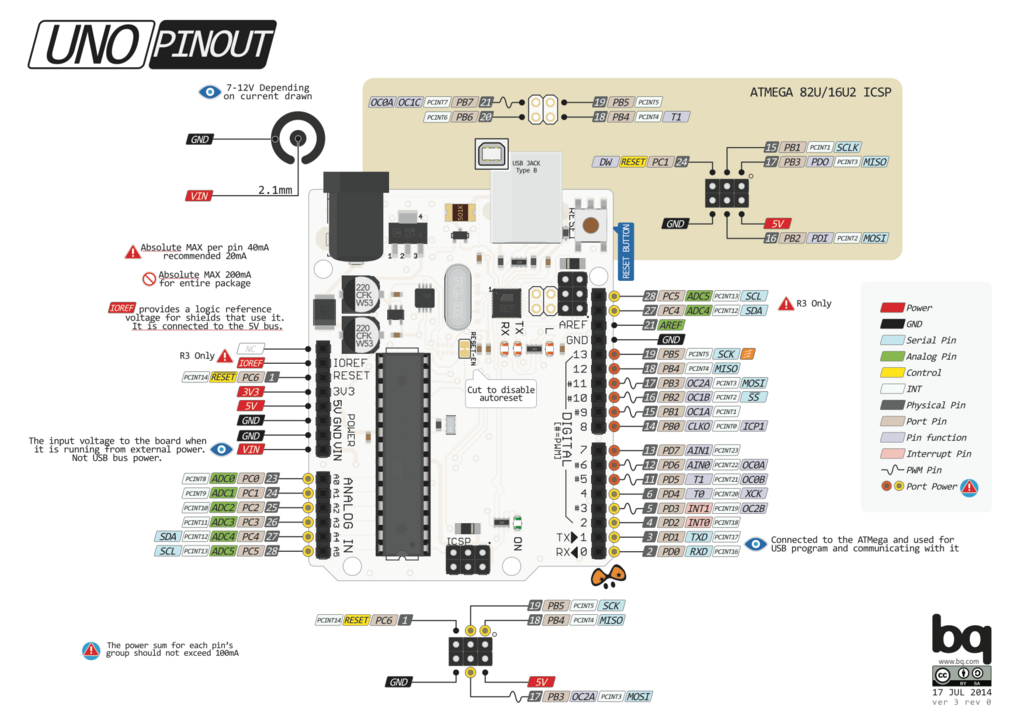
The board itself is a collection of components that support its main star: a tiny computer called a microcontroller. Let's break down what each part does.
The Brains of the Operation
The largest black chip on the board is the microcontroller. This is where the magic happens. It's a self-contained computer that you can program to follow a set of instructions. When you upload a program (called a "sketch" in the Arduino world), it's stored on this chip. The microcontroller then runs that program over and over, reading inputs and controlling outputs.
microcontroller
noun
A compact integrated circuit designed to govern a specific operation in an embedded system. It's a small, low-power computer on a single chip.
To interact with the outside world, the microcontroller uses a series of connection points, or pins, that line the edges of the board.
Pins: Senses and Limbs
If the microcontroller is the brain, the pins are its senses and limbs. They are how the Arduino receives information and performs actions. You'll connect wires from sensors, lights, motors, and other components to these pins. There are two main types: digital and analog.
Digital Pins are like a light switch. They can only be in one of two states: fully on or fully off. In the digital world, we call this HIGH (on) or LOW (off). These are perfect for things like turning an LED on or off, or checking if a button has been pressed.
Analog Pins, on the other hand, are like a dimmer switch. They can detect a range of values, not just on or off. This allows them to read sensors that measure changing conditions, like the brightness of a room or the temperature. The Arduino reads these values as a number, typically between 0 and 1023.
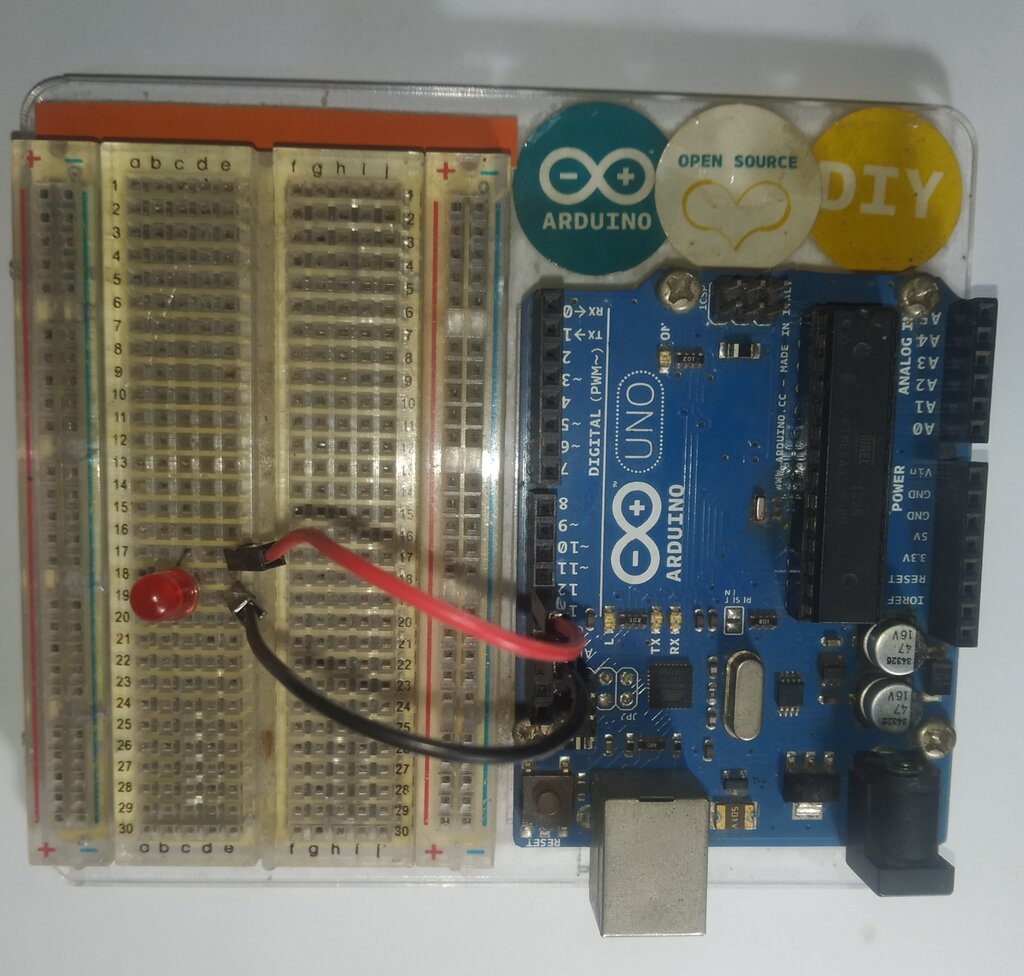
Power and Communication
Your Arduino needs power to run. You have two main options for this. The first and most common way, especially when you're programming, is through the USB port. When you connect the Arduino to your computer with a USB cable, it receives power and can also send and receive data. This is how you upload your sketches to the board.
The second option is the barrel jack, which looks like a small, black, cylindrical port. This lets you power your Arduino from an external source, like a 9V battery or a wall adapter. This is how you'll power your project once it's finished and no longer needs to be connected to your computer.
No matter which power source you use, the Arduino has special pins that provide a steady 5 volts (5V) or 3.3 volts (3.3V) to power the other components in your circuit. You'll also see several ground pins, labeled 'GND', which are essential for completing the electrical circuit.
Now that you know your way around the board, you're ready to start connecting components and bringing your ideas to life.