Arduino Programming and Electronics Fundamentals
Arduino Basics
What is an Arduino?
An Arduino is a small, programmable computer designed to bring your electronic projects to life. Think of it as a tiny brain you can teach to control lights, motors, and sensors. It's a popular tool for everyone from artists creating interactive installations to engineers building prototypes.
The system has two main parts: the hardware, which is the physical circuit board, and the software, which is the program you use to write instructions for the board.
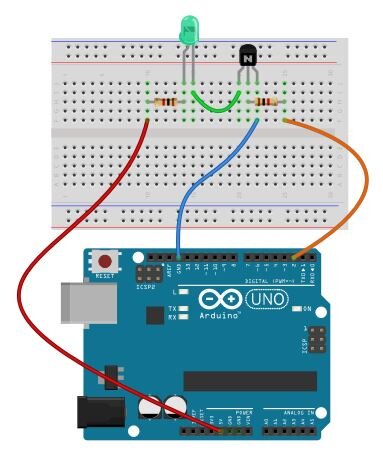
The board itself has several key features. The large silver chip is the microcontroller, the actual 'brain' that runs your code. The rows of black sockets along the edges are called pins. These are how the Arduino interacts with the outside world, sending signals to control things or receiving information from sensors.
A USB port connects the board to your computer. This connection provides power and allows you to upload your programs.
The Arduino IDE
To tell the Arduino what to do, you need to write code. This is done in the Arduino IDE, which stands for Integrated Development Environment. The IDE is a specialized application that includes a text editor for writing your code, along with buttons to check it for errors and send it to the Arduino board.
You can download the IDE for free from the official Arduino website. Once installed, it provides a simple interface for all your programming needs.
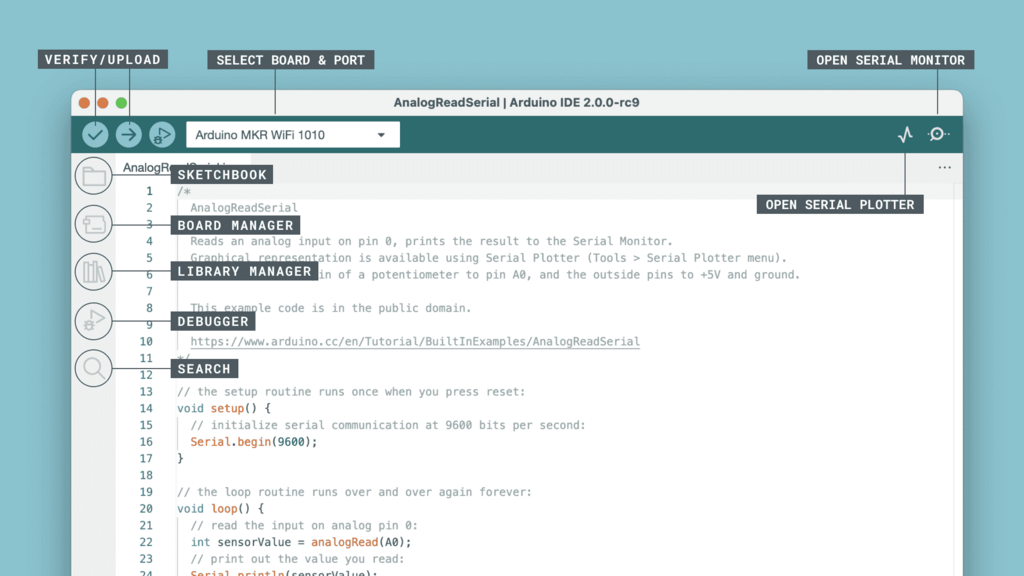
The main window is where you'll type your code. At the top, you'll find a few important buttons:
- Verify: A checkmark icon that compiles your code. Compiling is the process of translating your human-readable code into the machine language the Arduino understands. It also checks for any syntax errors.
- Upload: An arrow icon that sends your compiled code to the Arduino board through the USB cable.
Your First Program
The classic first project in electronics is making a light blink. It's a simple way to confirm that your board is working and that you can successfully upload code. Most Arduino boards have a tiny, built-in LED (Light Emitting Diode) that you can control without any extra wiring.
Let's write a program, called a 'sketch' in Arduino terminology, to make this LED turn on for one second, then off for one second, and repeat.
/*
  Blink
  Turns an LED on for one second, then off for one second, repeatedly.
*/

// The setup() function runs once when you press reset or power the board
void setup() {
  // Initialize the built-in LED pin as an output.
  pinMode(LED_BUILTIN, OUTPUT);
}

// The loop() function runs over and over again forever
void loop() {
  digitalWrite(LED_BUILTIN, HIGH);  // Turn the LED on
  delay(1000);                      // Wait for a second (1000 milliseconds)
  digitalWrite(LED_BUILTIN, LOW);   // Turn the LED off
  delay(1000);                      // Wait for a second
}
Every Arduino sketch has two essential parts: setup() and loop(). These are called functions. The setup() function runs only one time, right when the Arduino first powers on. It's used for initial configuration, like telling the Arduino that a specific pin will be used to send signals out (OUTPUT).
The loop() function does exactly what its name suggests. After setup() is finished, the code inside loop() runs over and over again, forever. This is where you put the main logic of your program.
Inside the loop, digitalWrite(LED_BUILTIN, HIGH) sends power to the LED, turning it on. delay(1000) pauses the program for 1000 milliseconds, or one second. Then, digitalWrite(LED_BUILTIN, LOW) cuts the power, turning the LED off before another one-second delay.
Uploading Your Sketch
To get this code onto your board, first connect your Arduino to the computer with a USB cable.
Next, you need to tell the IDE what kind of board you're using and which port it's connected to. In the IDE, go to the Tools menu. Select your board type from the Board list (e.g., Arduino Uno). Then, select the correct serial port from the Port list. The port will usually have the name of your board next to it.
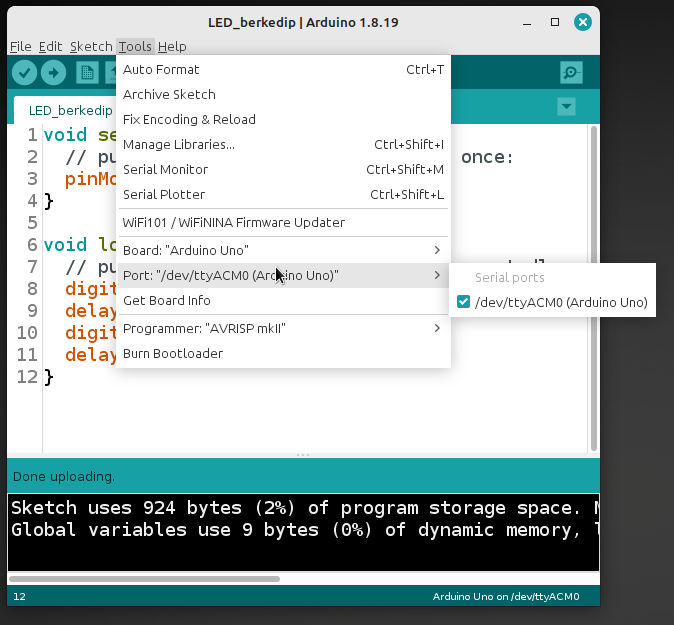
Once the board and port are set, click the Verify button (the checkmark) to compile the code and check for errors. If everything is correct, you'll see a 'Done compiling' message.
Finally, click the Upload button (the arrow). You'll see some lights on the Arduino flash rapidly. After a moment, a 'Done uploading' message will appear, and the built-in LED on your board should start blinking.
You've just run your first program on an Arduino, bridging the gap between software instructions and a physical, real-world action.
What is the primary role of the microcontroller on an Arduino board?
In an Arduino sketch, code inside the setup() function runs exactly once.