Advanced Sketching and Structural Drawing
Complex Linear Perspective
Adding the Third Dimension
You've mastered one and two-point perspectives, which are perfect for viewing objects head-on or from a corner. But what happens when you look up at a towering skyscraper or down from a balcony? The vertical lines, which were parallel in two-point perspective, now appear to converge. This is the realm of three-point perspective, and it adds a powerful sense of scale and drama to your drawings.
Imagine you're standing at the base of a tall building. The vertical lines of the building seem to recede upwards, meeting at a point high in the sky. This is your third vanishing point, often called the zenith. Conversely, if you're looking down from a great height, the vertical lines converge downwards to a point on the ground, known as the nadir.
This technique involves your two familiar vanishing points on the horizon line, plus a third one placed either above or below it. All vertical lines in your scene will recede towards this third point, creating a 'worm's-eye' view (looking up) or a 'bird's-eye' view (looking down). This is how you convey immense height or depth, transforming a simple box into a dramatic monolith or a dizzying chasm.
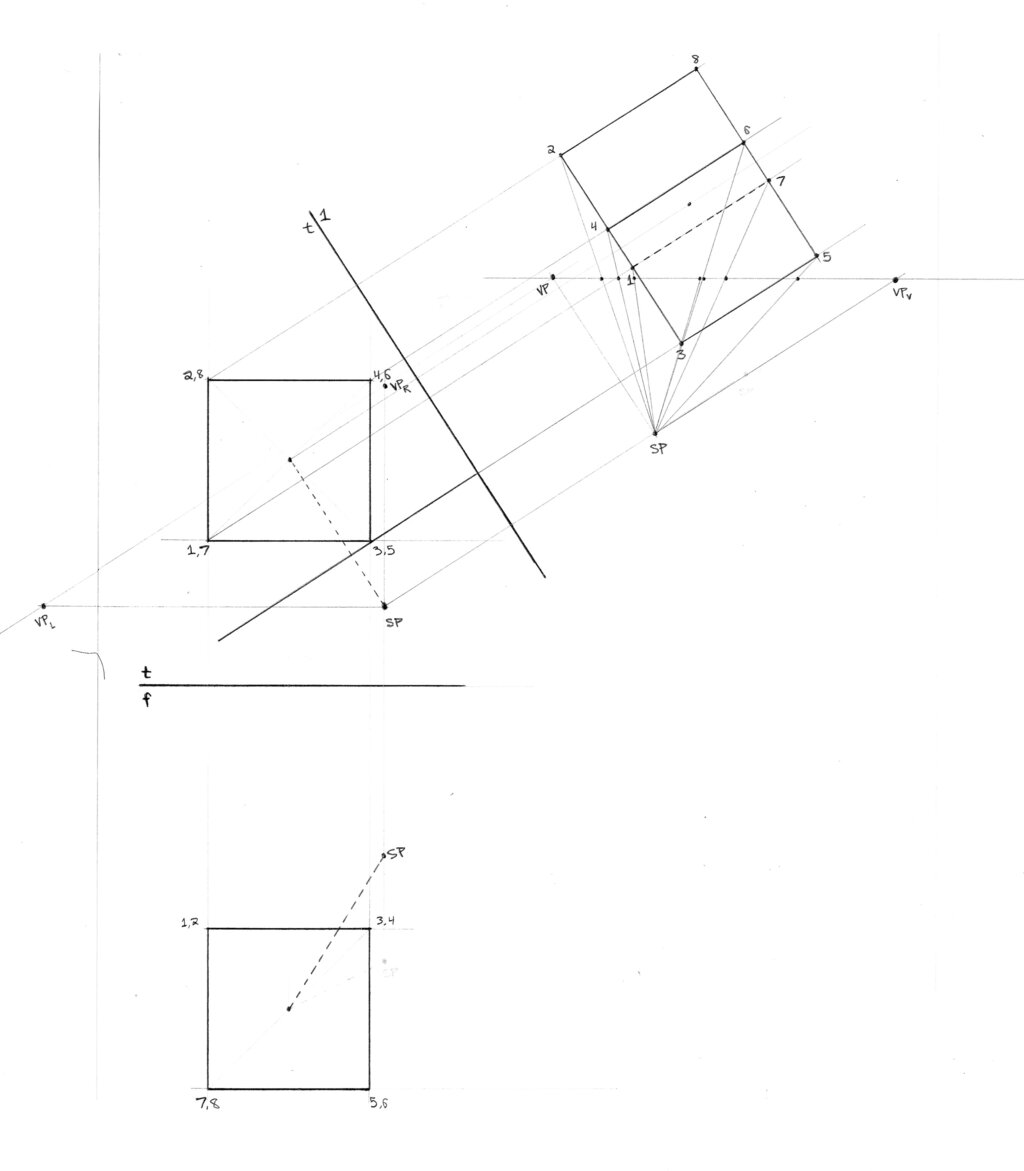
The key is the placement of your station point, which represents the viewer's exact position. The station point's distance from the picture plane and its height relative to the object determine the intensity of the perspective effect. A station point placed very close to the object and far below it will create an extreme, distorted worm's-eye view, exaggerating the building's height. It's a directorial choice that controls the mood of the scene.
Slopes, Stairs, and Curves
The real world isn't made of perfect cubes on flat ground. Inclined planes, like ramps, roofs, and staircases, require their own vanishing points. An inclined plane has its own set of parallel lines, so it needs a dedicated vanishing point. For a line going up (like the railing of a staircase), its vanishing point will be directly above one of the main vanishing points on the horizon. For a line going down, it will be directly below.
Imagine a long staircase climbing a hill. The horizontal lines of the steps recede to the vanishing point on the horizon, as usual. But the diagonal lines tracing the top and bottom of the staircase recede to a new vanishing point located on a vertical line that passes through the main vanishing point. This allows you to draw any sloped surface with mathematical precision.
Every set of parallel lines gets its own vanishing point. For inclined or declined planes, this point lives on a vertical line passing through the primary vanishing point on the horizon.
Curved surfaces, like arches or cylinders, are trickier. They don't have straight edges that recede neatly. The standard method is to encase the curve within a geometric form, like a square or a cube. You draw the box in perfect perspective first, then use its sides and diagonals as guides to sketch the curve inside it. For a circle on the ground, you'd draw a square in perspective (which will look like a trapezoid) and then inscribe an ellipse within it. This scaffolding technique ensures your curves distort correctly as they recede into space.
Complex Scenes and Accurate Scale
When you draw complex scenes with multiple buildings at different angles, you enter the world of multi-point perspective. Each object that isn't parallel to the others will have its own set of two vanishing points on the horizon line. A street scene with a main road and a side street turning off at a 45-degree angle would use a shared horizon line but different sets of vanishing points for the buildings on each street. This can get complicated, but the core principle is the same: one horizon line, with unique vanishing point pairs for each object's orientation.
But how do you ensure objects are scaled correctly as they get further away? How do you draw a row of telephone poles that are all 10 metres apart and have them shrink convincingly? For this, you use measuring points.
A measuring point is a special point on the horizon line used to transfer real-world dimensions into your perspective drawing. To place a measuring point, you measure the distance from a vanishing point to the station point, then swing that distance back onto the horizon line. By drawing a line from a known dimension on your picture plane to this measuring point, you can mark off equal intervals into the distance. This is how architects and engineers ensure their perspective sketches are not just believable, but proportionally accurate.
Let's test your understanding of these advanced concepts.
What is the primary effect achieved by using three-point perspective in a drawing?
When drawing a 'worm's-eye' view of a skyscraper, the vertical lines converge towards a third vanishing point. What is this point called?
Mastering these techniques elevates your sketches from simple representations to convincing and dynamic worlds. You now have the tools to construct complex scenes from any angle with precision.