Advanced Git Workflows
Git Branching Basics
What is a Branch?
Think of your project's history as a single timeline. Every commit is a point on that line, building on the one before it. This main timeline is often called main or master. But what if you want to try out a new idea, fix a bug, or develop a new feature without disrupting that stable, main timeline? You create a branch.
A branch is a separate, parallel timeline of your project. It lets you work in an isolated environment without affecting the main codebase.
When you create a branch, you're essentially creating a copy of your project at a specific point in time. From there, the new branch develops its own history. You can make commits, add files, and experiment freely. The original main branch remains untouched and stable, which is crucial when working on a team or managing a live product.
Working with Branches
Creating and moving between branches are fundamental skills in Git. Let's say you want to build a new feature. First, you create a new branch. The command for this is git branch followed by the name you want to give your branch.
git branch feature/user-profile
This command creates a new branch called feature/user-profile, but it doesn't automatically switch you to it. You're still on your previous branch. To start working on the new branch, you need to "check it out" using the git checkout command.
git checkout feature/user-profile
Because creating and checking out a new branch is such a common workflow, Git provides a handy shortcut that does both in one step. The -b flag tells Git to create a new branch before checking it out.
# Creates and switches to the new branch in one command
git checkout -b feature/user-profile
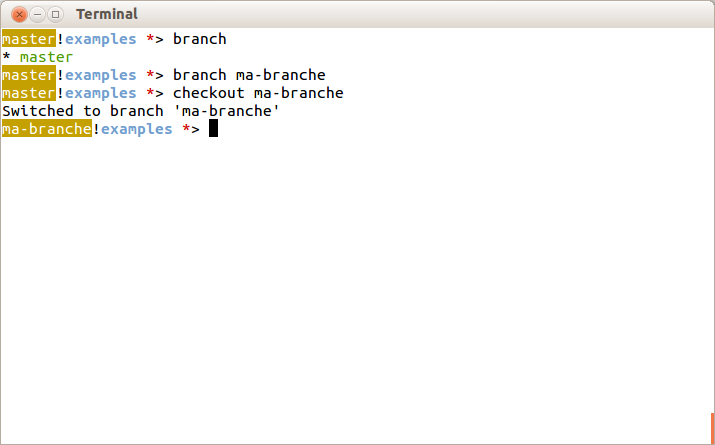
Now you are on the feature/user-profile branch. Any commits you make will be recorded on this branch's timeline, separate from main.
Branch Naming Conventions
While you can name a branch almost anything, clear names make it easier for you and your team to understand what work is happening where. A common convention is to use prefixes to categorize the branch's purpose. This helps keep the project organized, especially when many people are contributing.
| Prefix | Purpose | Example |
|---|---|---|
feature/ | For developing a new feature. | feature/add-dark-mode |
bugfix/ | For fixing a non-critical bug. | bugfix/incorrect-password-error |
hotfix/ | For a critical bug fix in a live product. | hotfix/fix-login-exploit |
chore/ | For maintenance tasks, no production code. | chore/update-dependencies |
Using descriptive, hyphenated names after the prefix makes the branch's intent obvious at a glance.
Deleting Branches
Once the work on a branch is complete and integrated back into the main timeline (a process called merging), you can delete the branch to keep your repository tidy. It’s like cleaning up your workshop after a project is finished.
To delete a branch, you use the git branch command with the -d flag (for delete). You must be on a different branch to delete the one you're targeting. For example, you can't delete feature/user-profile while you're still on it.
# First, switch back to the main branch
git checkout main

# Then, delete the feature branch
git branch -d feature/user-profile
Git is careful. If the branch you're trying to delete has work on it that hasn't been merged into another branch, the -d command will fail with a warning. This safety feature prevents you from accidentally losing commits.
If you are absolutely sure you want to delete a branch and discard its changes, you can use a capital -D flag to force the deletion.
# WARNING: This will permanently delete the branch and its history!
git branch -D some-buggy-branch
What is the primary purpose of creating a branch in Git?
Which command creates a new branch named new-feature but does NOT switch to it?
Branching is a core concept that enables powerful workflows in Git. Mastering these basic commands is the first step toward effective collaboration and project management.