3D Printable Product Design with CAD
Designing for 3D Printing
From Digital to Physical
A 3D model on your screen looks perfect. It's a clean, digital idea. But turning that idea into a physical object introduces real-world physics. A 3D printer builds things layer by tiny layer, and this process has rules. Designing for 3D printing means creating models that respect those rules.
Designing for 3D printing isn't the same as designing for other manufacturing methods.
Your slicer software, which prepares the model for the printer, needs a clear, unambiguous blueprint. If the blueprint is flawed, the print will fail. Let's look at the key principles for creating a printable design.
Is Your Model Watertight?
Before a printer can build your model, the slicer must understand its geometry completely. It needs to know what's inside and what's outside. For this to work, your model must be manifold, or "watertight."
Imagine your model is a container. A watertight model is perfectly sealed, with no holes, gaps, or weird walls passing through the middle. A slicer can easily figure out how to fill a sealed container. But if the container has a hole, where does the inside stop and the outside begin? The software gets confused.
Common errors that break the watertight seal include open edges (holes), internal faces that divide the interior, and inverted normals, where a face is pointing inward instead of outward. Most CAD software has tools to check for and repair these issues to ensure your model is a single, solid volume.
Think of it this way: your 3D model needs to be a solid object with a continuous, unbroken outer shell.
Defying Gravity, With Help
3D printers build from the ground up, depositing melted plastic or curing resin one layer at a time. Each new layer must be supported by the layer beneath it. This works perfectly for vertical walls, but what about parts that stick out into thin air?
These are called overhangs. A printer can handle shallow overhangs, where each new layer extends only slightly beyond the previous one. A common guideline is the 45-degree rule: most FDM printers can print overhangs up to a 45-degree angle from the vertical without any issues. Anything steeper, and the melted filament will droop or print poorly because there isn't enough support underneath.
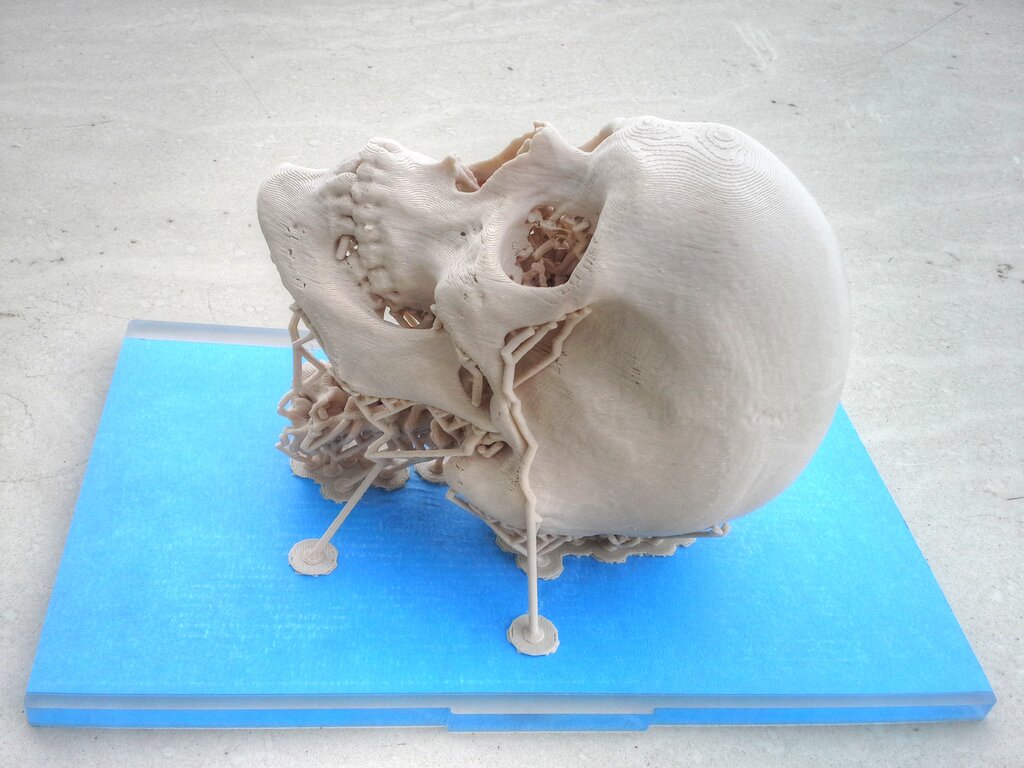
When an overhang is too steep, or when a part of your model bridges a gap (like the crossbar of the letter 'H'), you need support structures. These are temporary, disposable lattices that the slicer software generates automatically. They print along with your model to hold up the tricky parts.
While supports are essential, they have downsides. They use extra material, add to the printing time, and can leave small marks on the surface where they connect to the model. A key part of designing for 3D printing is orienting your model or even modifying its design to minimize the need for supports.
Accounting for Reality
A digital model has perfect dimensions. A physical print does not. The realities of heated plastic, printer mechanics, and material properties mean you have to design with tolerances in mind. A tolerance is an acceptable amount of variation in a dimension.
| Consideration | Why It Matters | Design Tip |
|---|---|---|
| Printer Accuracy | No printer is perfectly precise. There will be tiny variations in the dimensions of the final part. | For parts that need to fit together, design a small gap (e.g., 0.2-0.5 mm) between them. Print test pieces to find the ideal clearance for your machine. |
| Material Properties | Different materials behave differently. For example, ABS plastic shrinks more as it cools than PLA. | If using a material prone to shrinking, you may need to scale up your design slightly to compensate. Check the material manufacturer's guidelines. |
| Hole Sizing | Small holes often print slightly smaller than designed, as the filament squishes inward. | Design holes slightly oversized. For a 3mm screw, you might design a 3.2mm hole to ensure it fits. |
Getting tolerances right is often a process of trial and error. Every printer and material combination is slightly different. Creating small, simple calibration prints is a great way to test how your setup handles things like clearances, hole sizes, and overhangs before you commit to a large, complex print.
For a 3D model to be printable, its geometry must be 'manifold' or 'watertight'. What does this mean?
What is the primary purpose of support structures in 3D printing?
By keeping these principles in mind—watertight models, overhangs, and tolerances—you can design parts that not only look good on screen but also print successfully in the real world.