Mastering Audacity from Scratch
Setup and Interface
Getting Started with Audacity
Audacity is a powerful and free tool for recording and editing audio. Before you can use it, you need to install it safely. It's crucial to download the software only from its official source to avoid harmful versions disguised as the real thing.
Always download Audacity from the official website: audacityteam.org
Once installed, open Audacity. The main window might look complex, but we'll focus on just a few key parts. Recent versions have a clean, modern look. You can even change the appearance by going to Edit > Preferences > Interface and choosing a theme. Light, Dark, and Classic options are available to suit your preference.
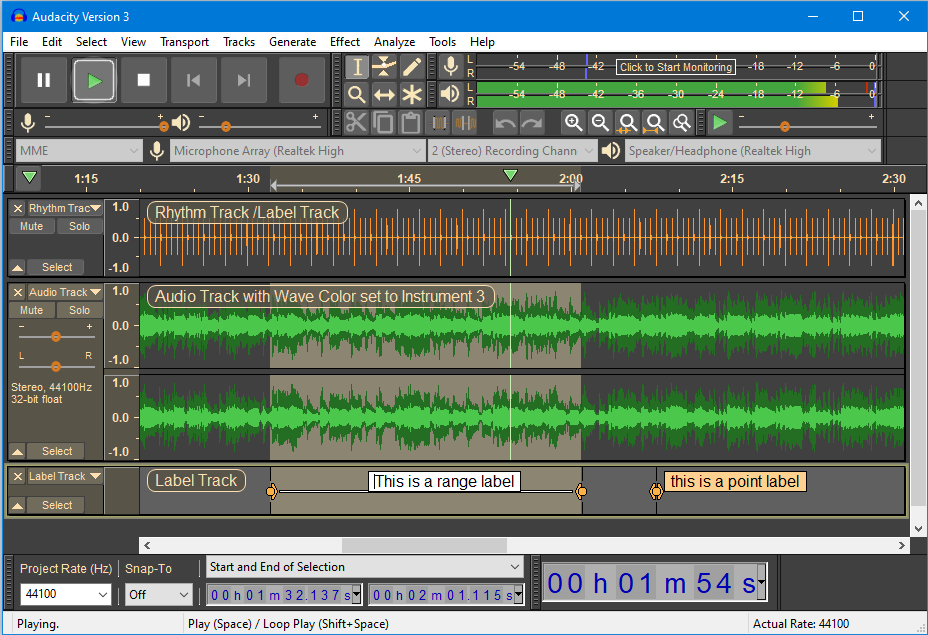
The Waveform and Timeline
The large area in the middle of the screen is where you'll see your audio. When you record or import a sound file, it appears as a blue, squiggly shape. This is called the waveform. The waveform is a visual map of your sound. The taller the waves, the louder the sound at that moment. The flatter the line, the quieter it is.
Above the waveform is the timeline, marked in seconds. This shows you where you are in the audio file. You can click anywhere on the timeline to jump to that specific point in the recording.
Setting Up Your Project
Before you hit record, it's good practice to check a couple of settings to ensure you capture high-quality audio. These settings determine the detail and clarity of your recording. You'll find them at the bottom-left of the window, labeled 'Project Rate (Hz)'.
Sample Rate
noun
The number of audio snapshots a computer takes per second. Think of it like frames per second in a video. For music and most podcasts, a sample rate of 44,100 Hz is the standard, capturing the full range of human hearing.
Bit Depth
noun
This determines how much detail is in each audio snapshot. A higher bit depth captures a wider range of quiet and loud sounds, resulting in a cleaner recording with less background noise. A bit depth of 24-bit or 32-bit float is excellent for recording.
Choosing Your Microphone and Speakers
Finally, you need to tell Audacity what equipment you're using. Look for the 'Audio Setup' button in the toolbar. Clicking it will open a menu where you can configure your hardware.
Under 'Recording Device,' select the microphone you want to use. This could be your computer's built-in microphone or an external one you've plugged in. Under 'Playback Device,' choose the speakers or headphones you'll use to listen to your audio. Making sure these are set correctly is the last step before you're ready to record.
Start with a good microphone and recording software.
With the software installed and your microphone and speakers selected, you are now ready to start working with audio.