LED Control with Button Input
Introduction to Arduino
Meet Arduino
Arduino is an open-source platform used for building electronics projects. It consists of two main parts: a physical programmable circuit board (the hardware) and a piece of software, or IDE (Integrated Development Environment), that runs on your computer. You use the IDE to write and upload computer code to the physical board.
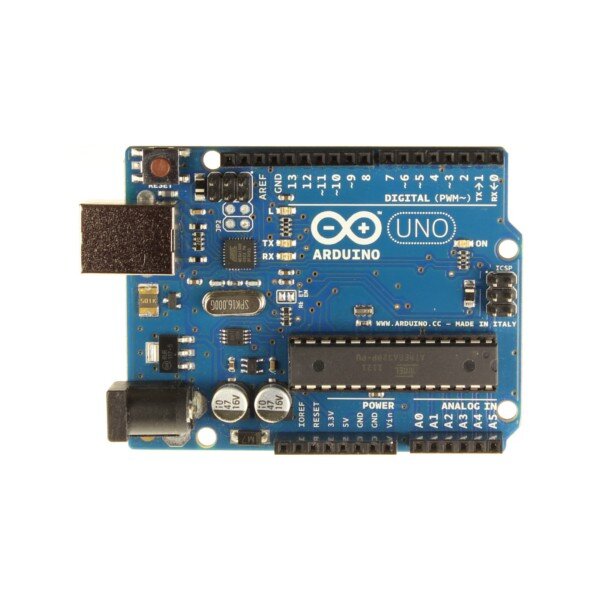
This combination of easy-to-use hardware and software has made Arduino a go-to for hobbyists, artists, and students creating interactive objects or environments. Think of it as a small, simple computer that you can program to sense and control things in the physical world.
The Hardware
Let's look at the most common Arduino board, the Uno. It might seem complex at first, but it has a few key parts we need to know.
The large black chip in the middle is the microcontroller. This is the brain of the board. It runs the programs you write.
The board has a USB port to connect to your computer for power and to upload code. It also has a separate power jack if you want your project to run without being connected to a computer.
Most importantly, it has rows of connectors on the sides called pins. These are how you connect wires to build circuits. They are the bridge between the Arduino board and your electronic components, like lights and sensors.
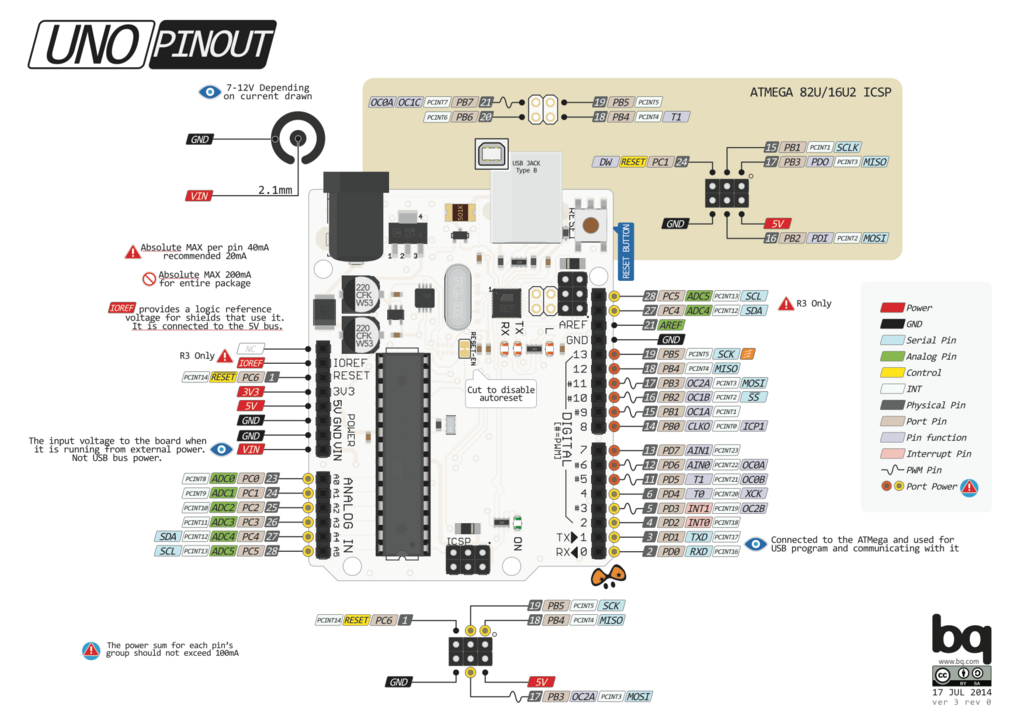
The pins are labeled. You'll see pins for Power (like 5V and GND for ground), Analog In (for reading sensors that give a range of values), and Digital (for signals that are either on or off, like a switch).
The Software
The software you'll use is the Arduino IDE (Integrated Development Environment). It's a simple text editor with a few buttons that let you check your code for errors and upload it to the Arduino board. Programs you write in the IDE are called "sketches."
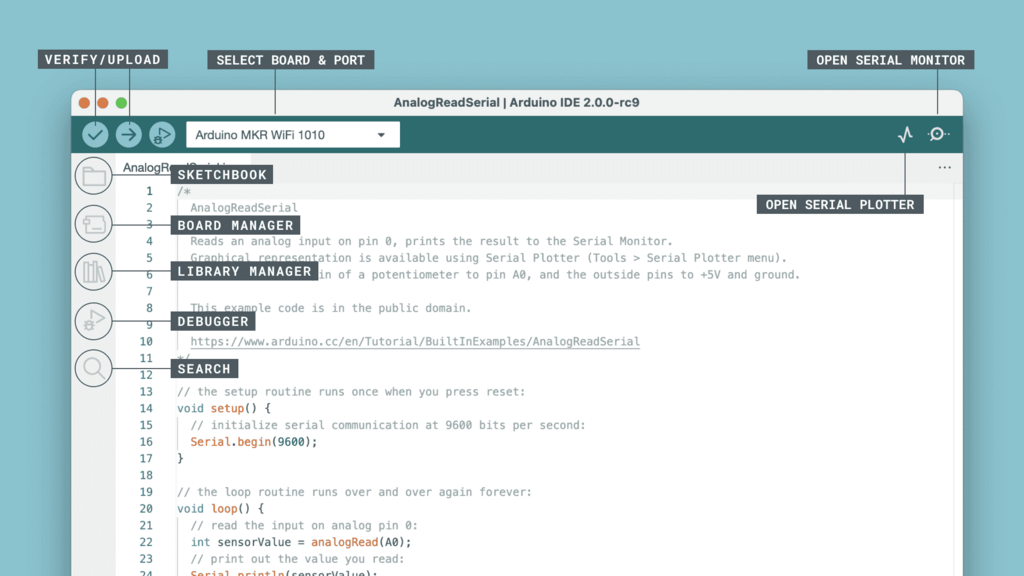
Setting it up is straightforward. First, download the IDE from the official Arduino website and install it. Once that's done, plug your Arduino Uno into your computer using a USB cable.
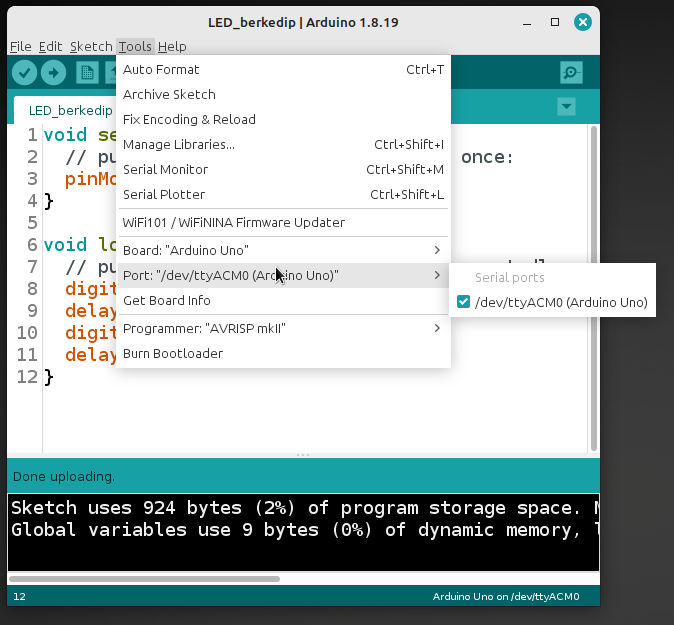
Now, you need to tell the IDE which board you're using. Go to the menu and select Tools > Board and choose Arduino Uno.
Next, you need to tell the IDE which communication port the board is connected to. Go to Tools > Port and select the port that has your Arduino listed. On Windows, this will look like COM3 or similar. On a Mac or Linux, it will look something like /dev/tty.usbmodem14101.
Your First Sketch
Let's write a simple program to make an LED blink. Most Arduino boards have a tiny LED built right onto the board, connected to digital pin 13. We can control it without wiring anything.
Every Arduino sketch has two main functions: setup() and loop().
void setup() { ... }runs once when the sketch starts.void loop() { ... }runs over and over again, forever.
In setup(), we'll tell the Arduino that pin 13 is an output pin, meaning we want to send signals out of it to control something. In loop(), we'll turn the LED on, wait a second, turn it off, and wait another second. This loop creates the blinking effect.
// The setup function runs once when you press reset or power the board
void setup() {
  // Initialize digital pin 13 as an output.
  pinMode(13, OUTPUT);
}

// The loop function runs over and over again forever
void loop() {
  digitalWrite(13, HIGH);   // Turn the LED on (HIGH is the voltage level)
  delay(1000);              // Wait for a second (1000 milliseconds)
  digitalWrite(13, LOW);    // Turn the LED off by making the voltage LOW
  delay(1000);              // Wait for a second
}
Type or copy this code into your IDE. Click the checkmark button to verify it for errors. If there are none, click the arrow button to upload it to your board. You should see the small 'L' LED on your Arduino start to blink!
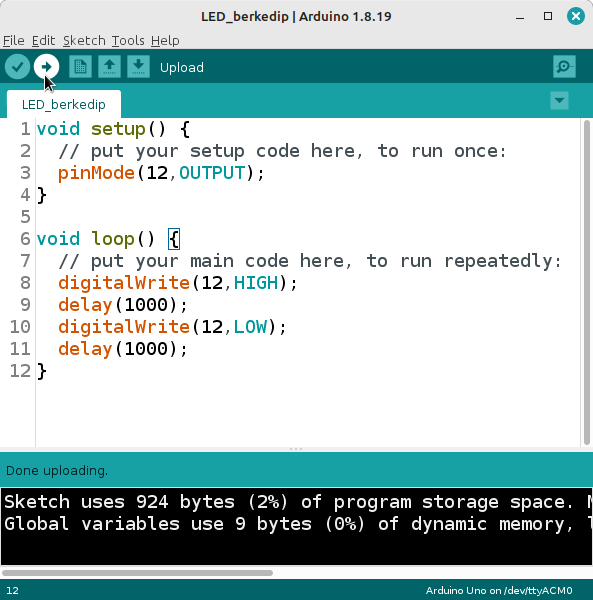
You've just programmed your first microcontroller. This simple act of controlling an LED is the foundation for almost every physical computing project.